Printer Stuff
- Details
- Parent Category: BubsBuilds Projects
- Category: Printer Stuff
Design Overview

Build
BOM
- Printed
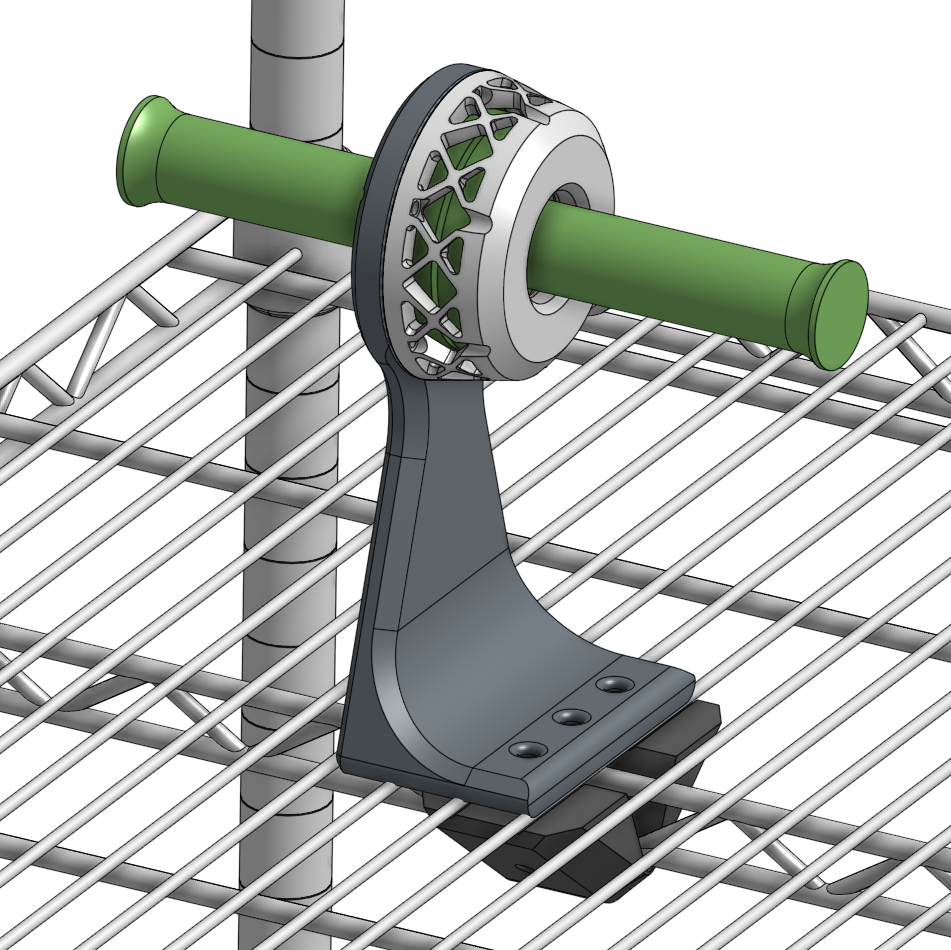
- (1) MountRace - Mostly Sunlu PETG, with a touch of green Polymaker PETG on the base
- (1) RetainerRace - White Sunlu PETG
- (1) Cap - Black Sunlu PETG
- (1 or 2) SpoolPost - Green Polymaker PETG
- (0 or 1) SpoolBlank - Only needed if using for a single spool. Shown in the gif above. Green Polymaker PETG
- (?) Spacers - The number and thickness of spacers depends on how much preload you want to put in your bearing.
- COTS
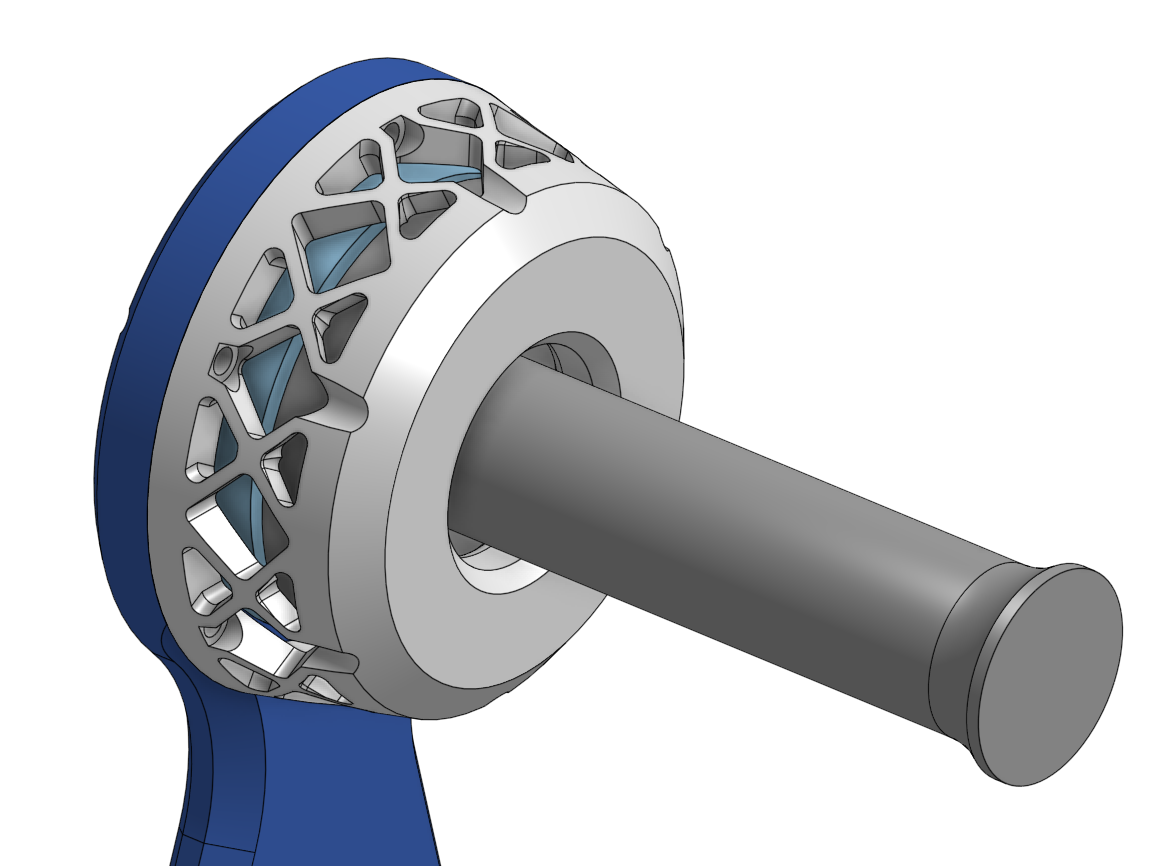
- (33) 9.5mm balls - 16 in each race and one for the center 'jewel bearing'. I actually use 3/8" 'slingshot ammo', but it's technically modeled for 9.5mm...close enough :)
- (6) M3 heat set insert - I went with 6mm lengths. Anything up to 10 should be fine.
- (6) M3 BHCS - Length will depend on spacers, but likely between 10 and 12 mm lengths should work.
- (2) M5 heat set inserts - For the Cap
- Insert six M3 heat sets in Mount Race
- Insert two M5 heat sets in Cap
- TIP: if you're planning to set it up for two spools, I'd recommend setting the Mount Race up in a vise or the like with the bearing race aiming up. This will make the next steps much easier.
- Drop in the 16 balls in the Mount race.
- Set the Spool Blank or Spool Post onto the Mount Race so that the bearing races nest. It should spin pretty freely. If it doesn't, now's a good time to check for any print blobs or the like that might be getting in the way.
- Place a single ball into the cone on the back side of the Spool Post (or Blank)
- Set the other Spool Blank on top...like a little top hat...
- Add the remaining 16 balls to the race of the Spool Blank.
- Slide the Retainer Race over the post of the top Spool Post and into position. Be careful to not knock over the post to avoid playing 16 ball pickup. Also, I found it easier to insert the fasteners in their holes before lowering the retainer onto the assembly.
- Tighten the retainer fasteners, preferably using a star pattern to close the bearing evenly. You want to tighten these fully (I don't have a torque spec for ya, but 'fully tightened for M3 in polymer...?). If the bearing feels too tight for your liking, you can add in one or more of the Spacers to get your preferred level of preload or play.
some Design Notes
2024/01/16 - Initial Design

- Details
- Parent Category: BubsBuilds Projects
- Category: Printer Stuff
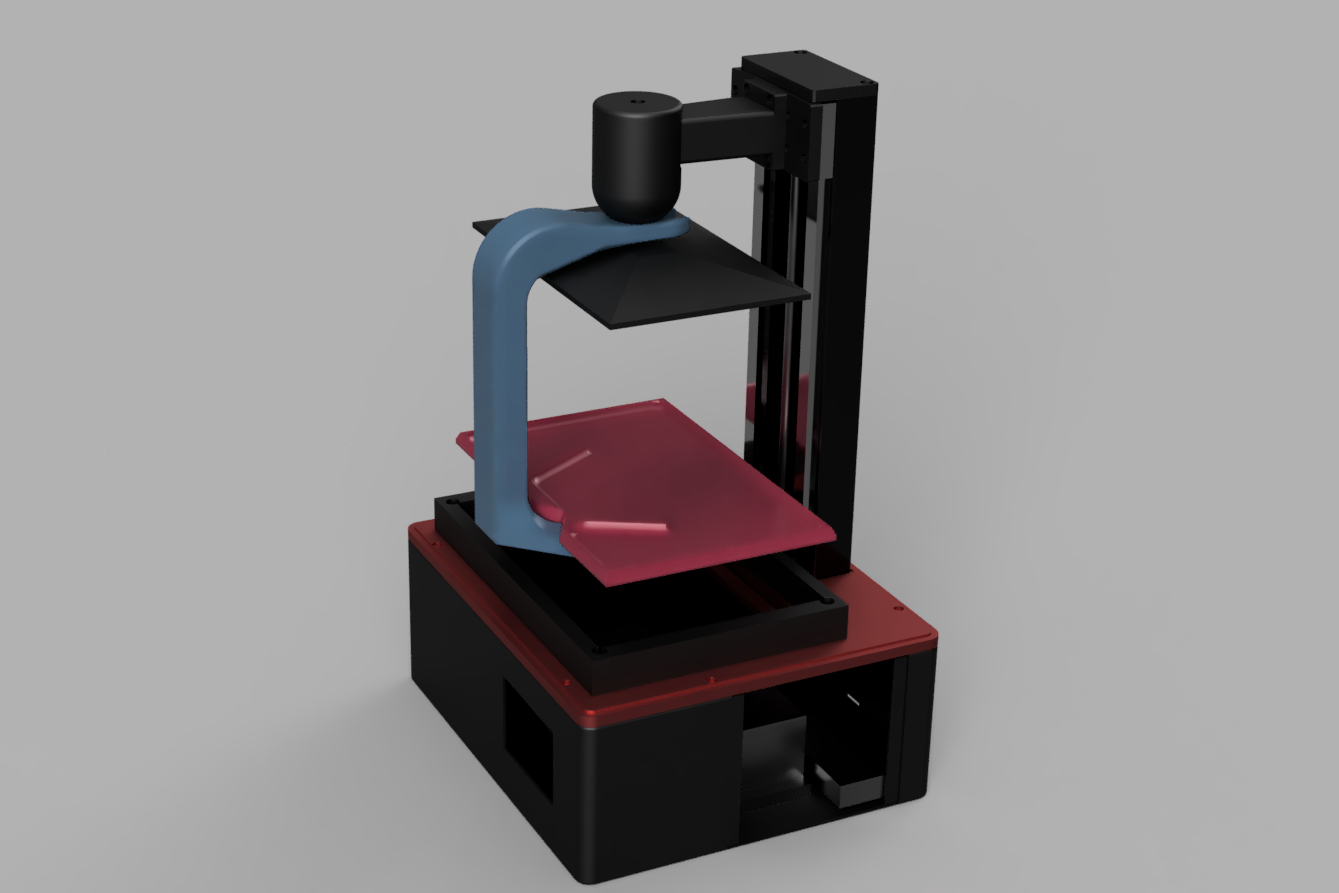
One of my more consistent ways to make me curse my own name is when I dump resin down the front of a printer while removing the platen...I just got sad thinking about it. I've also found, on more than one occasion looking for a stable place to put a loaded platen while I scramble for whatever thing I've forgotten. So I decided to build something that could save me from myself on both of these.
 |
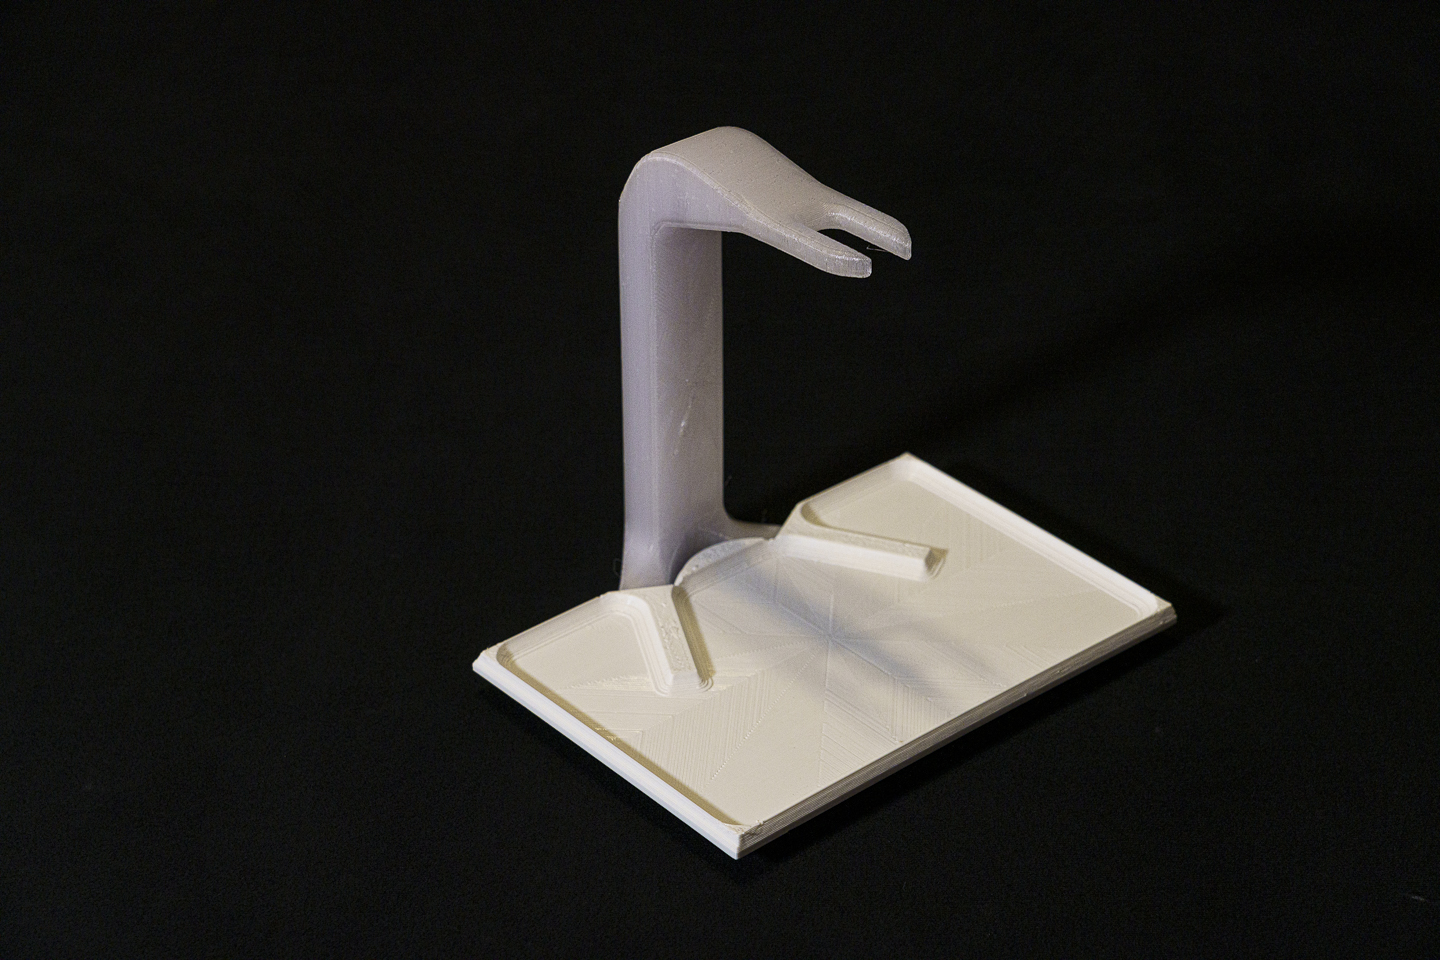 |
The Drip tray is preloaded against the Hanger using some magic blocks (aka magnets). I used two of these 60x10x5 magnets in the base of the Hanger and these 60x10x3 magnets in the Drip Tray. If you're looking to simplify on parts, I'd recommend using the thinner, 60x10x3, in both locations as opposed to the alternative. As I have mine, it is a quite strong preload (but that is what I was aimin for!) If you were to go with 60x10x5s on both ends, it will also be possible for the magnets to make contact...which may not end well, those neodynium magnets are pretty brittle.
I printed mine from Clear and White Overture PETG. I LOVE the clear, but I don't know why I ever buy white filament...not ma favorite

- Details
- Parent Category: BubsBuilds Projects
- Category: Printer Stuff
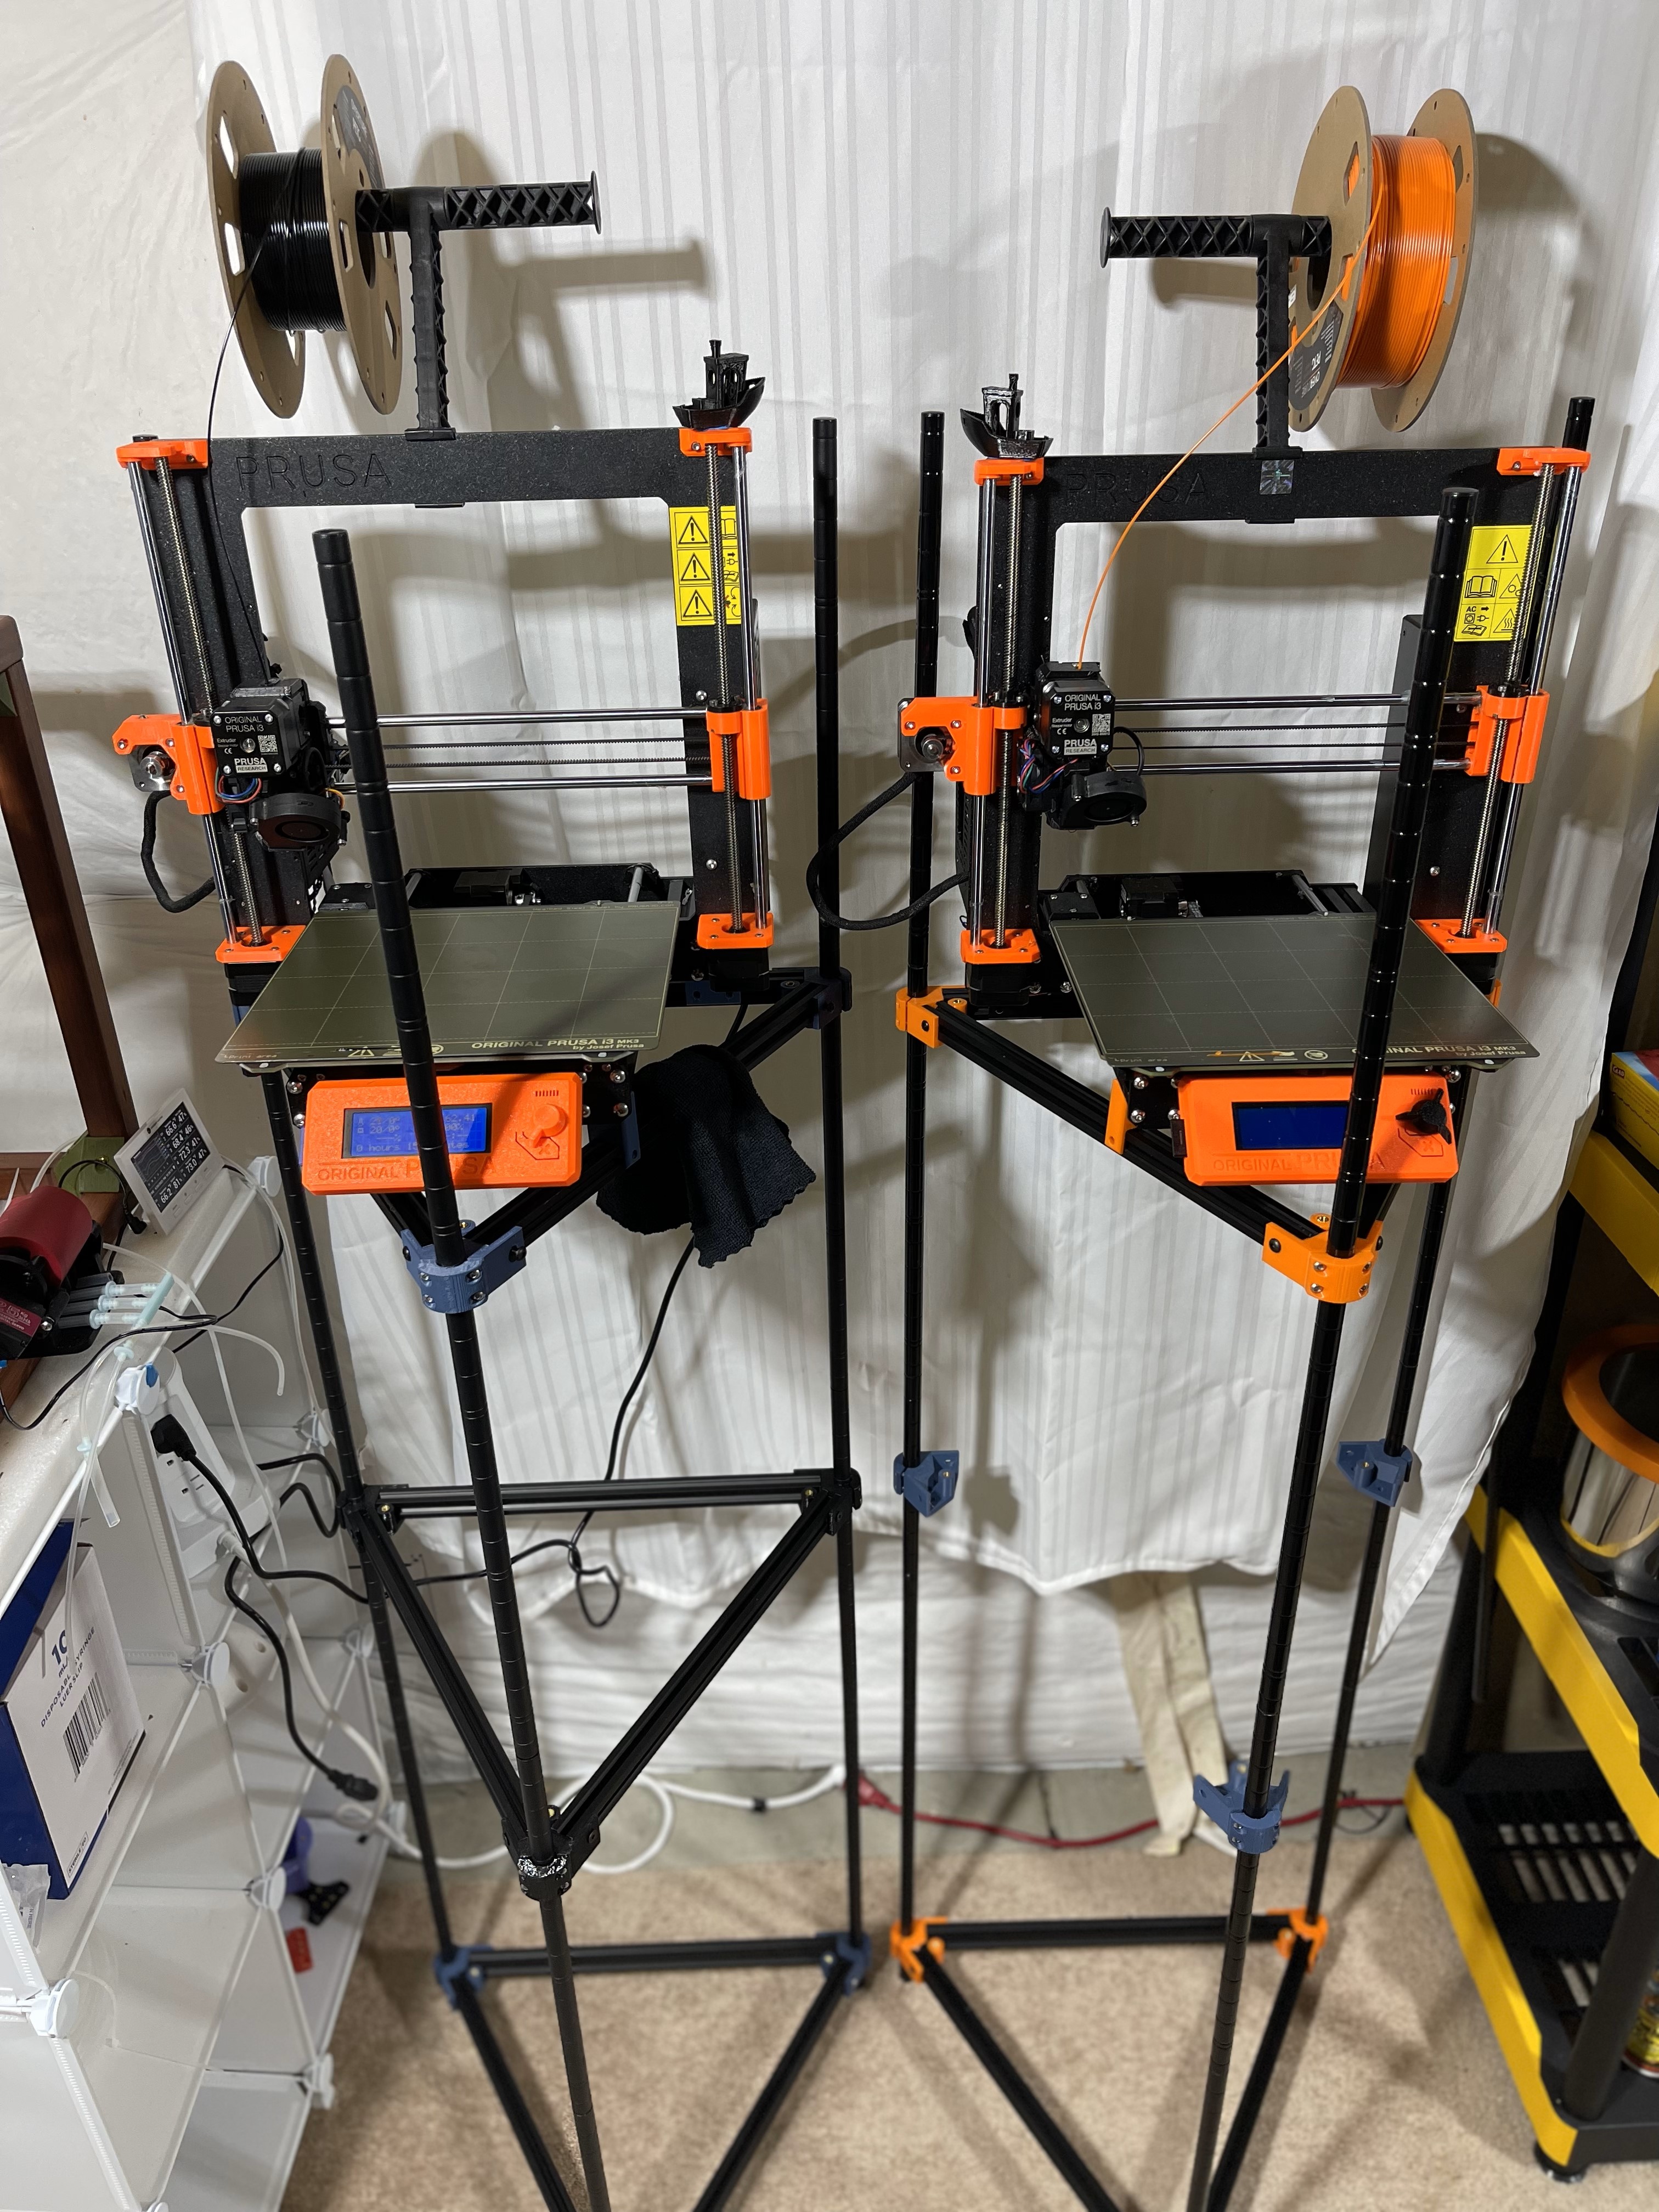
i3 Printer Stand
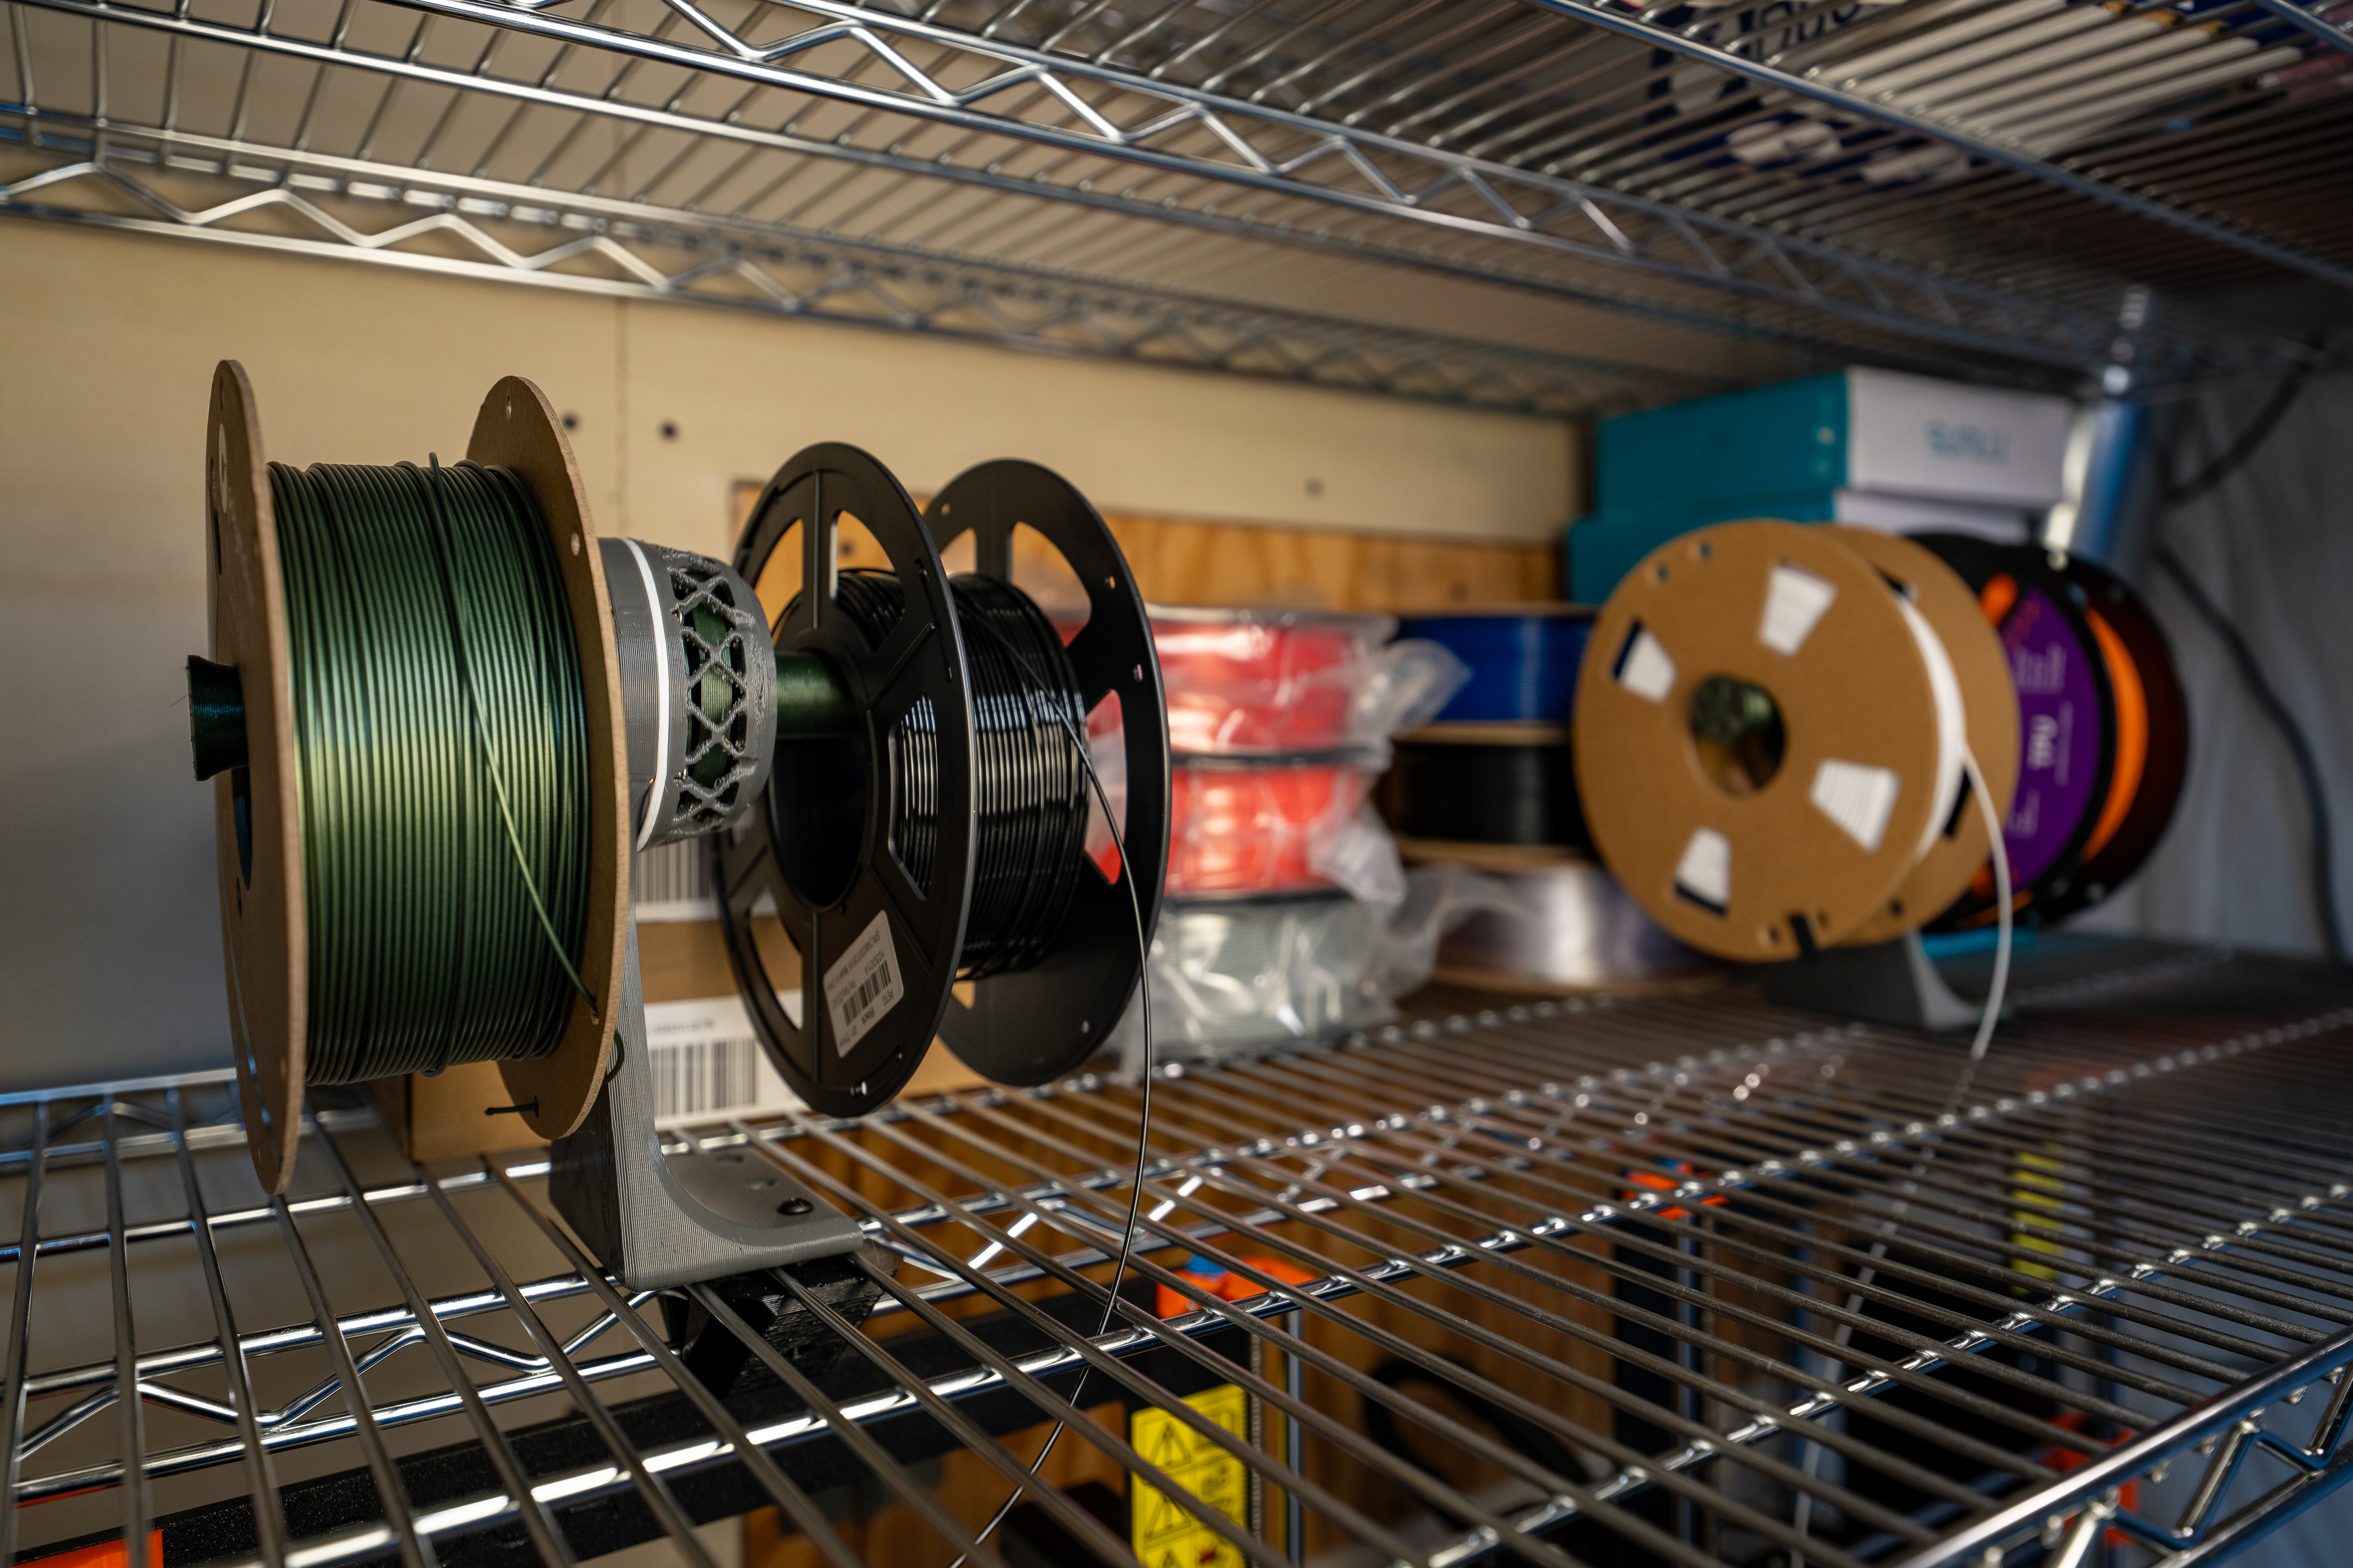
I made these with the intention of them being something I can easily extend/update/modify over time. The upright posts are 16mm diameter wire shelving posts from these shelves (I'm planning to use the wire shelves themselves as a trellis for a different project :) ) and the cross-members are made from 400mm lengths of 2020 extrusions. I chose both of these because the former is well-suited to clamps for things like cameras, sensors, etc. and the 2020 extrusion is just generally good for modular projects.
I have now printed about a dozen parts on each of the printers pictured (and yes, I still have yet to populate the center level of extrusions...seems fine for now ¯\_(ツ)_/¯
They definitely have some compliance to them, but only in modes that thus far don't concern me (mainly some torsional compliance up along the central axis of the stand). I also expect quite a bit of stiffening as I add things like a dry box to the middle tier. I suspect I may have to add some squish back into the printer mounts sometime in the future to keep the printer isolated, but for now I'm actually pretty pleased with how the tower itself is acting as an isolator between the printer and ground.
BOM
- Upright Posts - I used three of the post assemblies from this wire shelving unit.
- "Levels"
- (Qty 3/level) Clamps
- ClampBody.stl and ClampCap.stl - I printed mine from Orange and Black Overture PETG and from this Matte Navy PLA (which I really like the look of, but I don't generally like making long term structural parts from PLA)
- (Qty 4/clamp) m5x10 bhcs and their t-nuts
- (Qty 4/clamp) m4x16 bhcs and their heat sets
- Optional - m5 heat set
- (Qty3/level) 20mmx20mm Aluminum t-slot extrusion - 400mm length
- (Qty 3/level) Clamps
- Printer supports
- (Qty2) Support_Front.stl
- (Qty1) Support_RearL.stl
- (Qty1) Support_RearR.stl
- Printer....
Printed part files:
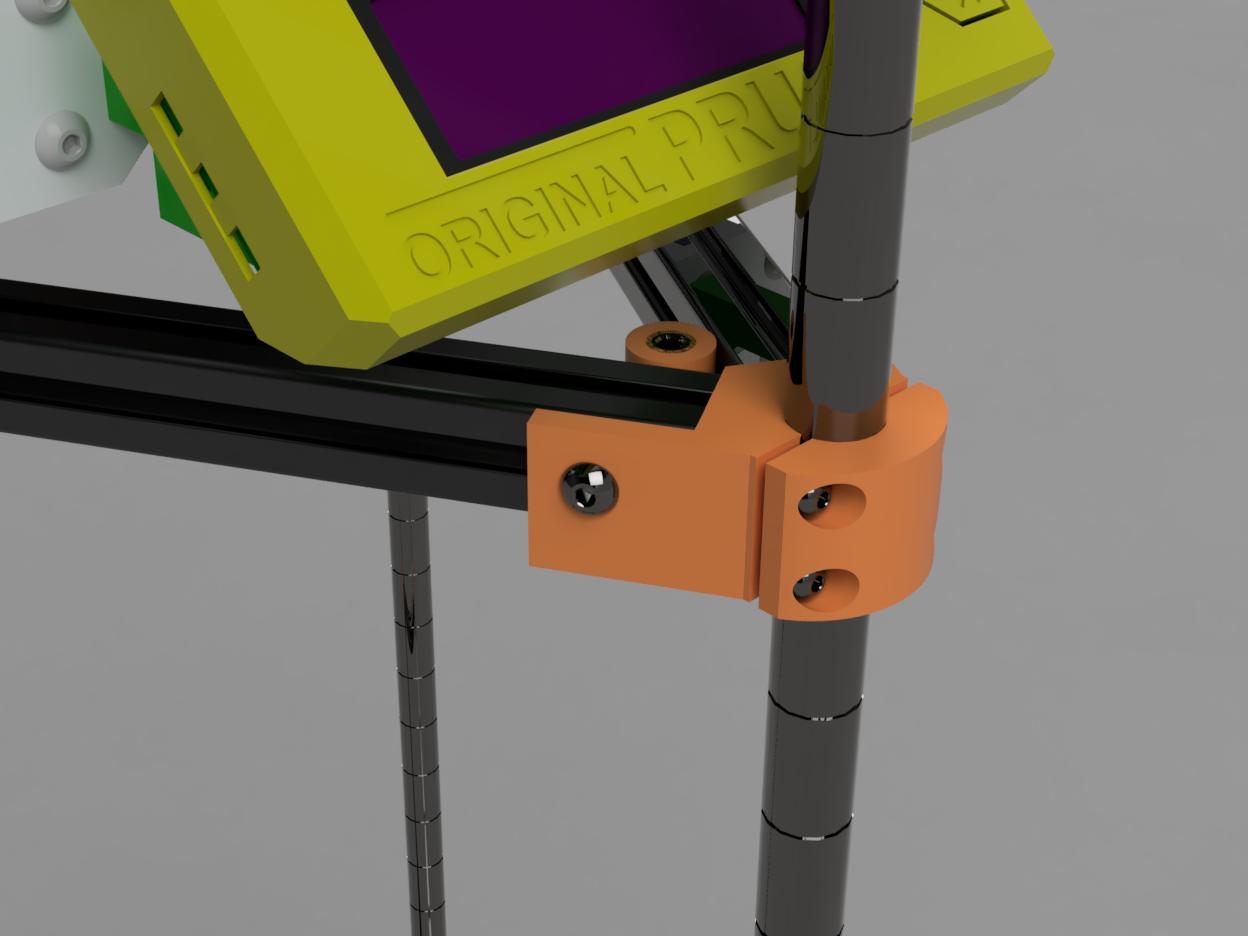
Corner Clamps
 |
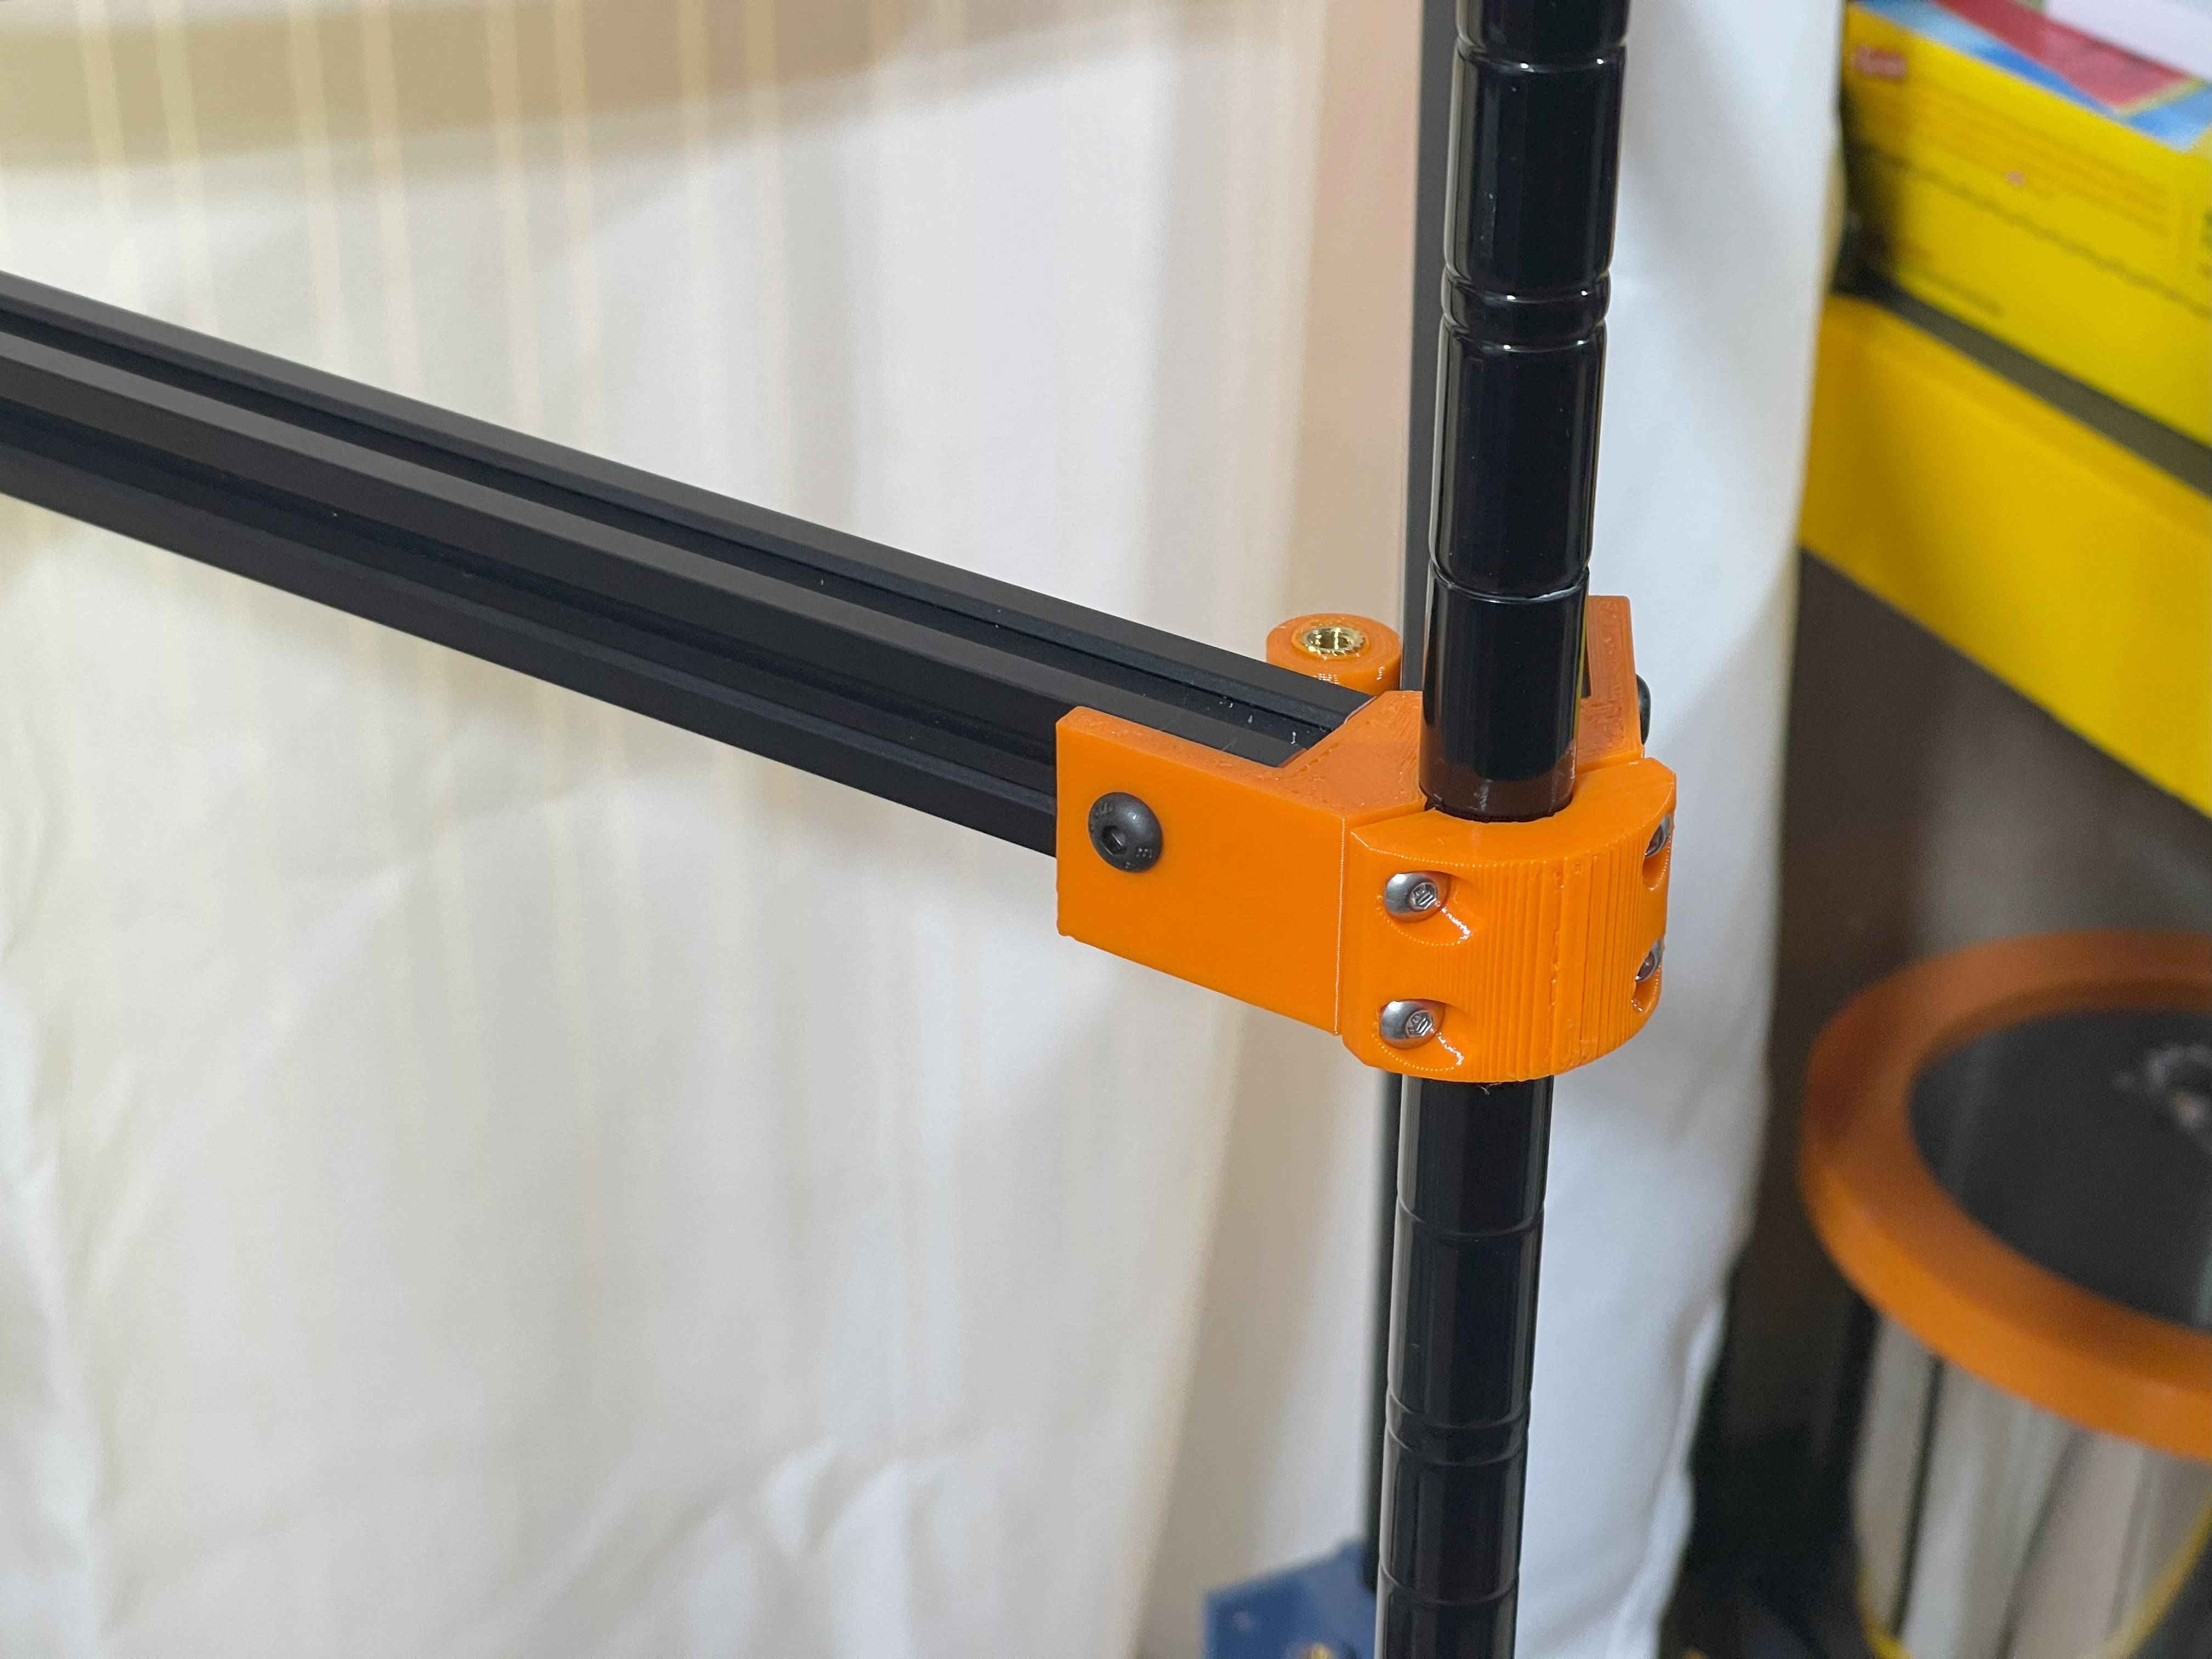 |
Each level of the stand uses three of these printed brackets, and three sections of extrusion. I went with 400mm extrusions for these two stands for my Mk3s printers.
The brackets are secured to the extrusion with two m5x10 fasteners on each extrusion. The end cap is secured to the bracket with four m4x16 fasteners in companion heat sets. There is also an additional m5 heat set in between the extrusions, but it is only there as a "might be handy in the future" feature. So up to you as to whether to populate it.
 |
 |
Printer Supports
 |
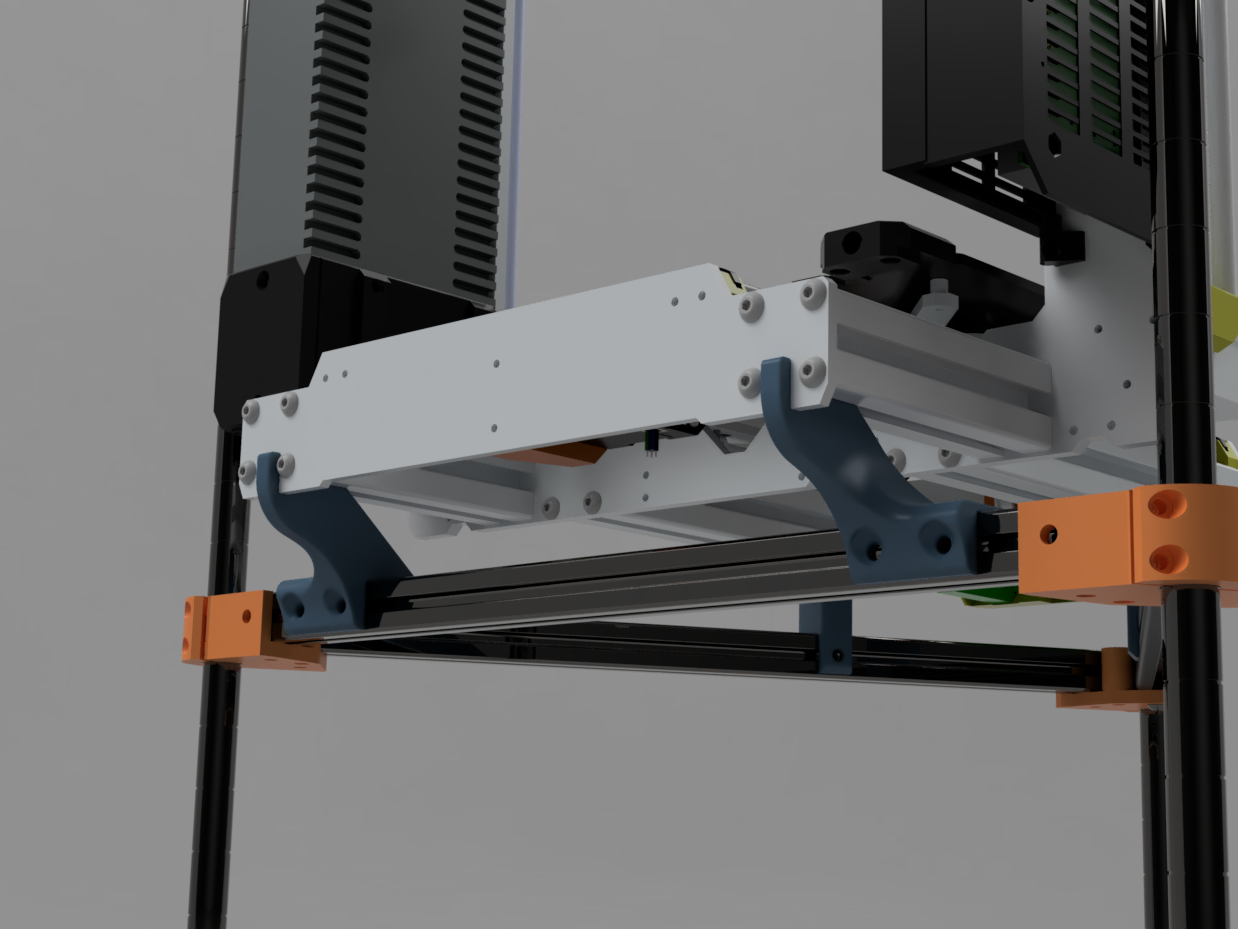 |
The supports are currently a little over-constrained, but leaving them unfastened from the extrusion has worked fine for me so far.
The rear supports are intended to sit inside of the t-slot extrusion of the i3, and then also behind the cast plate on the back of the printer.
The front supports are just cylindrical posts that sit inside of the front extrusions.
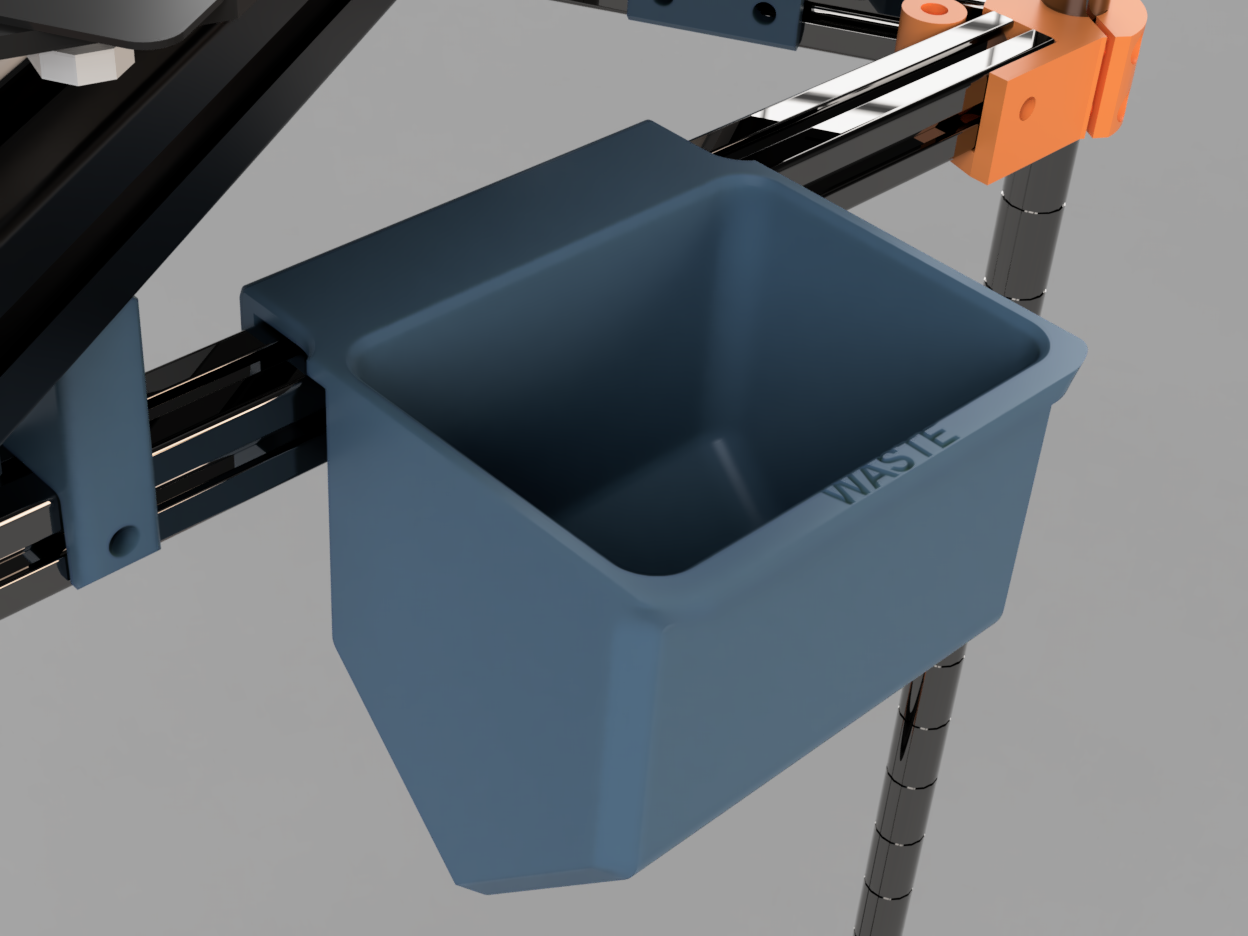
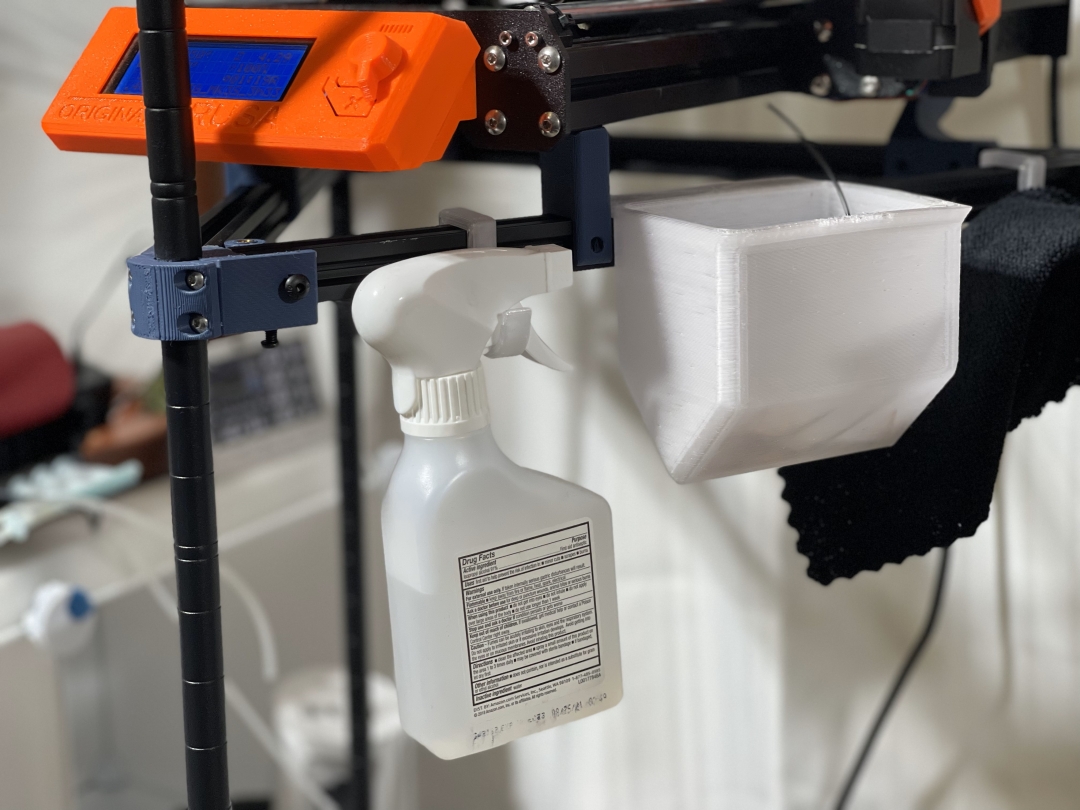
Waste Bin
 |
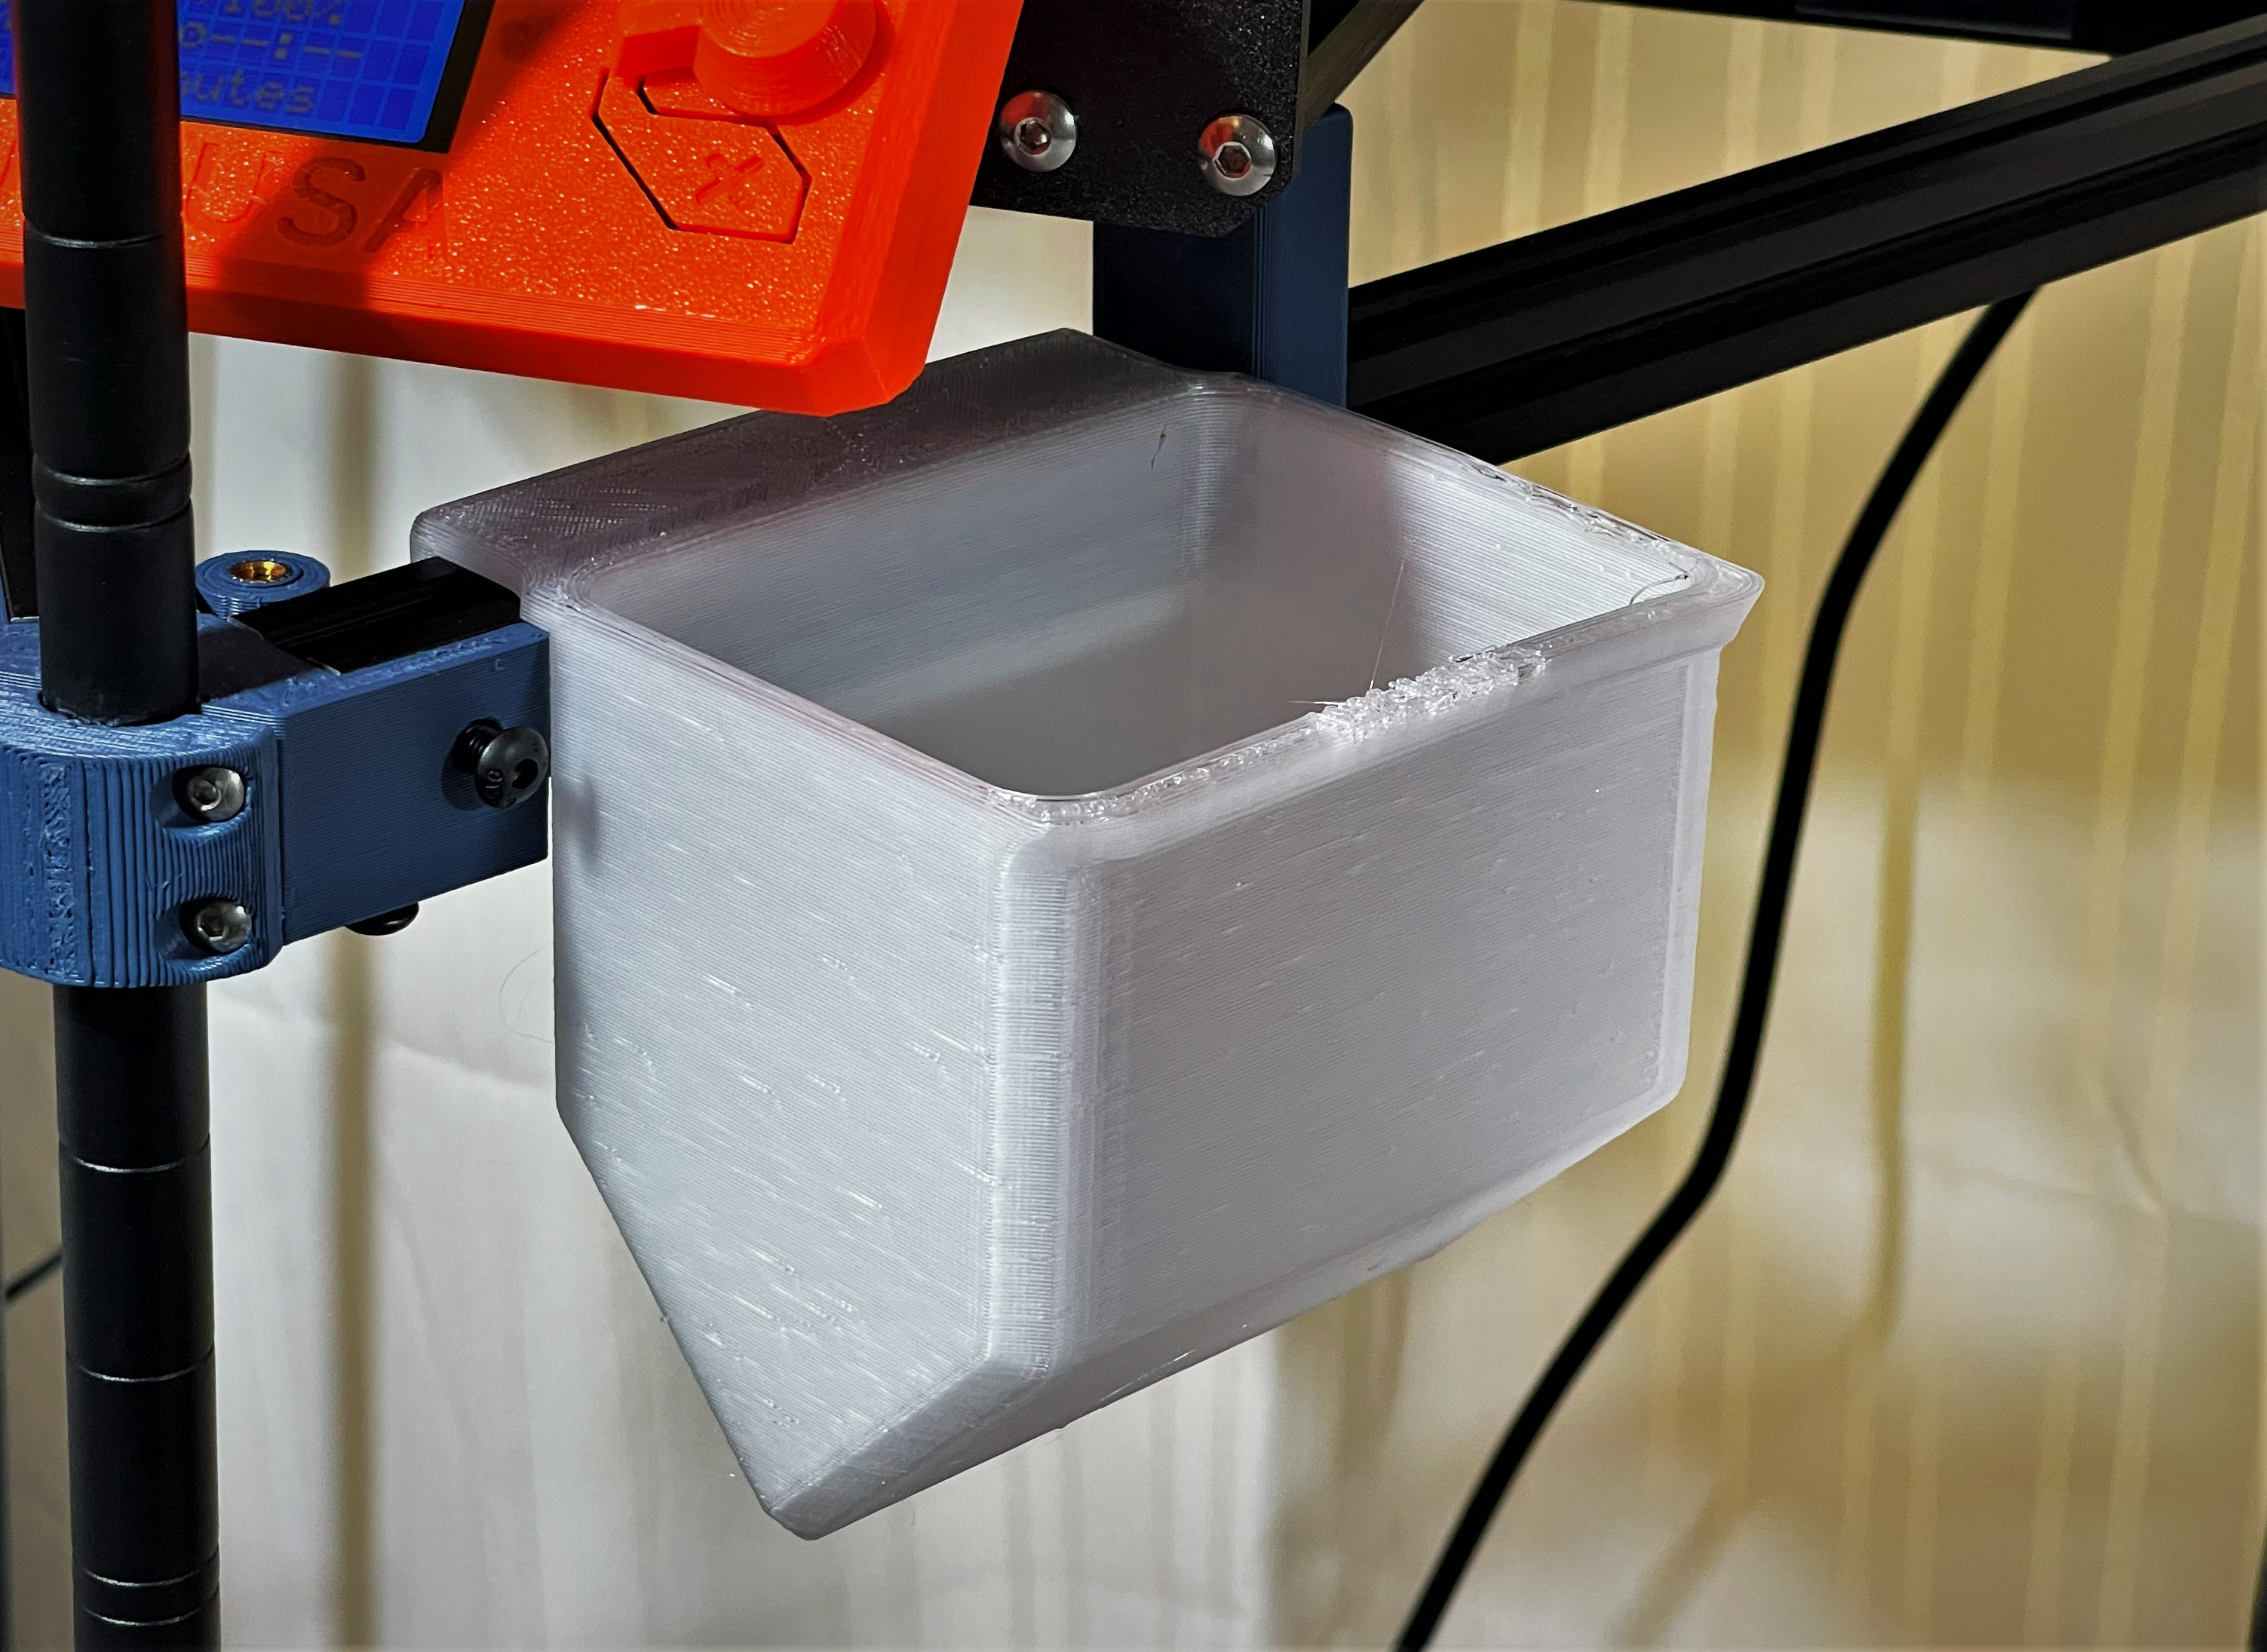 |
A simple waste bin that hangs from 2020 extrusion, intended as a convenient spot for tossing purge lines, brims, and the other assorted scraps/trash that accompany extrusion printing.
Prints without supports and took about 3.5 hours with the attached slicer config (0.6 nozzle), but I should point out that the lettering on my print came outa little lackluster.
I printed mine in Overture clear PETG
Simple Hook
A simple, quick-printing hook for hanging accessories and such from 2020 extrusions. I'm using several of them quite happily on my i3 printer tower.