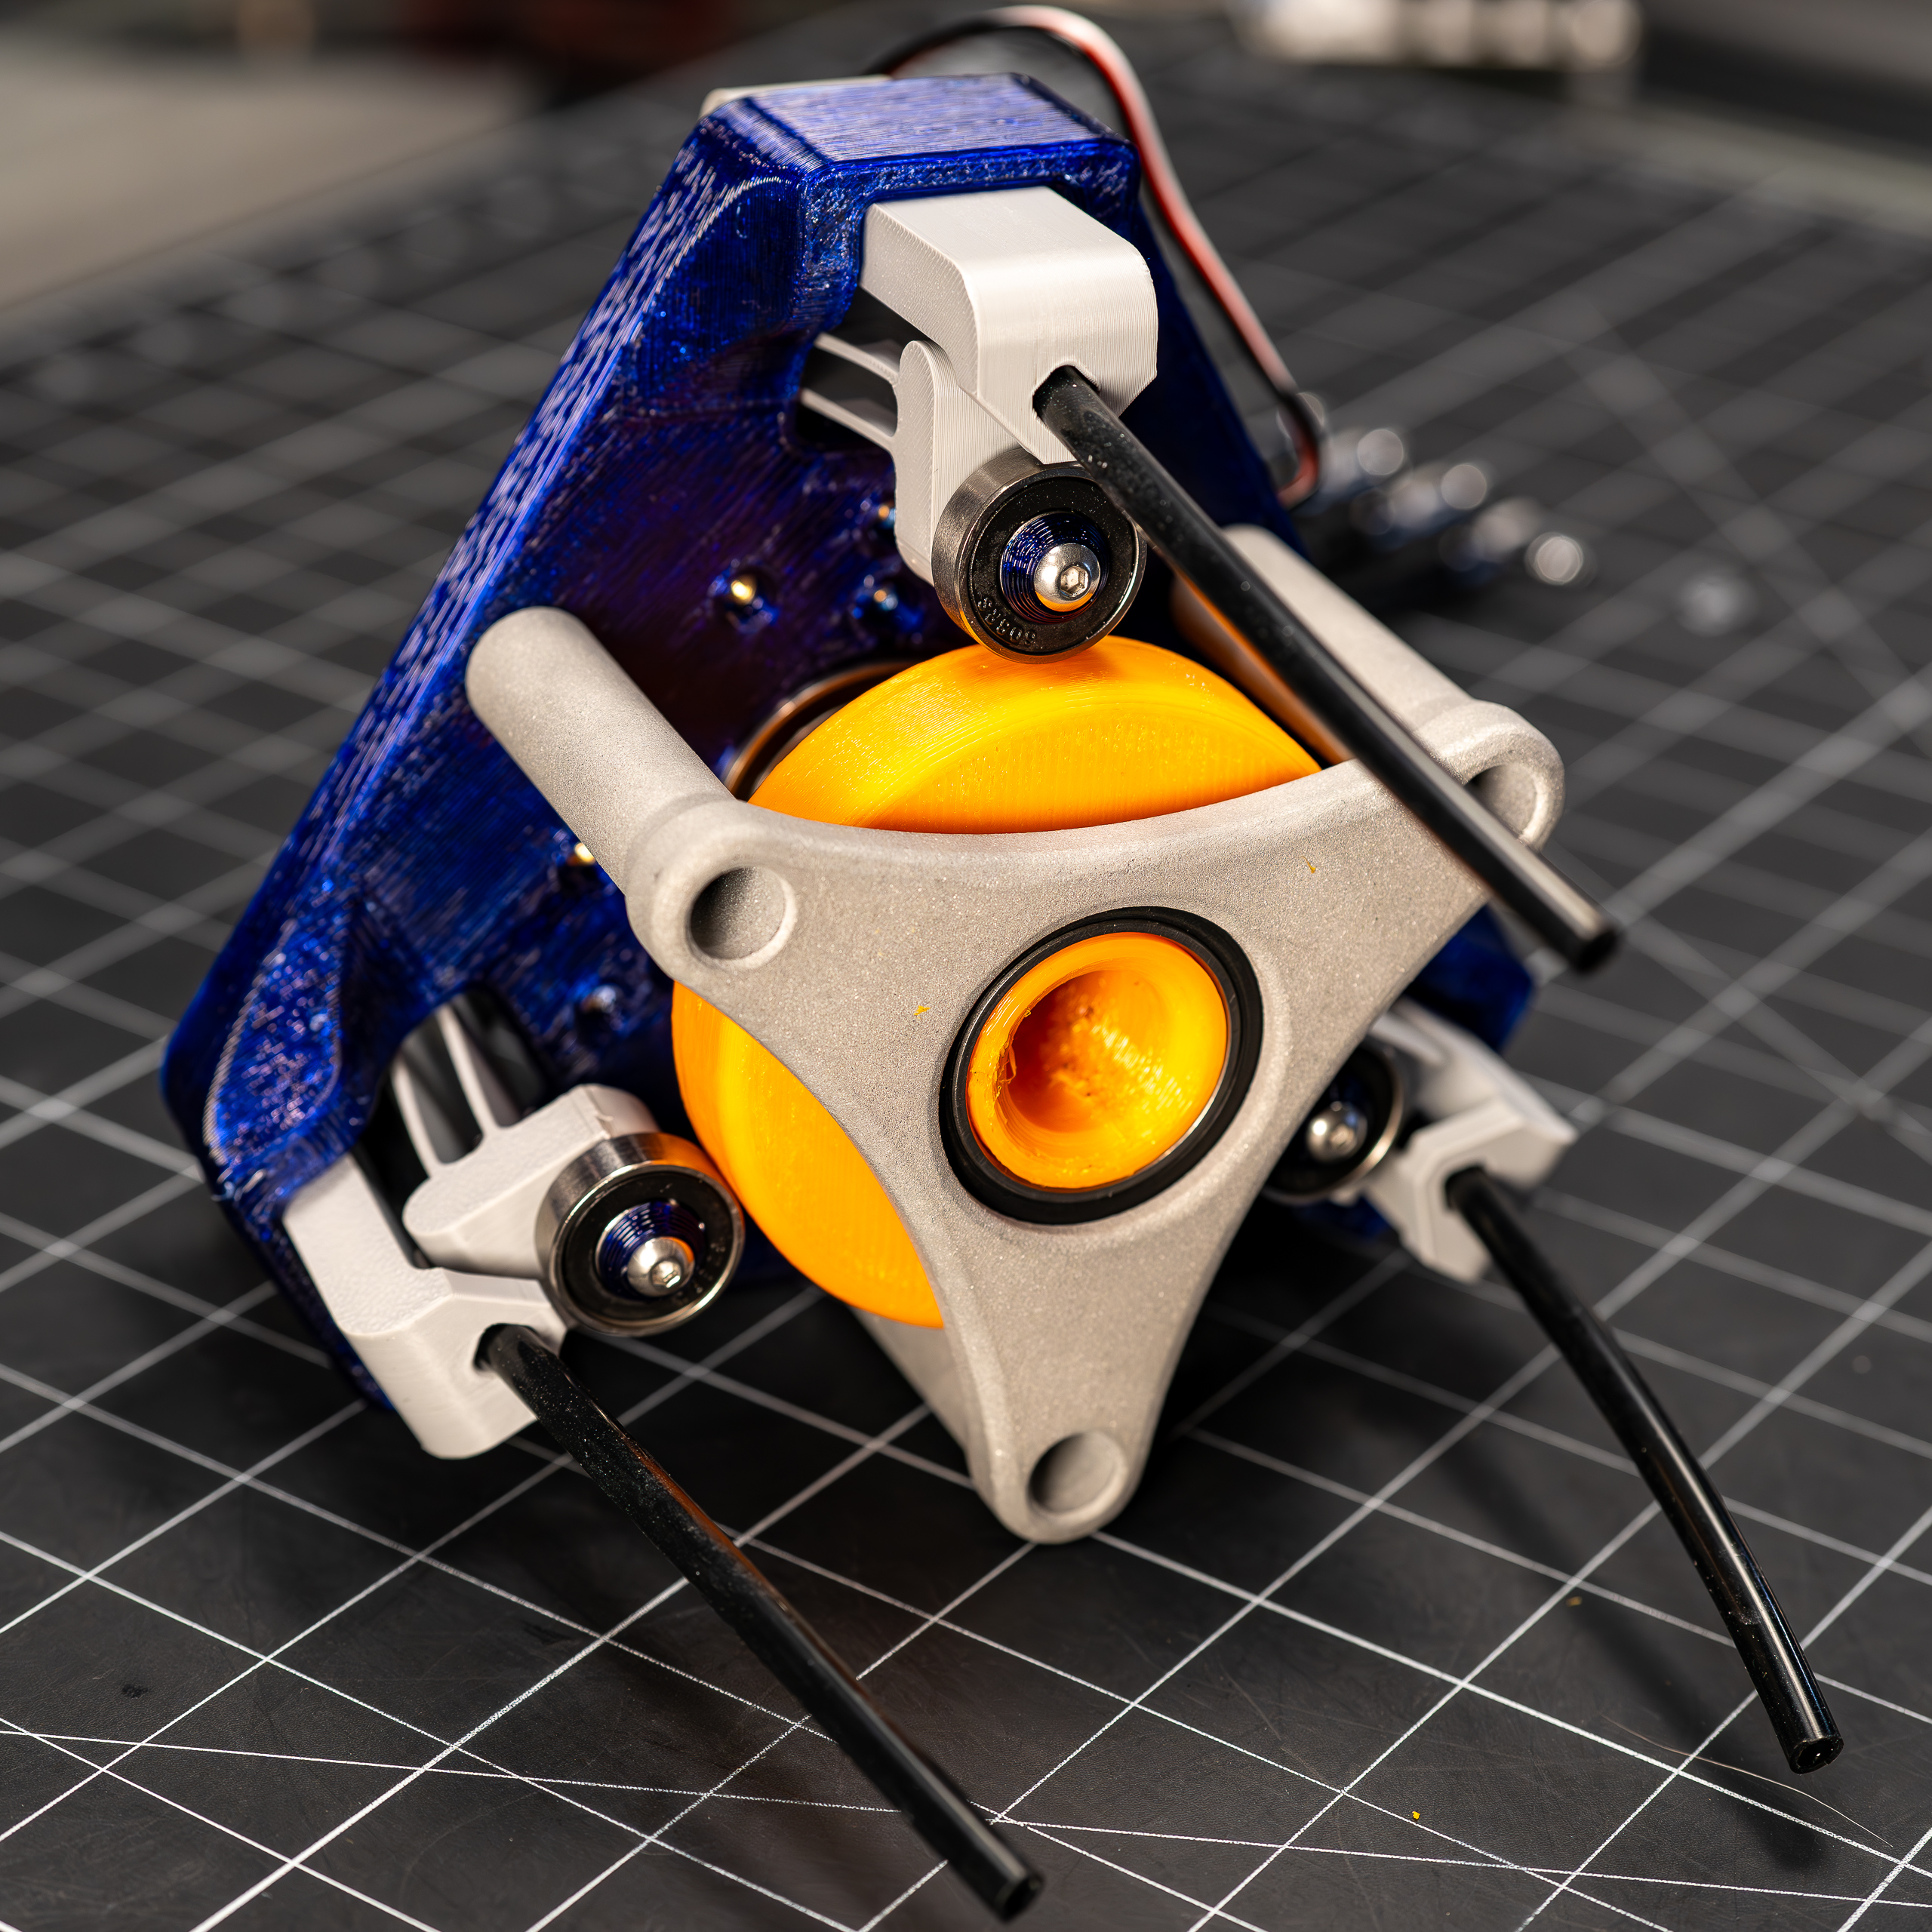
Overview
This project started off as a plan to just update my '
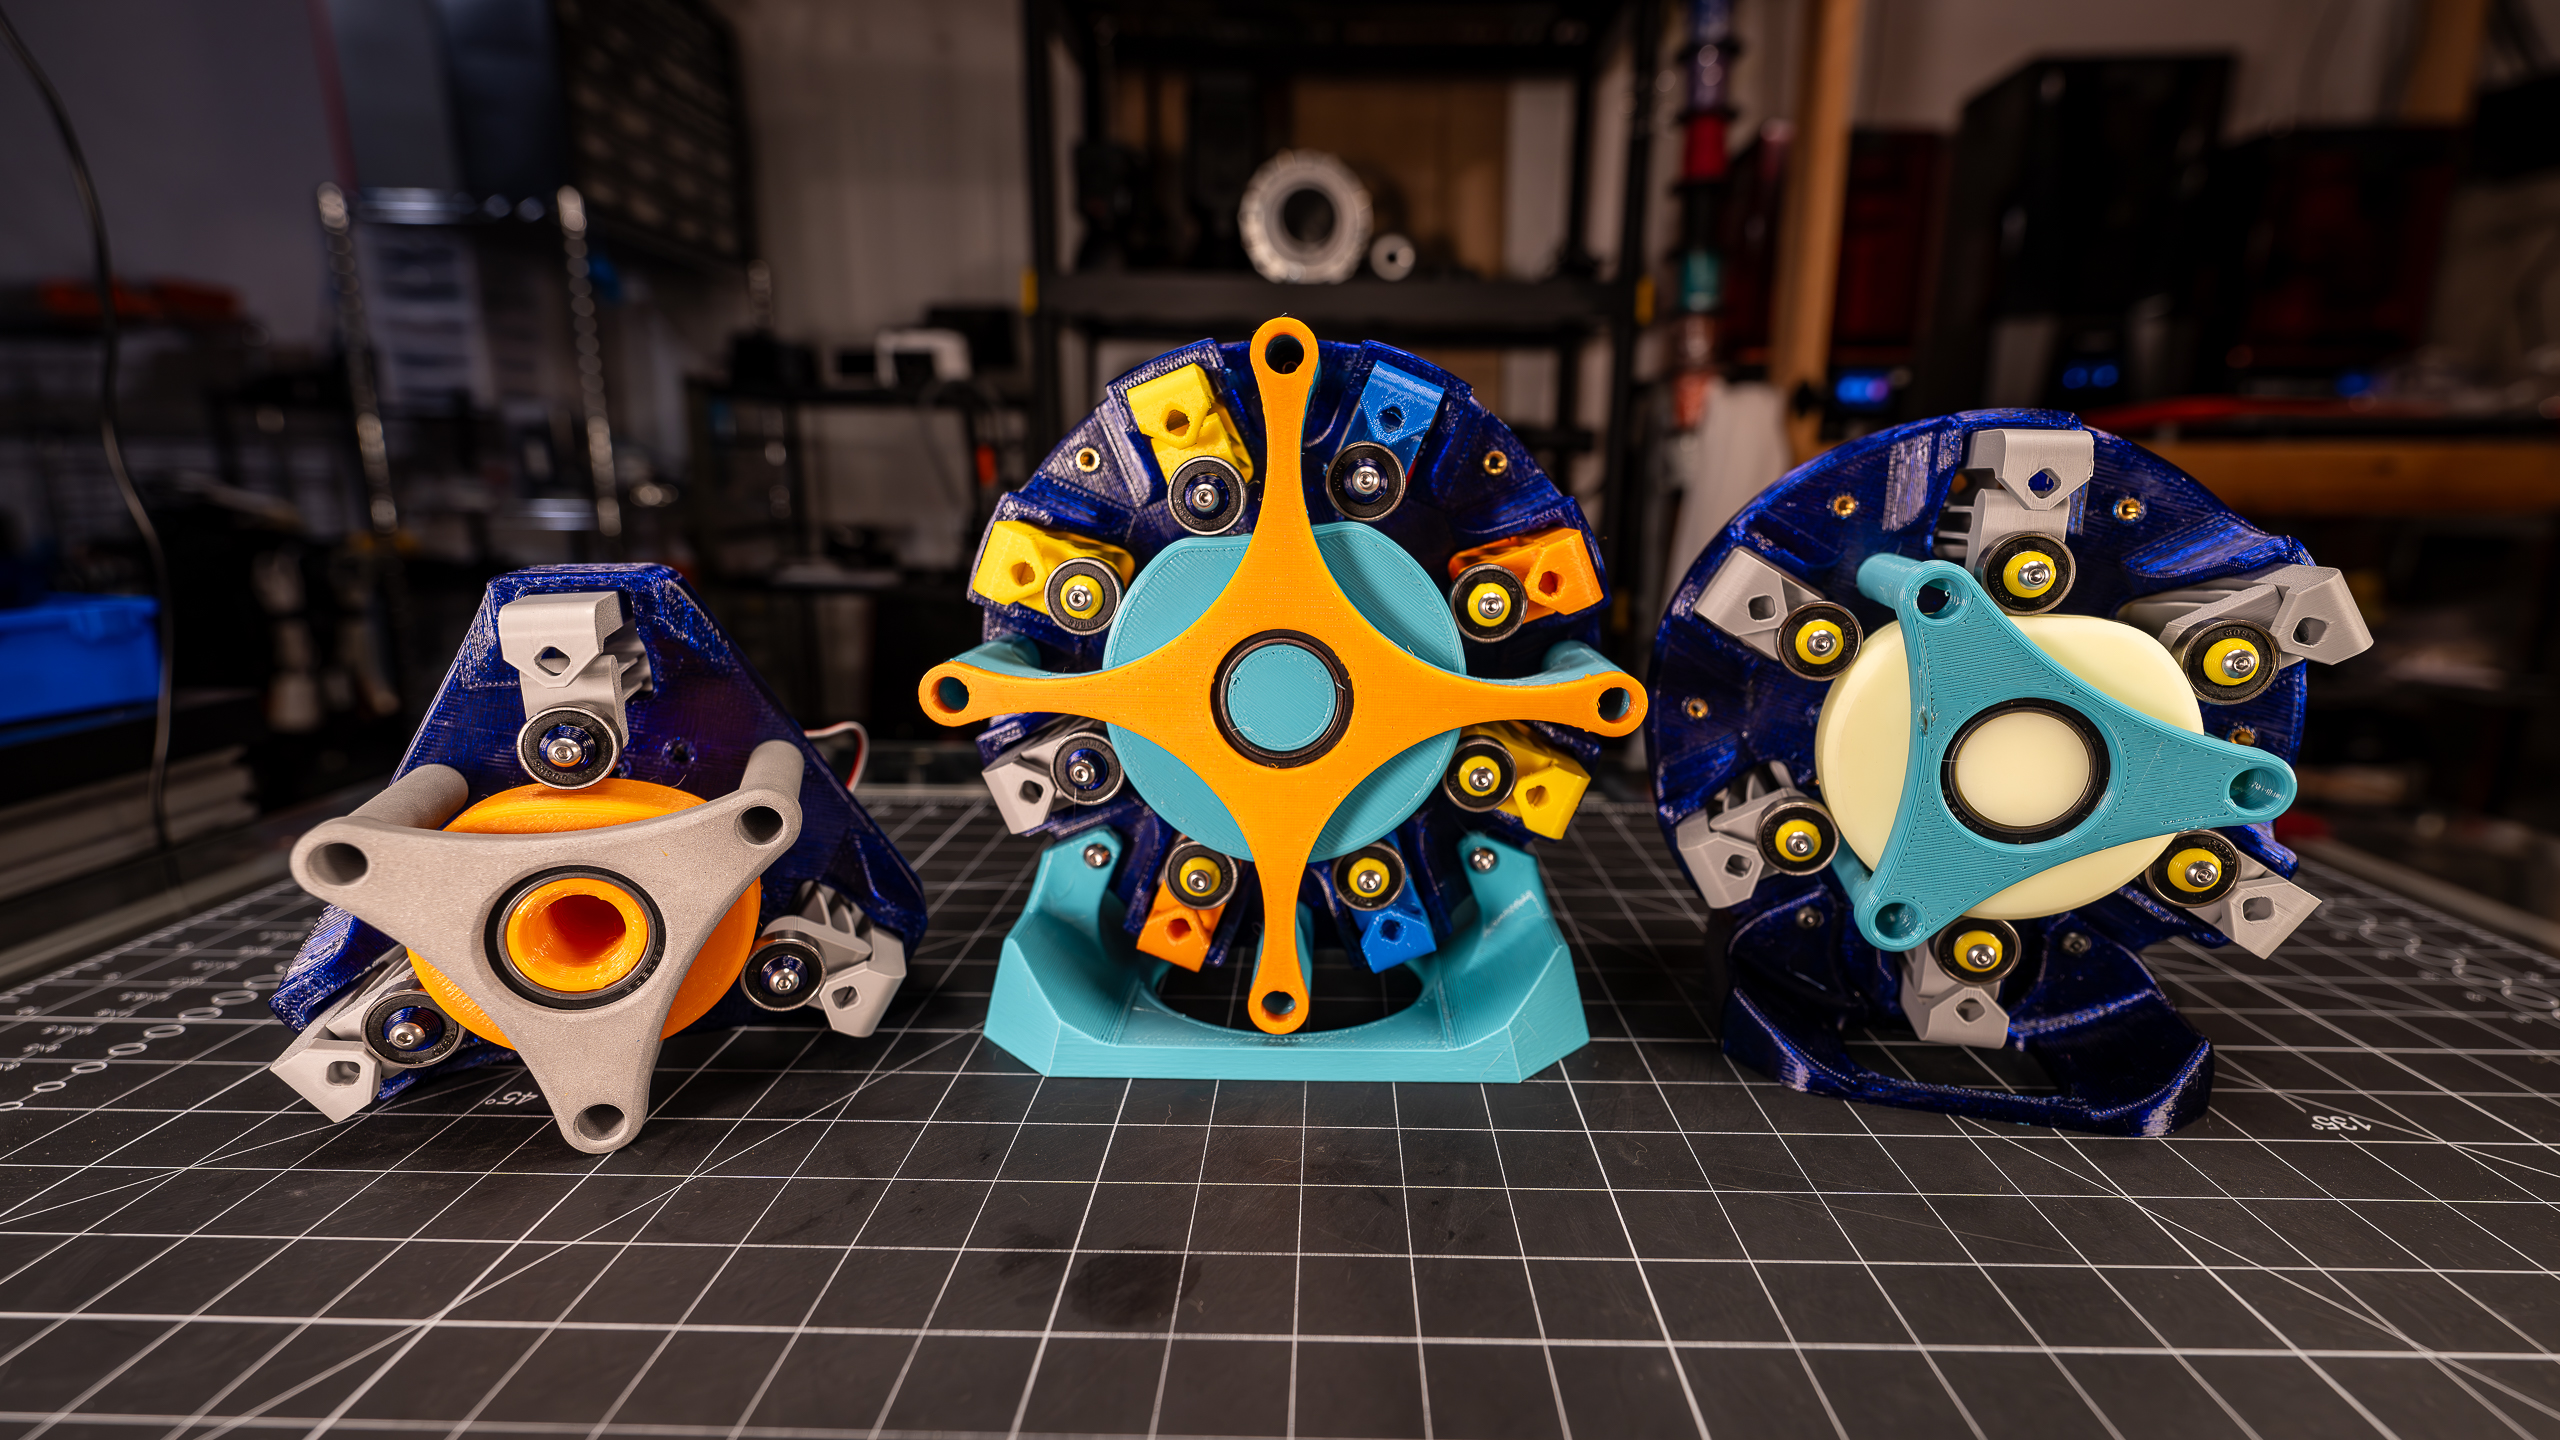
Drum Cam Valve' for an upcoming hydroponics system build I'm tinkering on. But I ended up just going with a full-on new design, which has resulted in the handful of new multi-channel valves pictured above.
The main problem with the Drum Cam Valve, aka Cam Valve Gen2, was with challenges in ensuring and maintaining a complete seal on all closed channels. Although I did find viable ways to make these valves work for previous hydro projects, they required a bit of effort to get them to work consistently that I'd rather avoid for future builds.
In addition to improving the valving performance, I also wanted a design that I could relatively easily scale to different channel counts. The variants pictured above had 3, 8, and 6 channels (from left to right). To vary the channel count, all I need to do is modify the base and cam wheel to accommodate more valve flexures (more on what I mean by that here shortly).
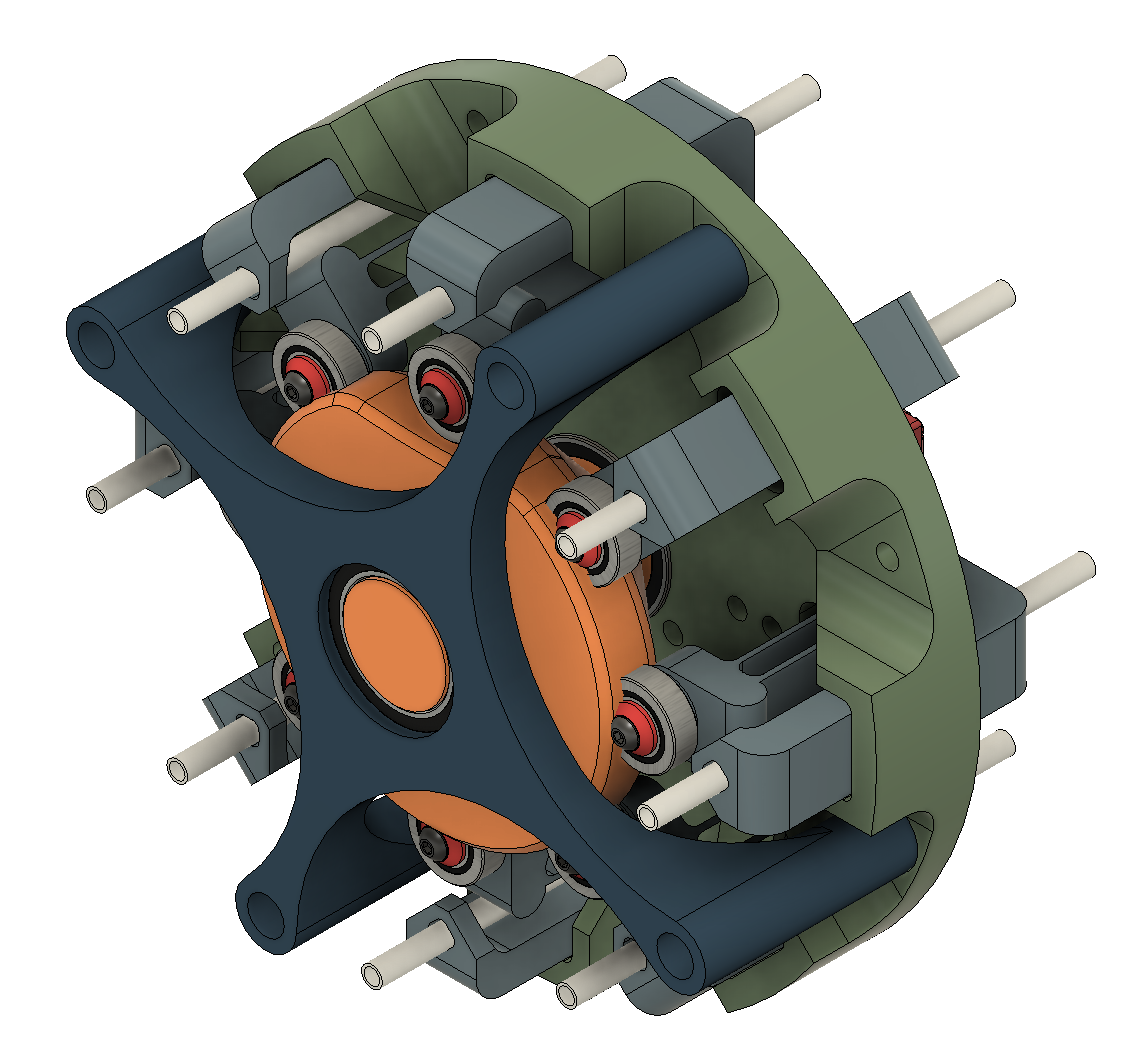
As with the two generations of cam valves that came before these are pinch valves, where each channel is separate tube passing through. All of these builds are also intended to have only one channel (or no channels) open at a time. It was the way that this pinching happens that was the primary driver for the changes between Gen2 and Gen3. In Gen2, the contact of the pincher was a ball bearing, and it was that spherical contact with the cylindrical tubing that led to the difficulties in getting a good seal. So for this revision I wanted to go back to something I tried in Gen1, which was to have a line contact. And to remove the need for any sort of linear bearing solution, I went with a four bar equivalent flexure mechanism to guide the motion of the ‘blade’ that gives the line contact.
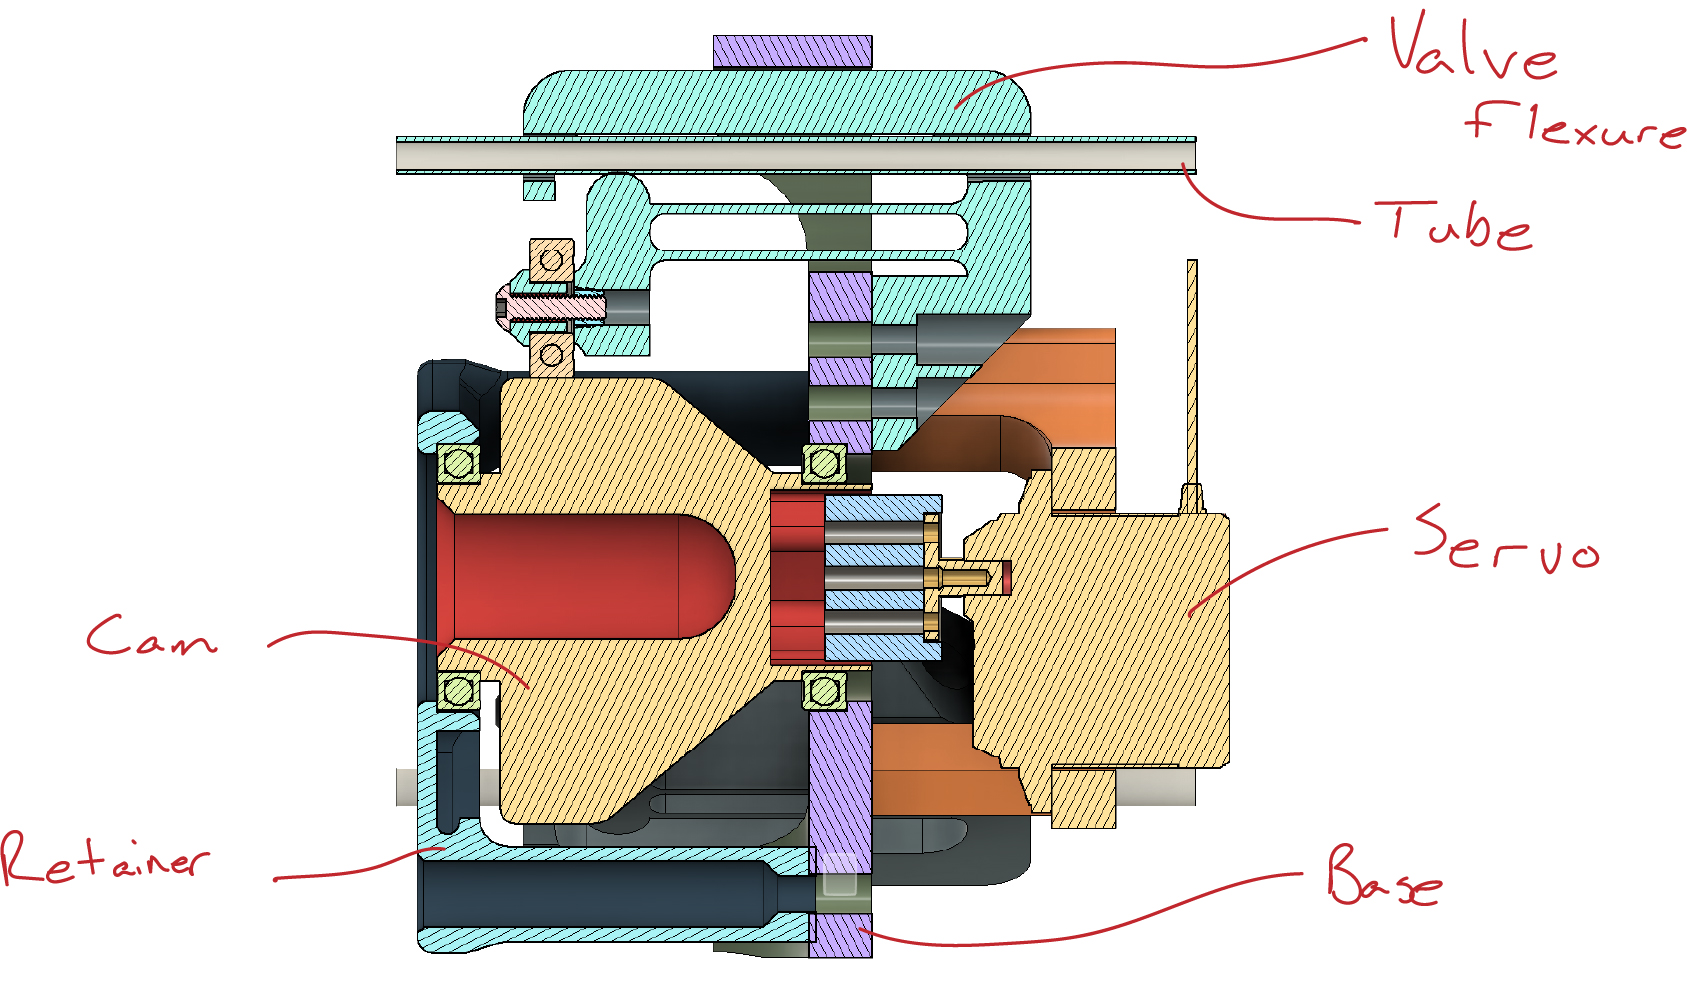
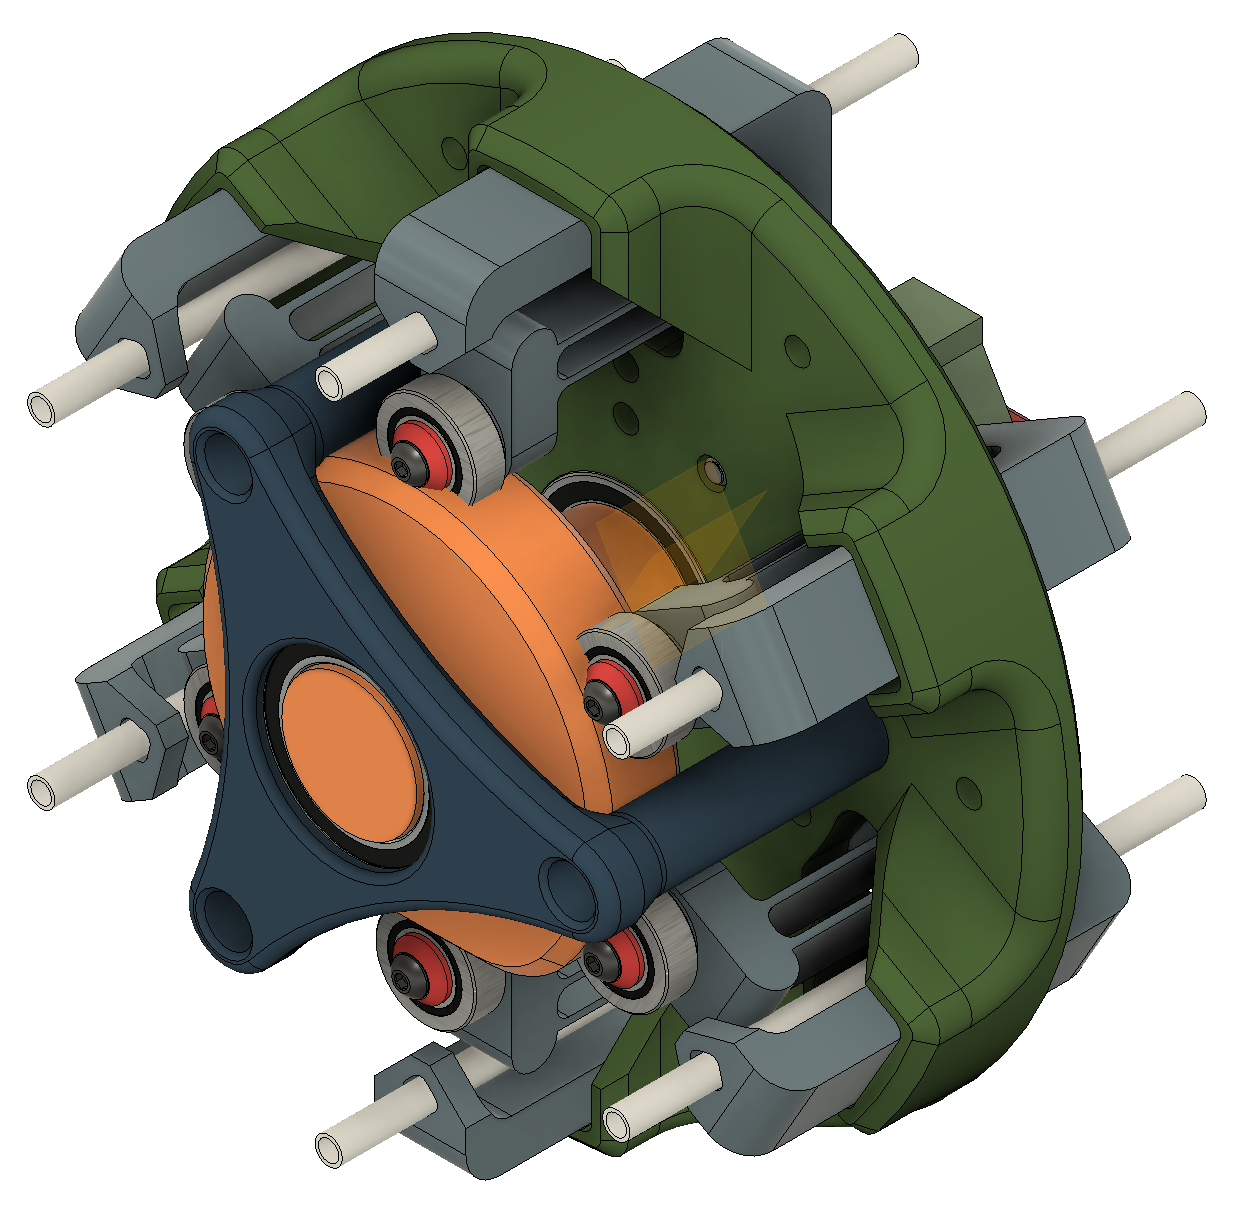
To actuate these valve flexures, I arrayed them around a central cam wheel. The cross-section image below shows how the interface between the cam wheel and one of these flexures looks along the line of action. The image shows how the valve looks when open, where the cam wheel has the smallest radius.
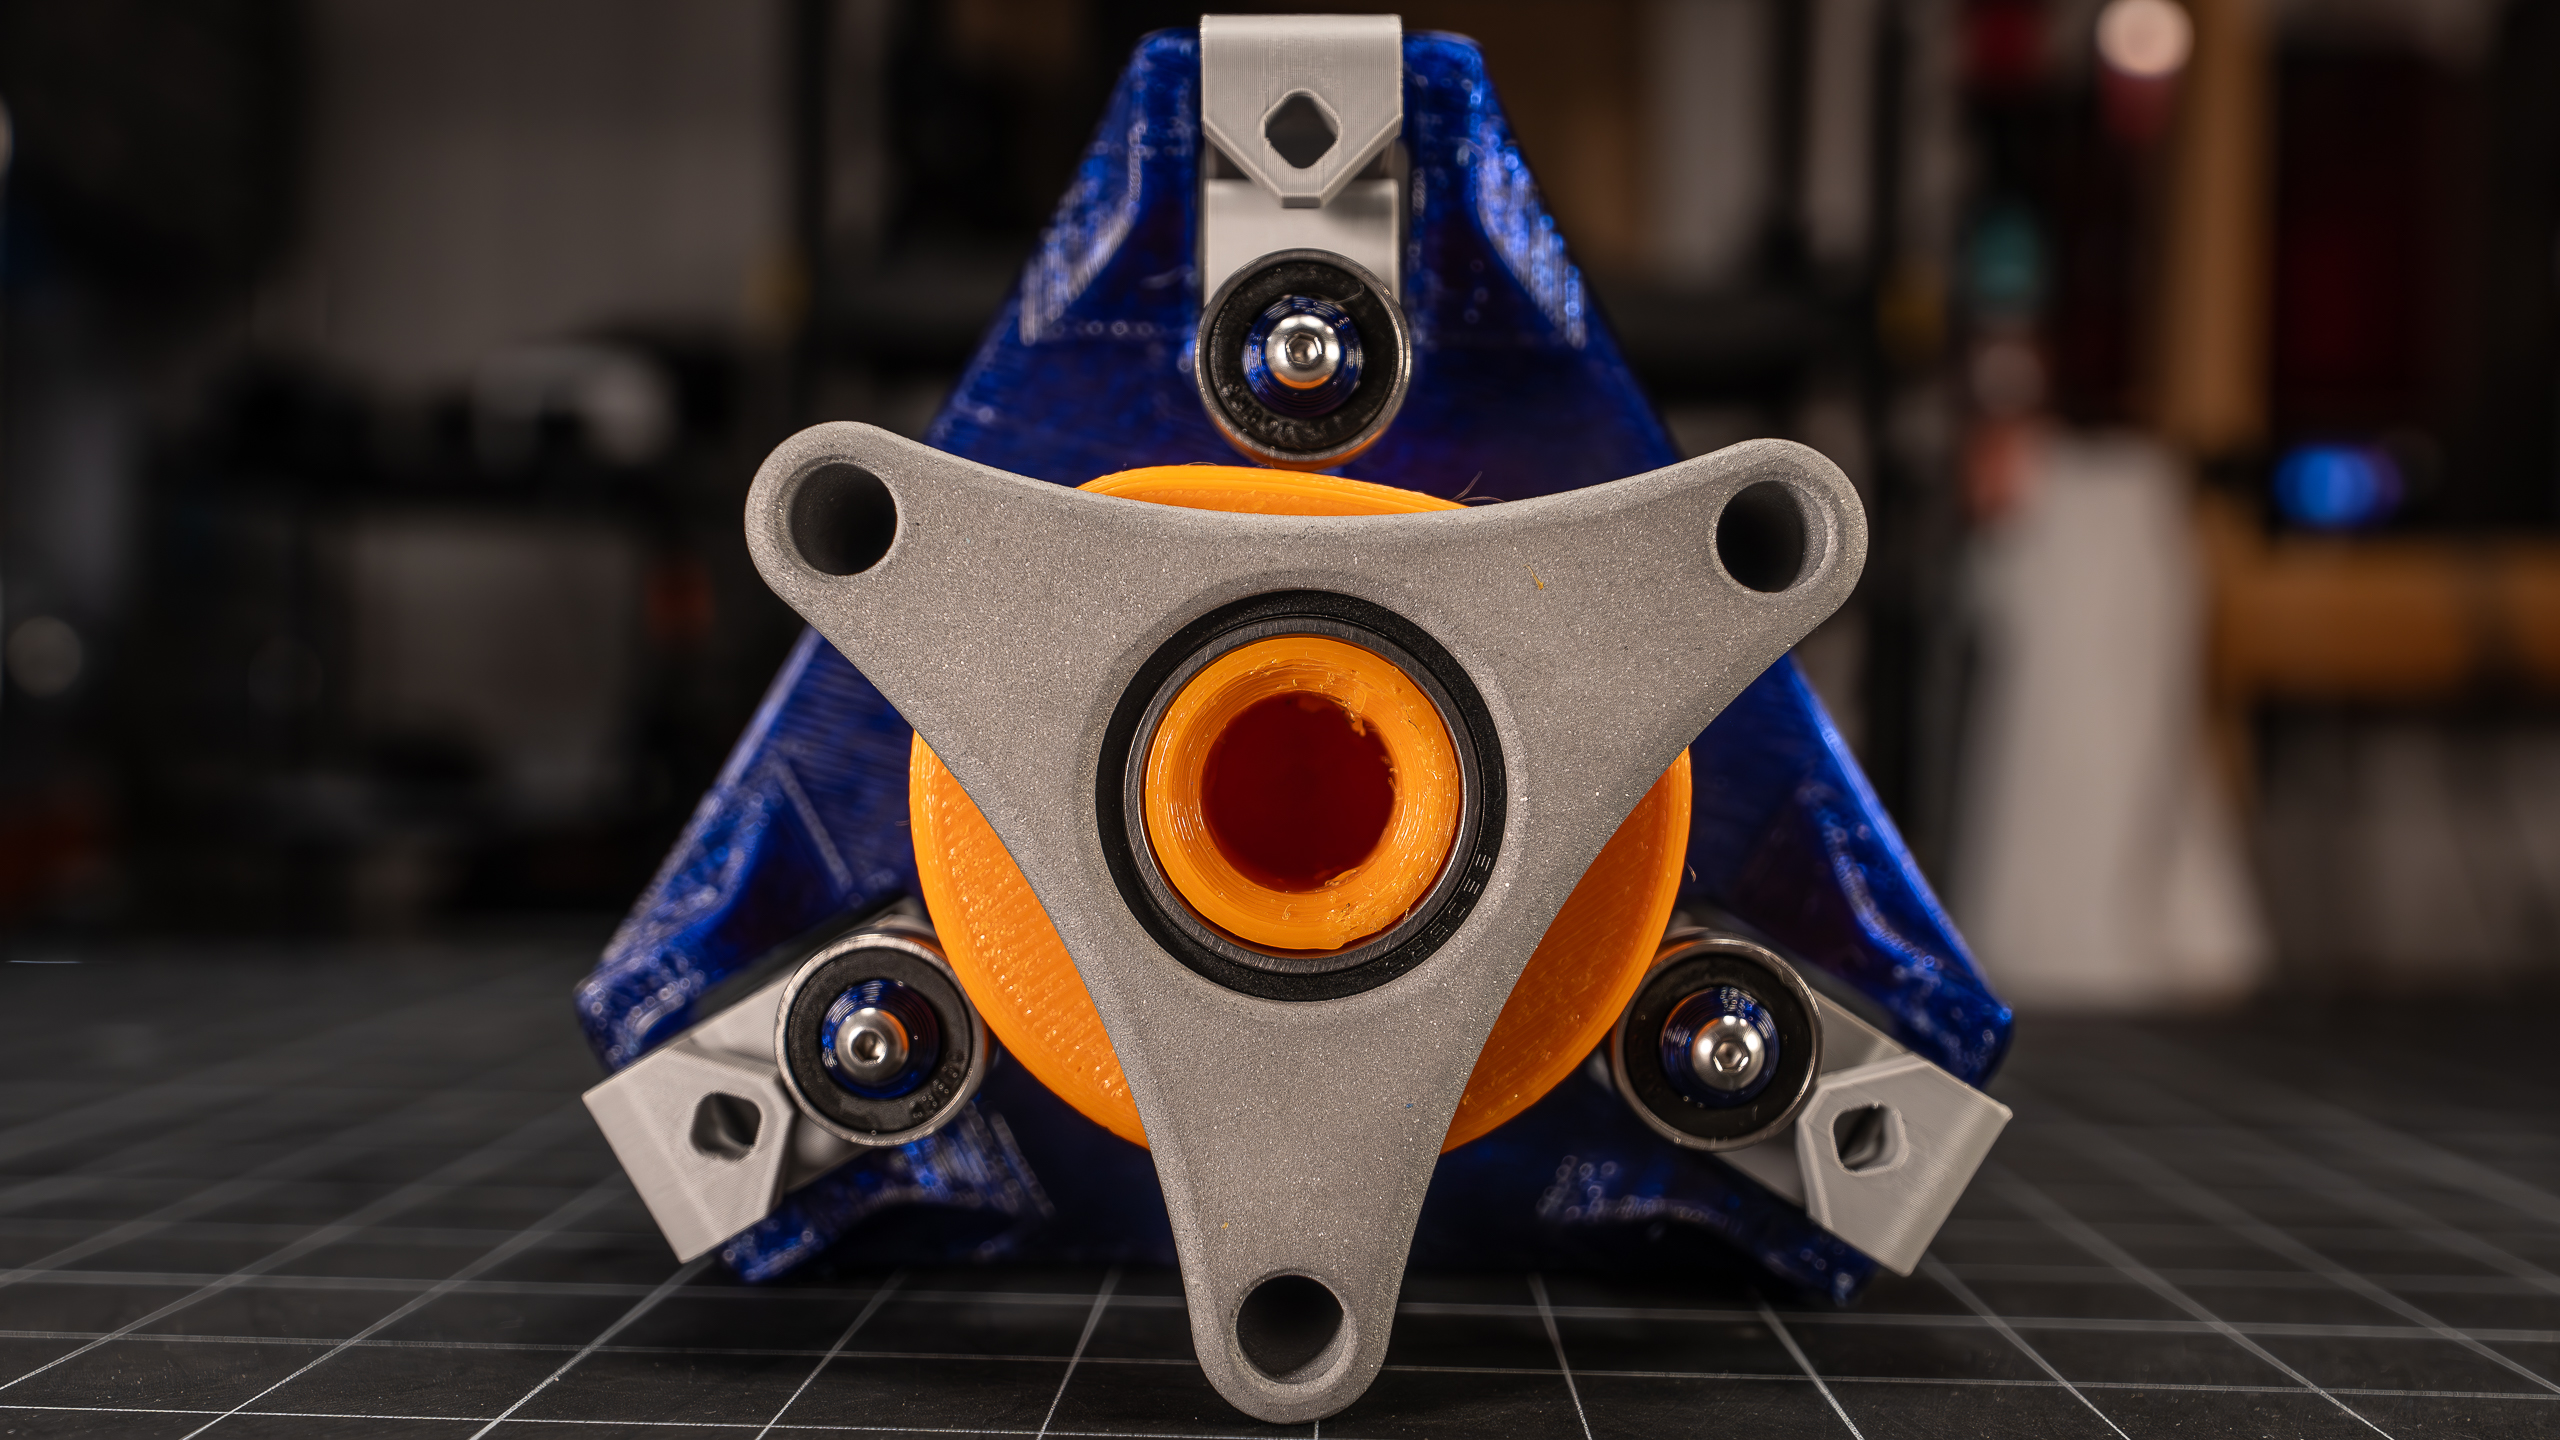
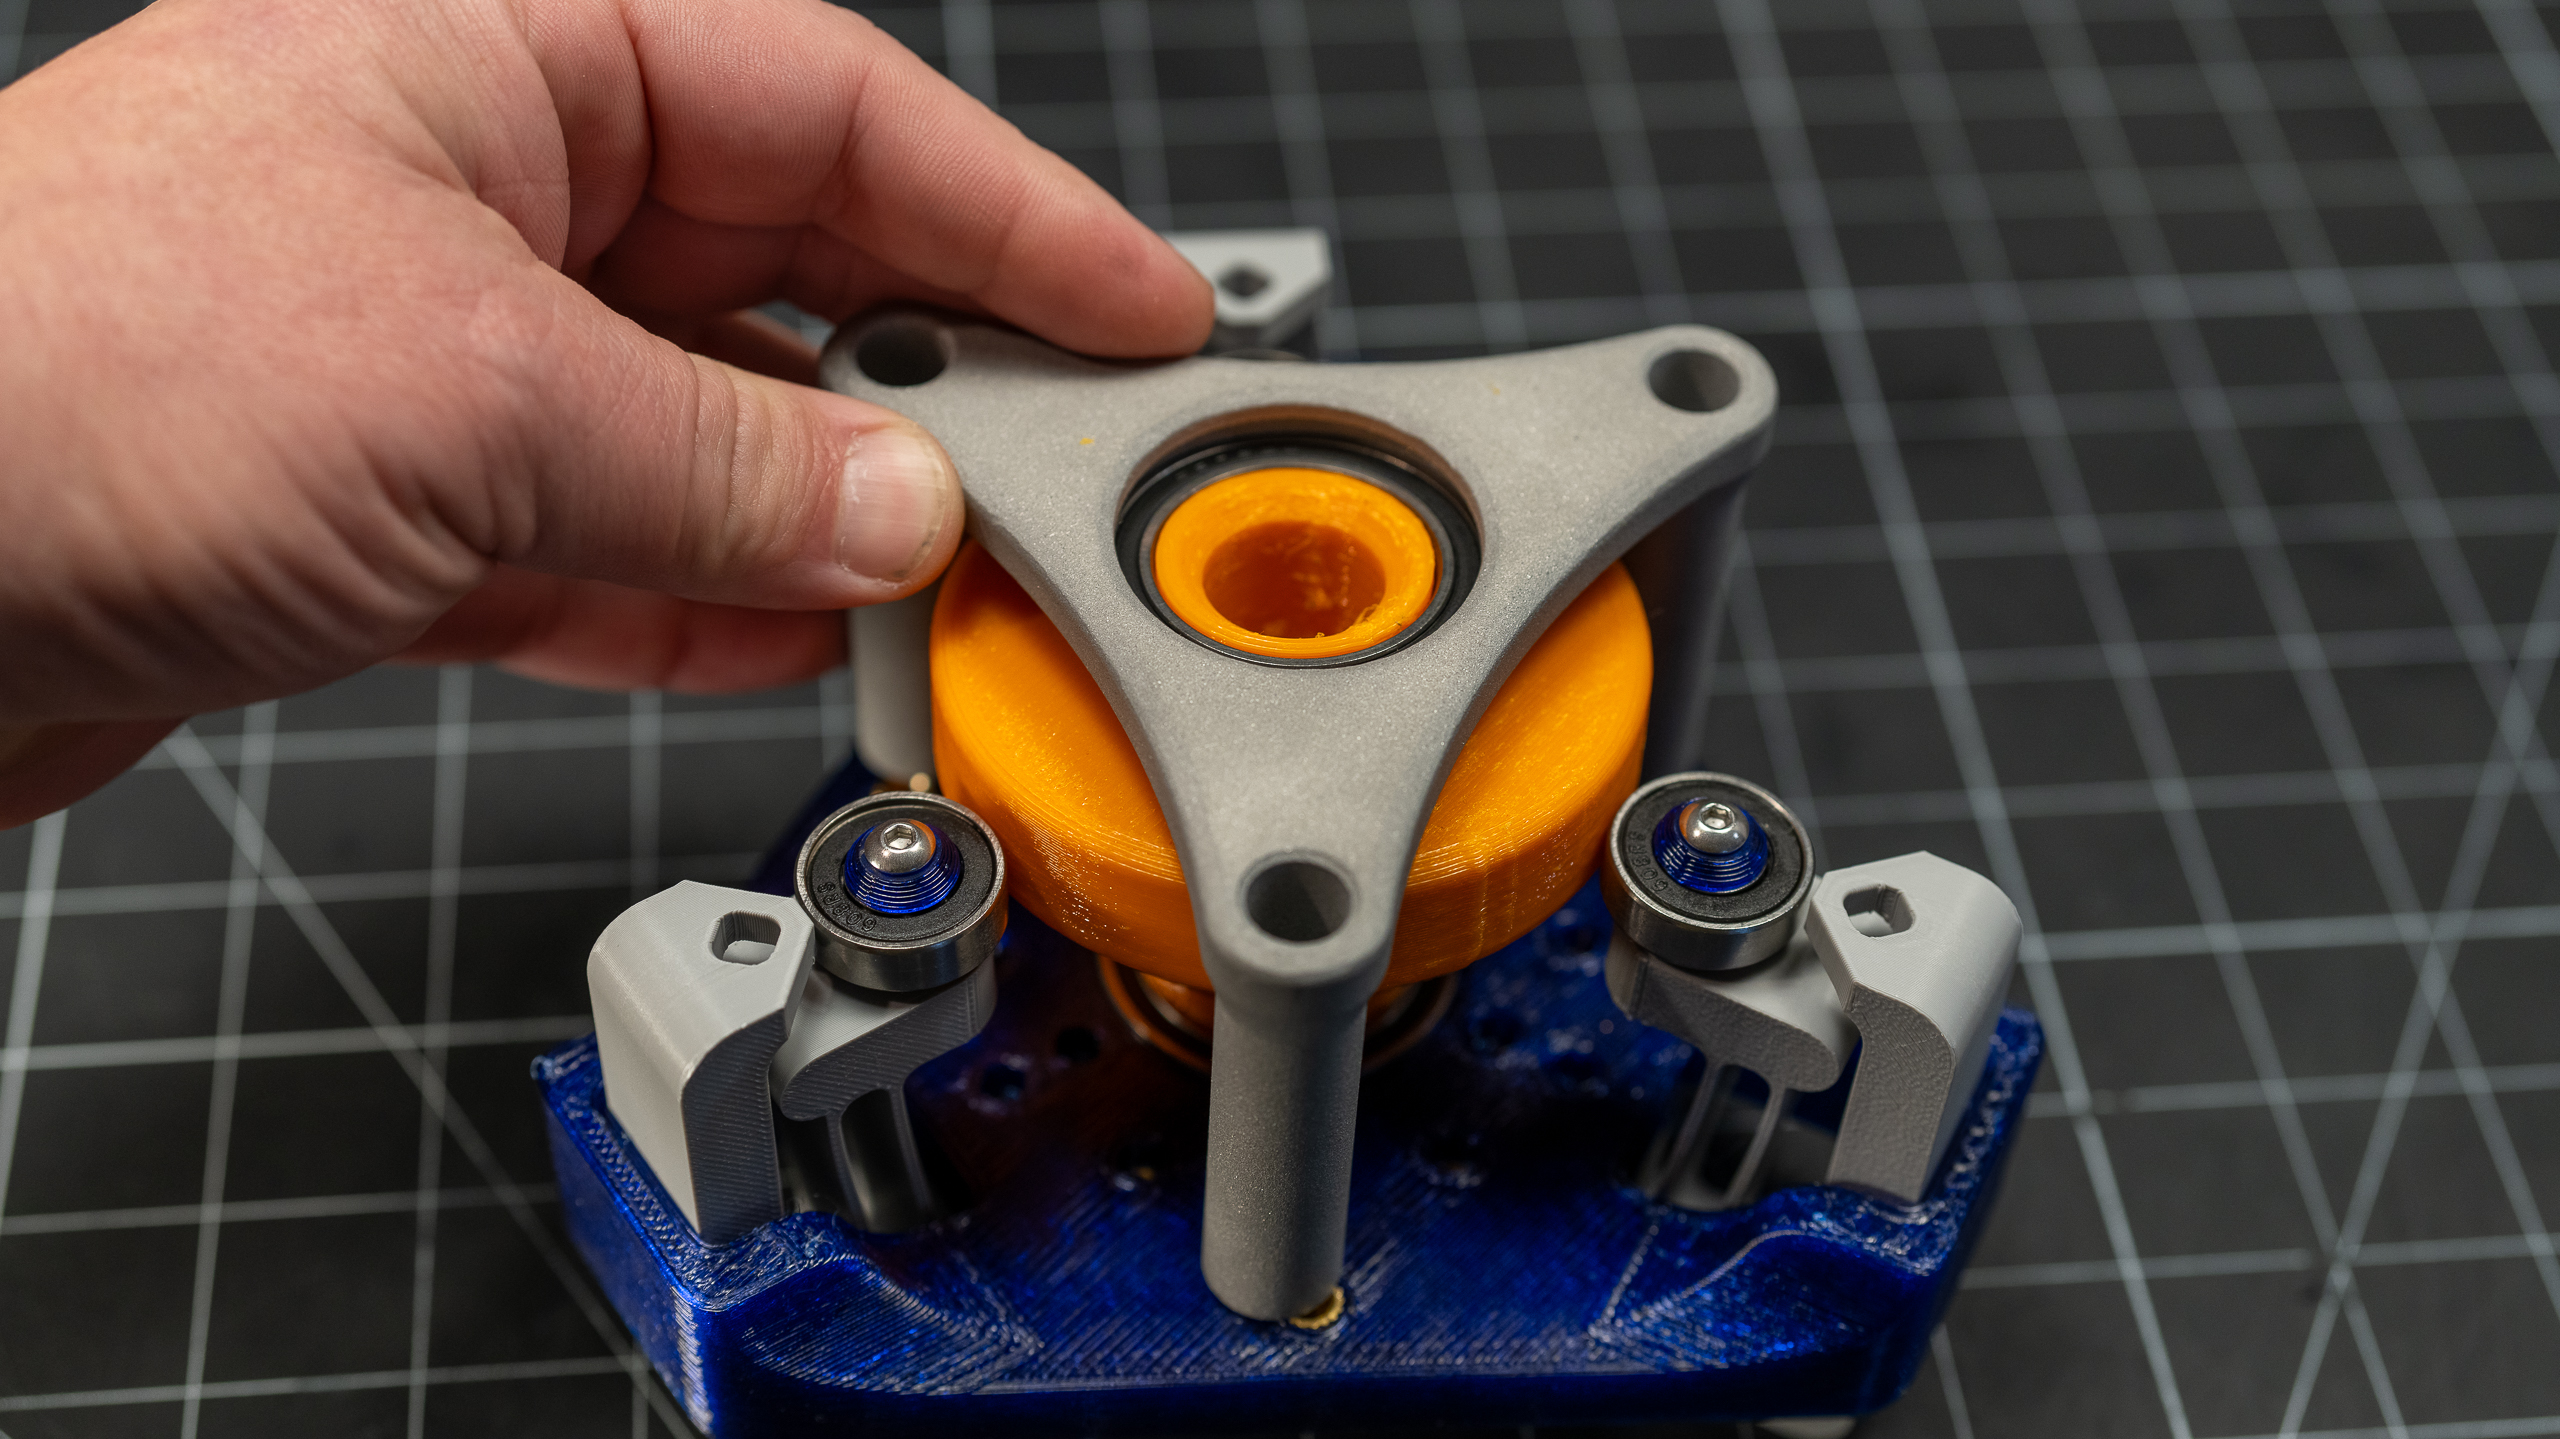
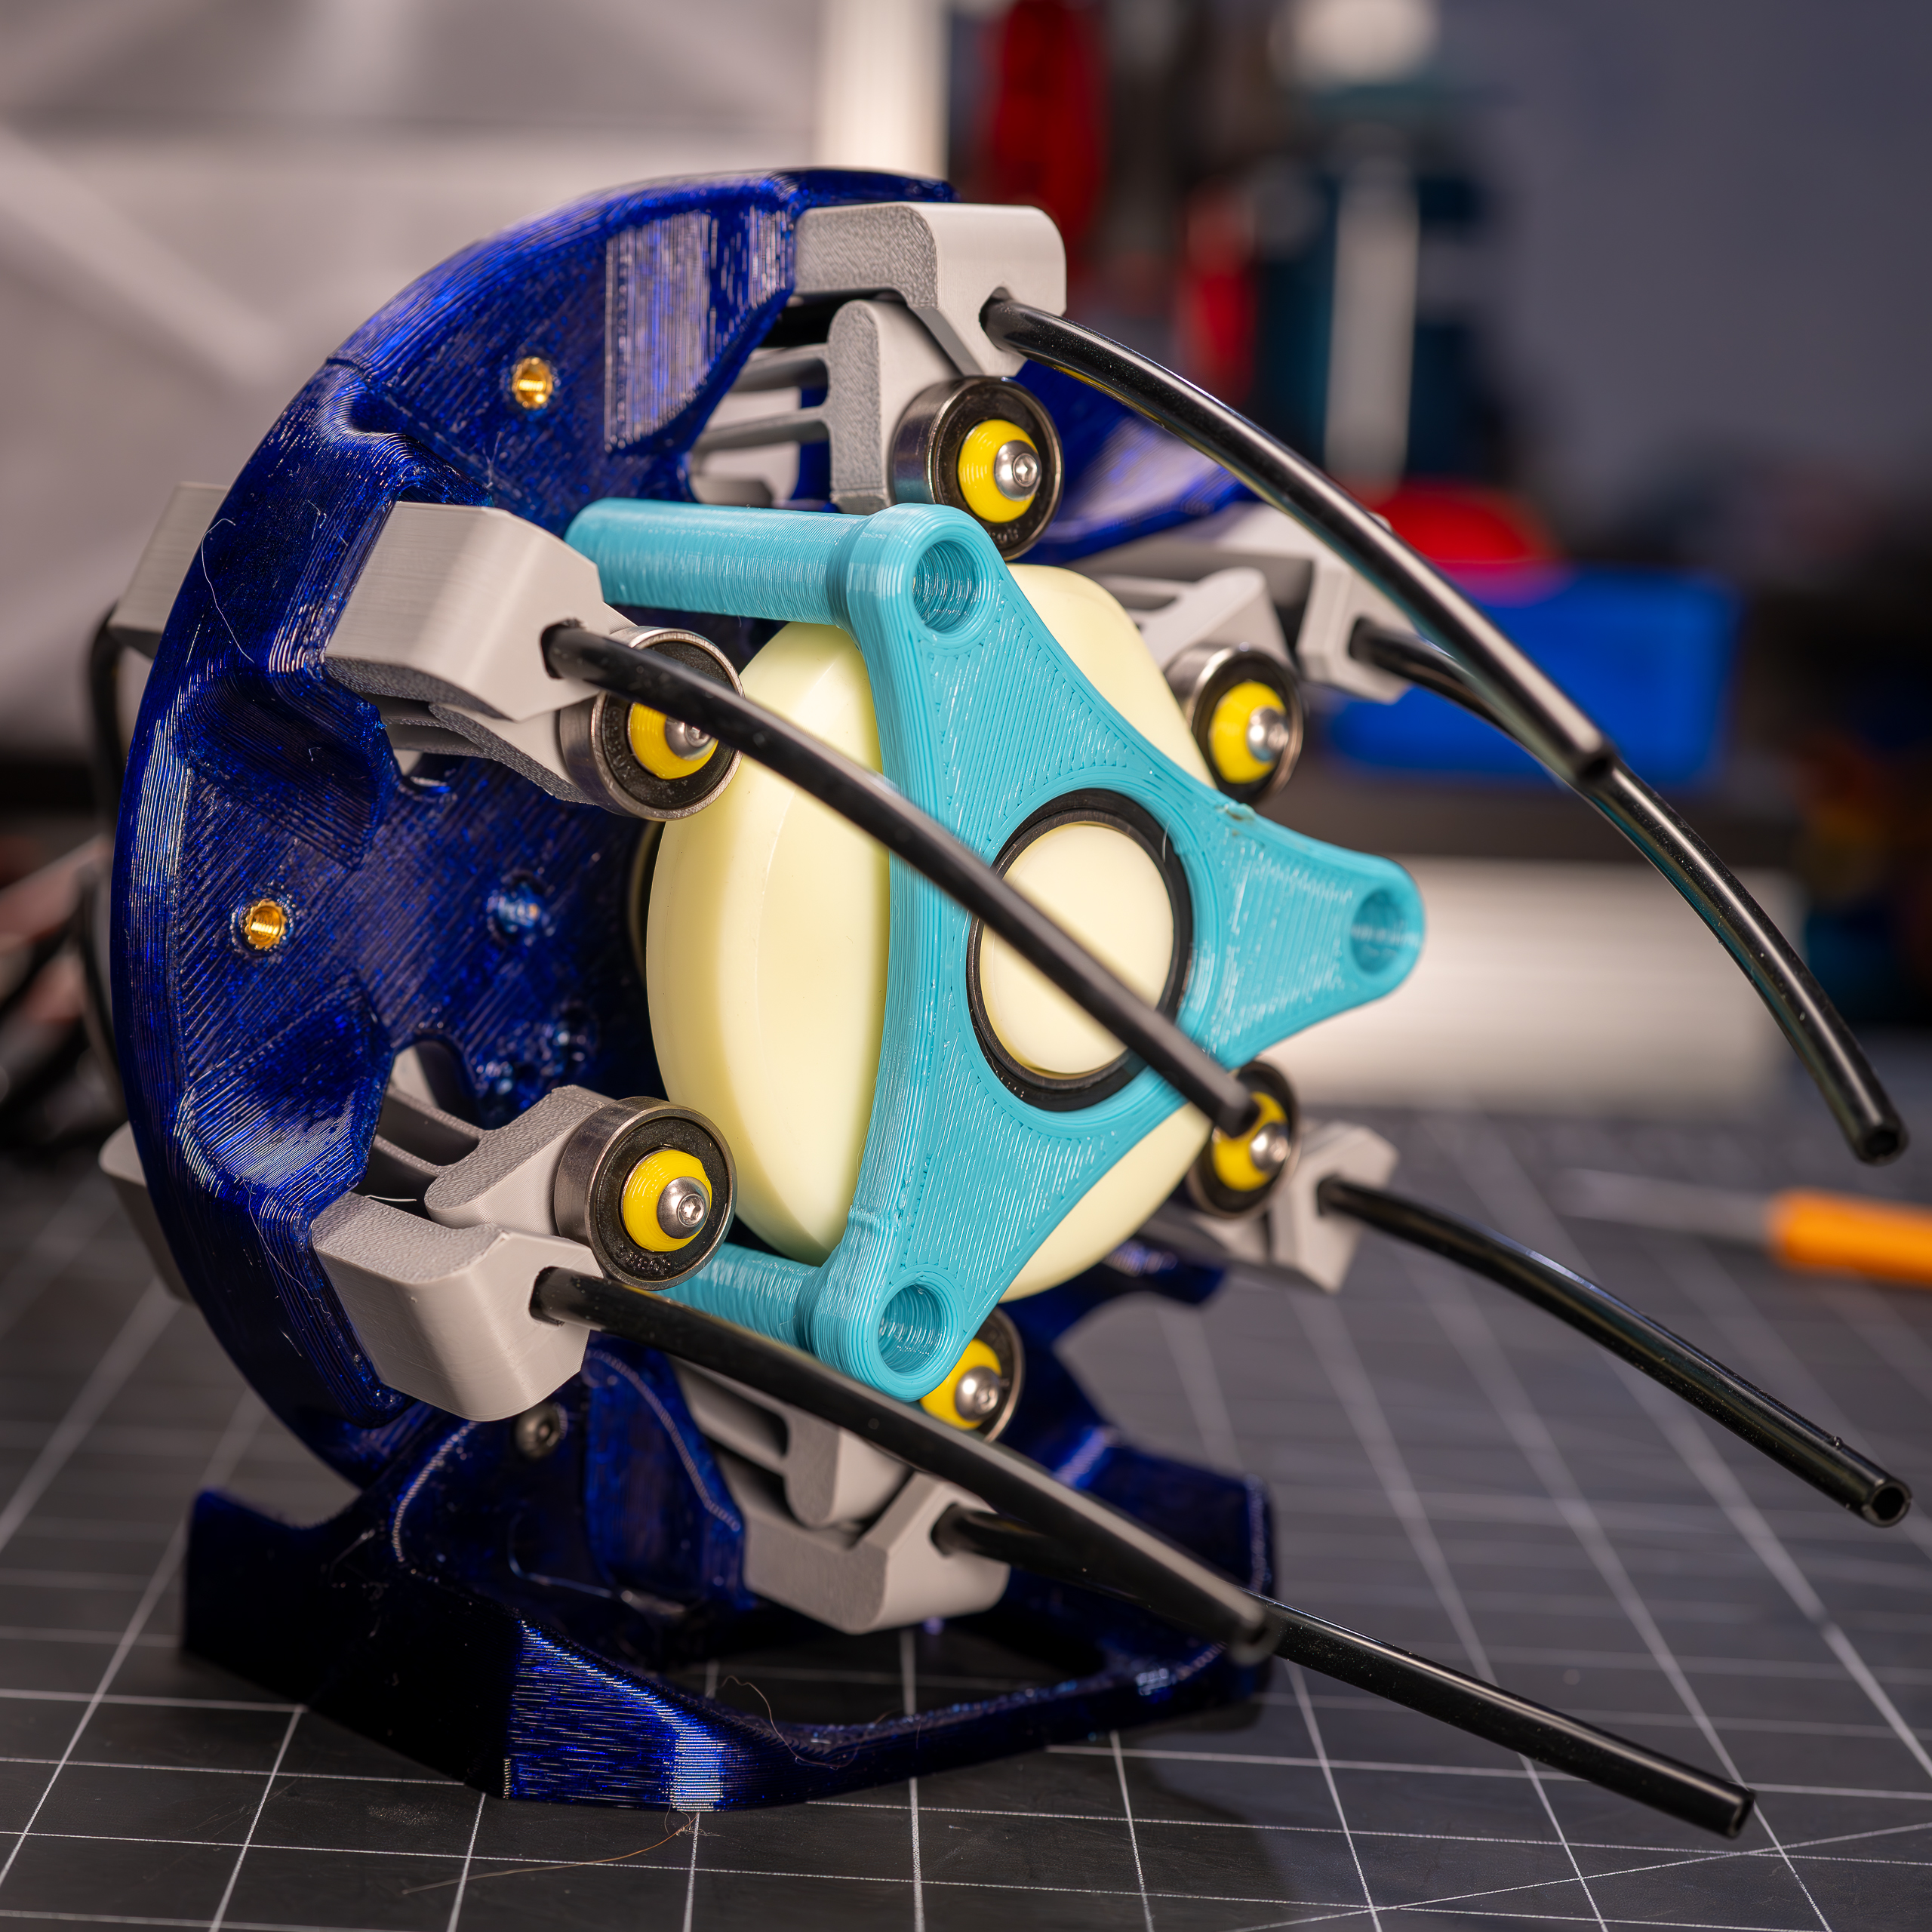
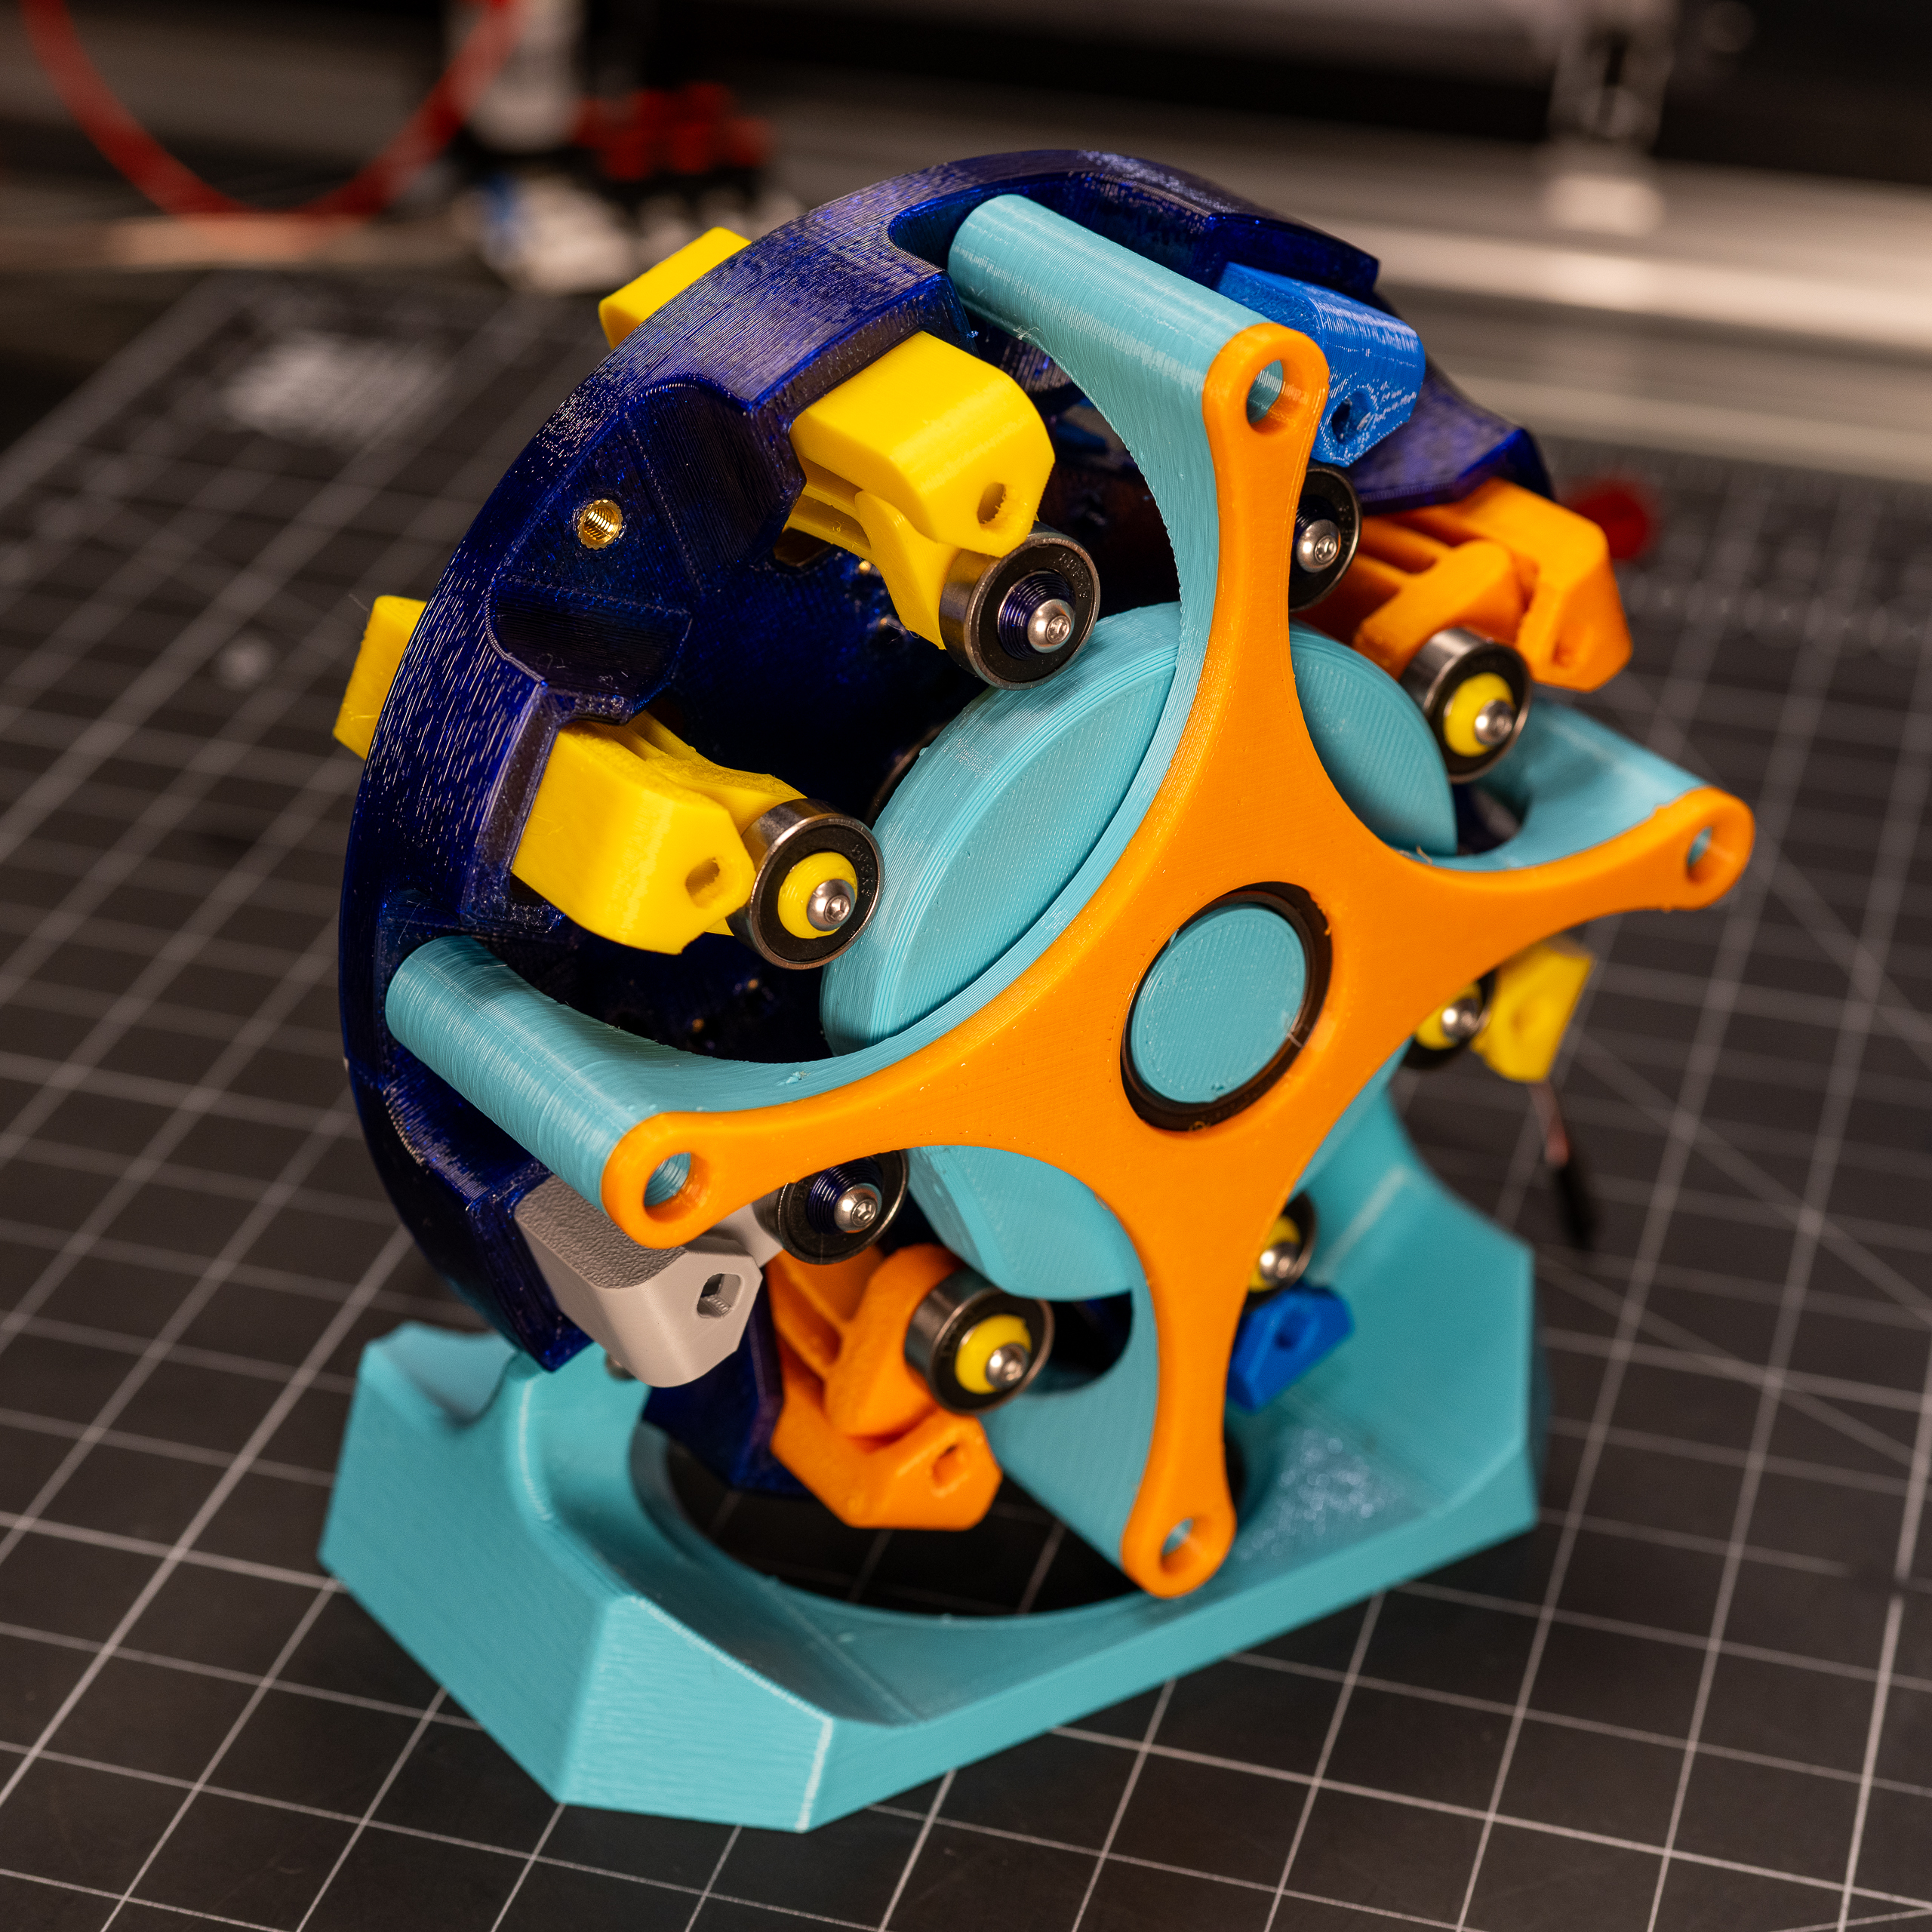
And the image below shows the real world version of the variant shown in the above cross-section. This frontal view shows how the cam radius varies. The two valves on the bottom are closed, and the one on top is open, just as shown in the cross-section.
Design
Valve Flexures
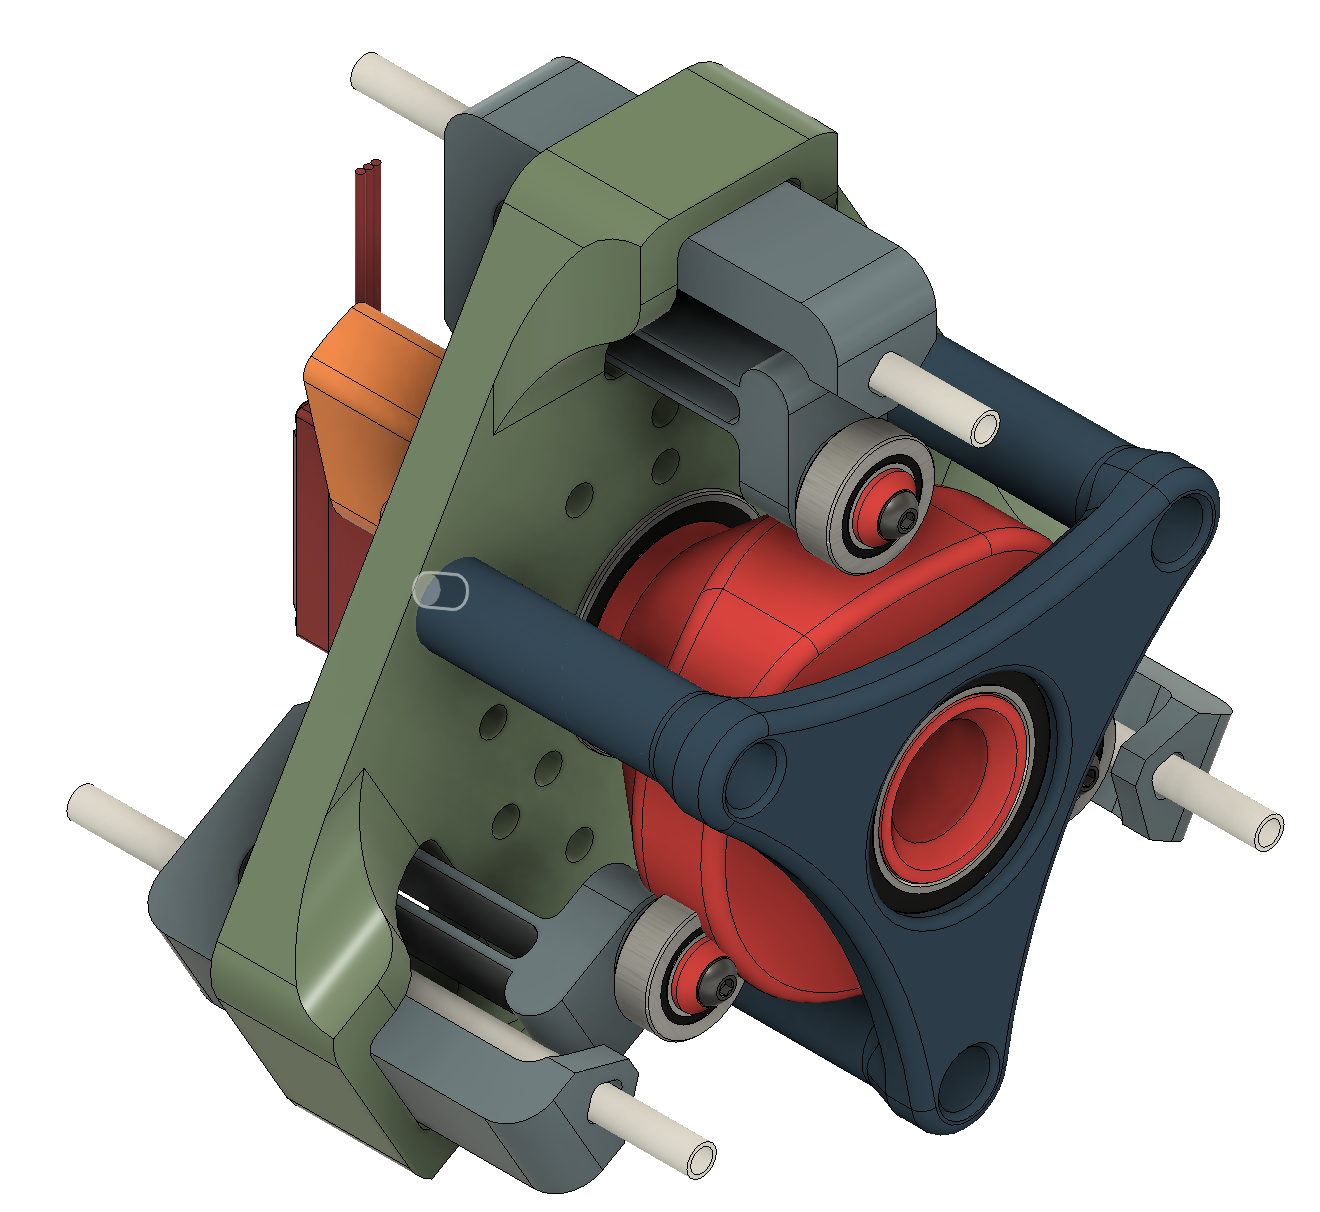
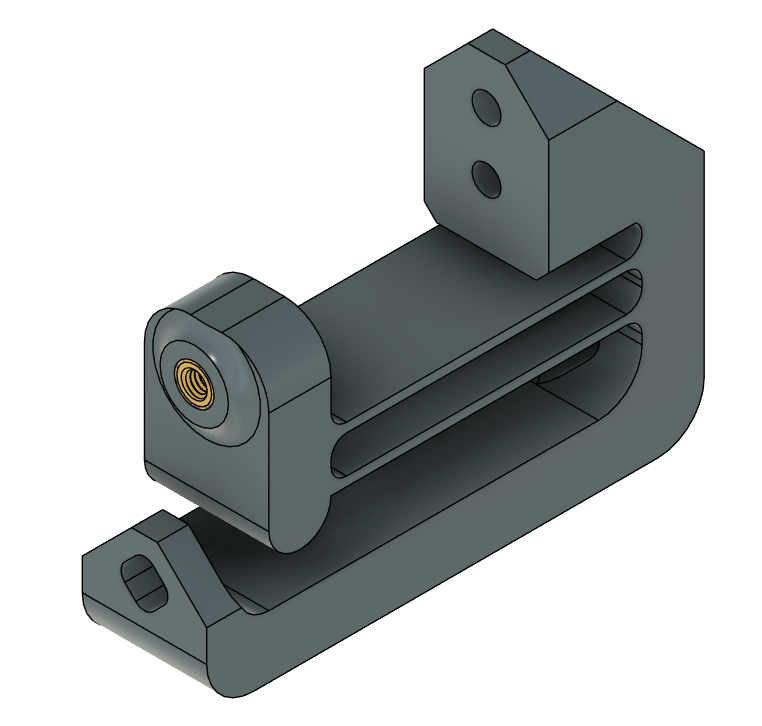
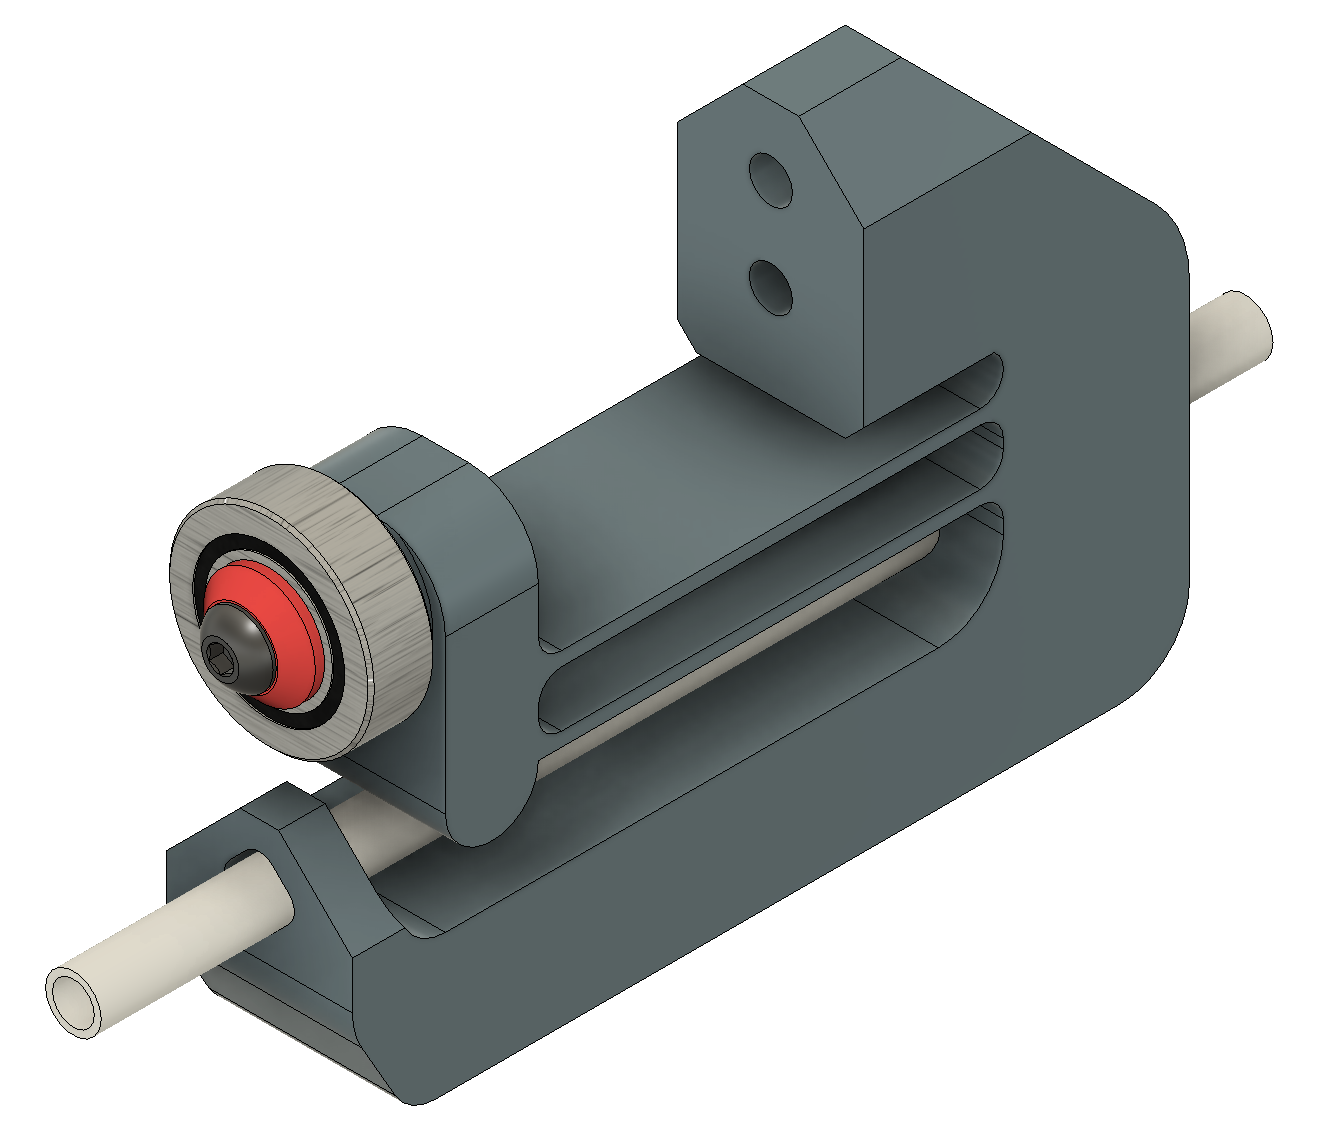
All of the valve assemblies I’ve built thus far have used the same flexure valve design, as shown in the images below. Each valve flexure has a mount location on the moving element where a rolling element bearing is attached with an M4 fastener. This bearing rolls along the cam wheel to open and close the valve. When open, the flexure is unstessed and the blade disengages the tubing, and when it is closed, the flexure is displaced and the tubing is pinched closed.
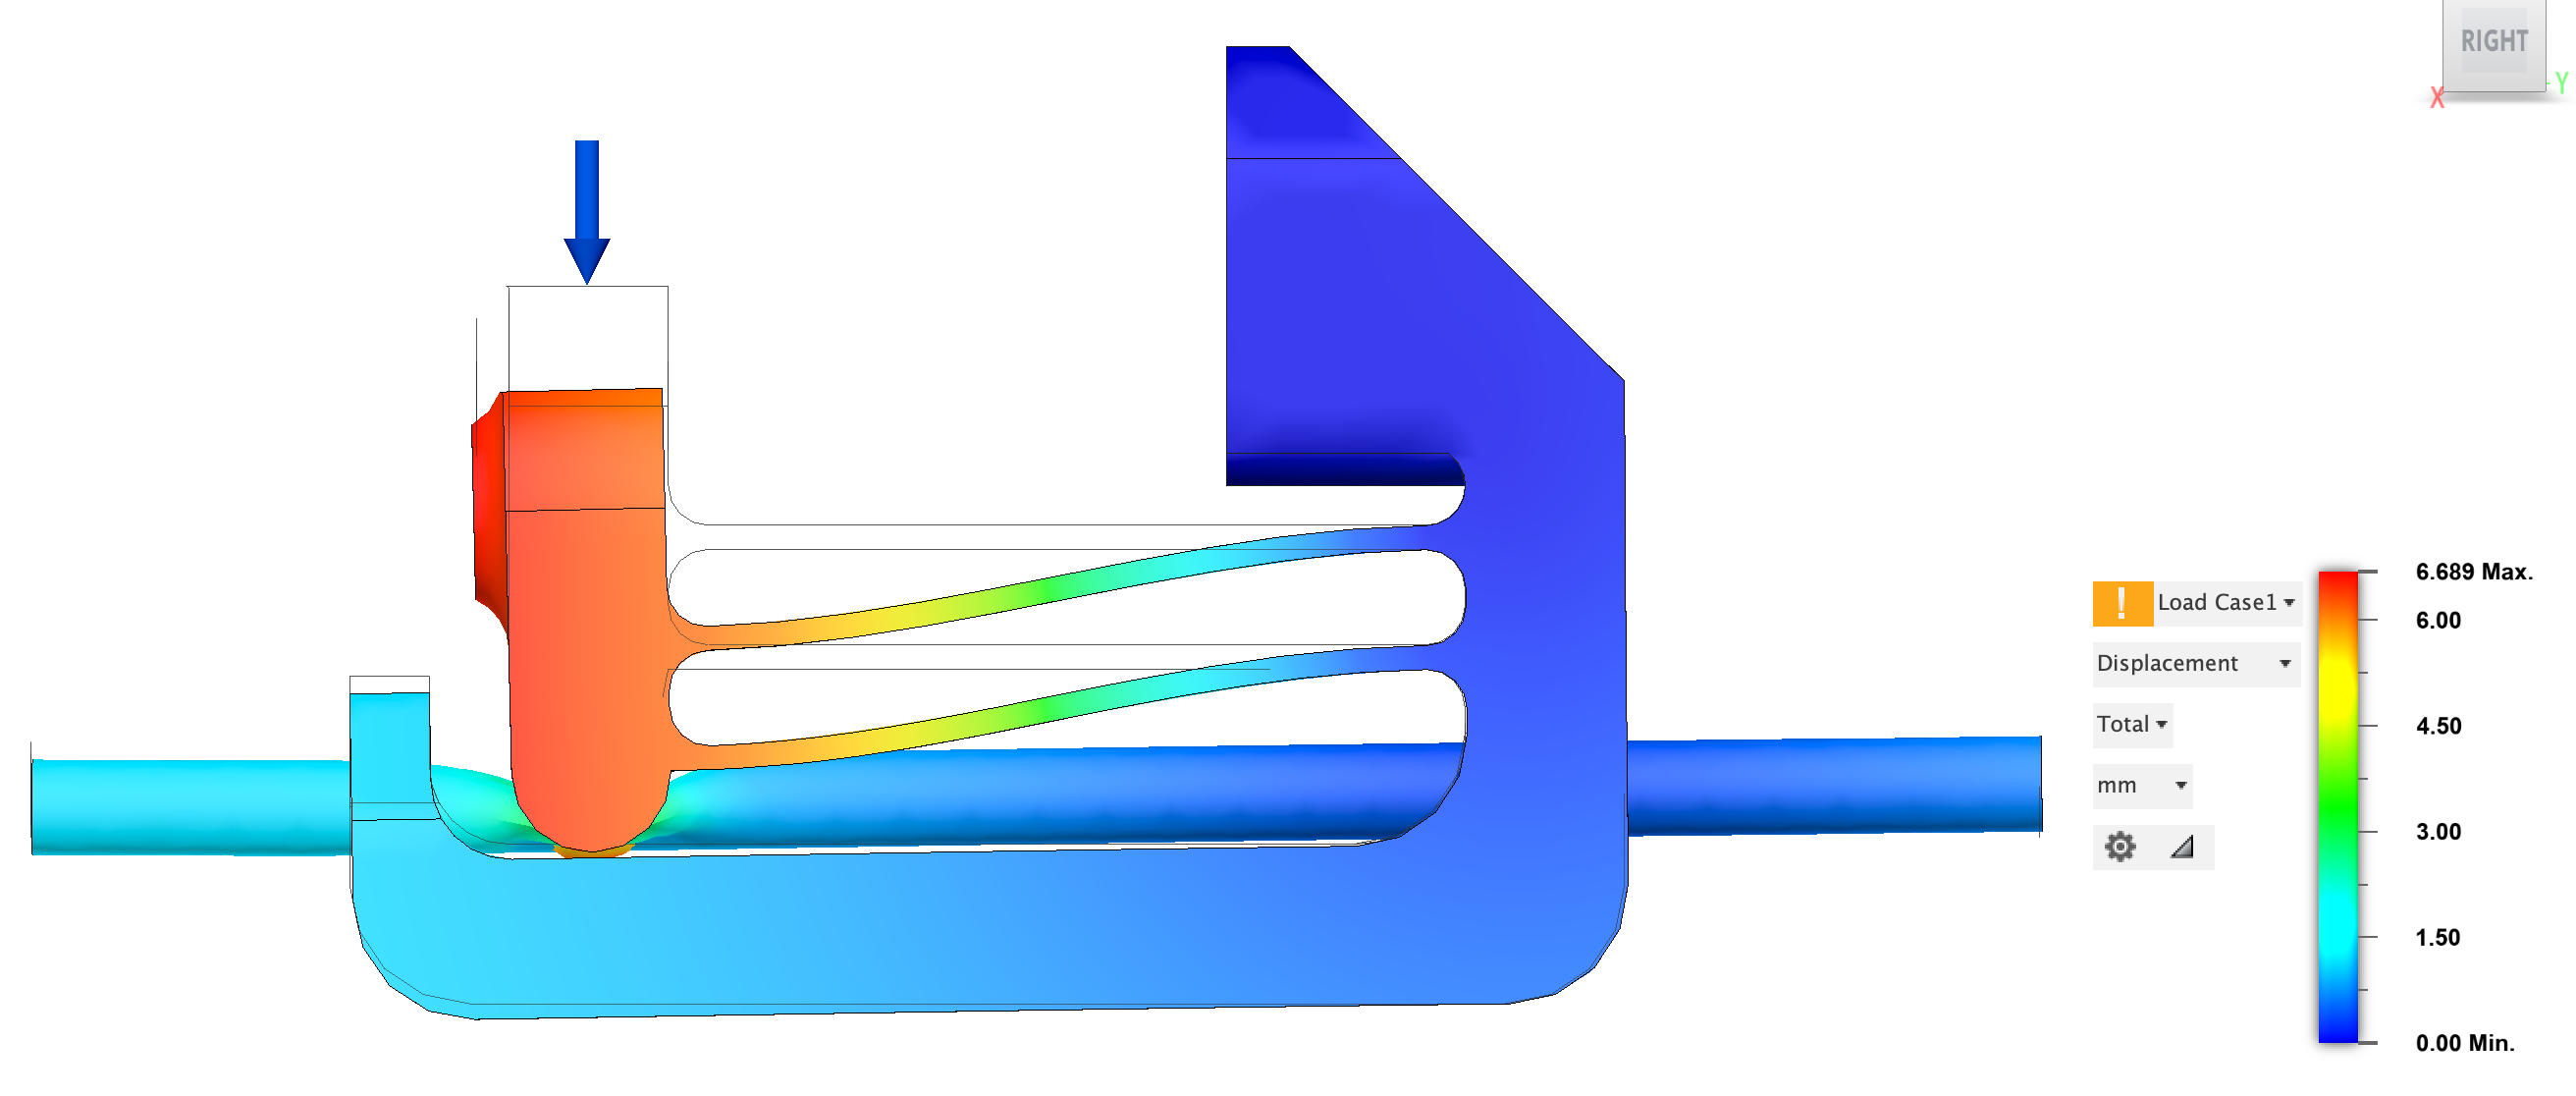
The image below shows one of the simulation results for the deflection of the valve. As the simulation shows, the “rigid” base element is expected to deflect a meaningful amount, but this is/was intentional. The idea behind allowing for this compliance was to reduce the sensitivity to tolerance stack up. The idea is that the nominal dimensioning is set to compress the tubing beyond what is actually needed by greater than the expected maximum deviation is stack up. As long as this base is substantially stiffer than the tubing, the vast majority of the deflection should be confined to the tubing until ‘lock up’ is achieved. Without compliance in the base, if the cam drove the follower beyond the lock up point of the tubing, the radial load would spike until compliance SOMEWHERE in the system accounts for this extra displacement....aka, something breaks. So, to avoid having the location of this compliance being selected for me, I opted to leave some compliance here in the rigid portion of the flexure.
In the initial testing, however, the actual relative displacement between the tubing and flexure base appears to show meaningfully more relative compliance in the flexure base than I expected. This wasn't a huge surprise, given how unpredictable printed polymers can be. So I just added some additional reinforcing to this section from the base that surrounds it in the assembly.
Build
3 Channel
BOM
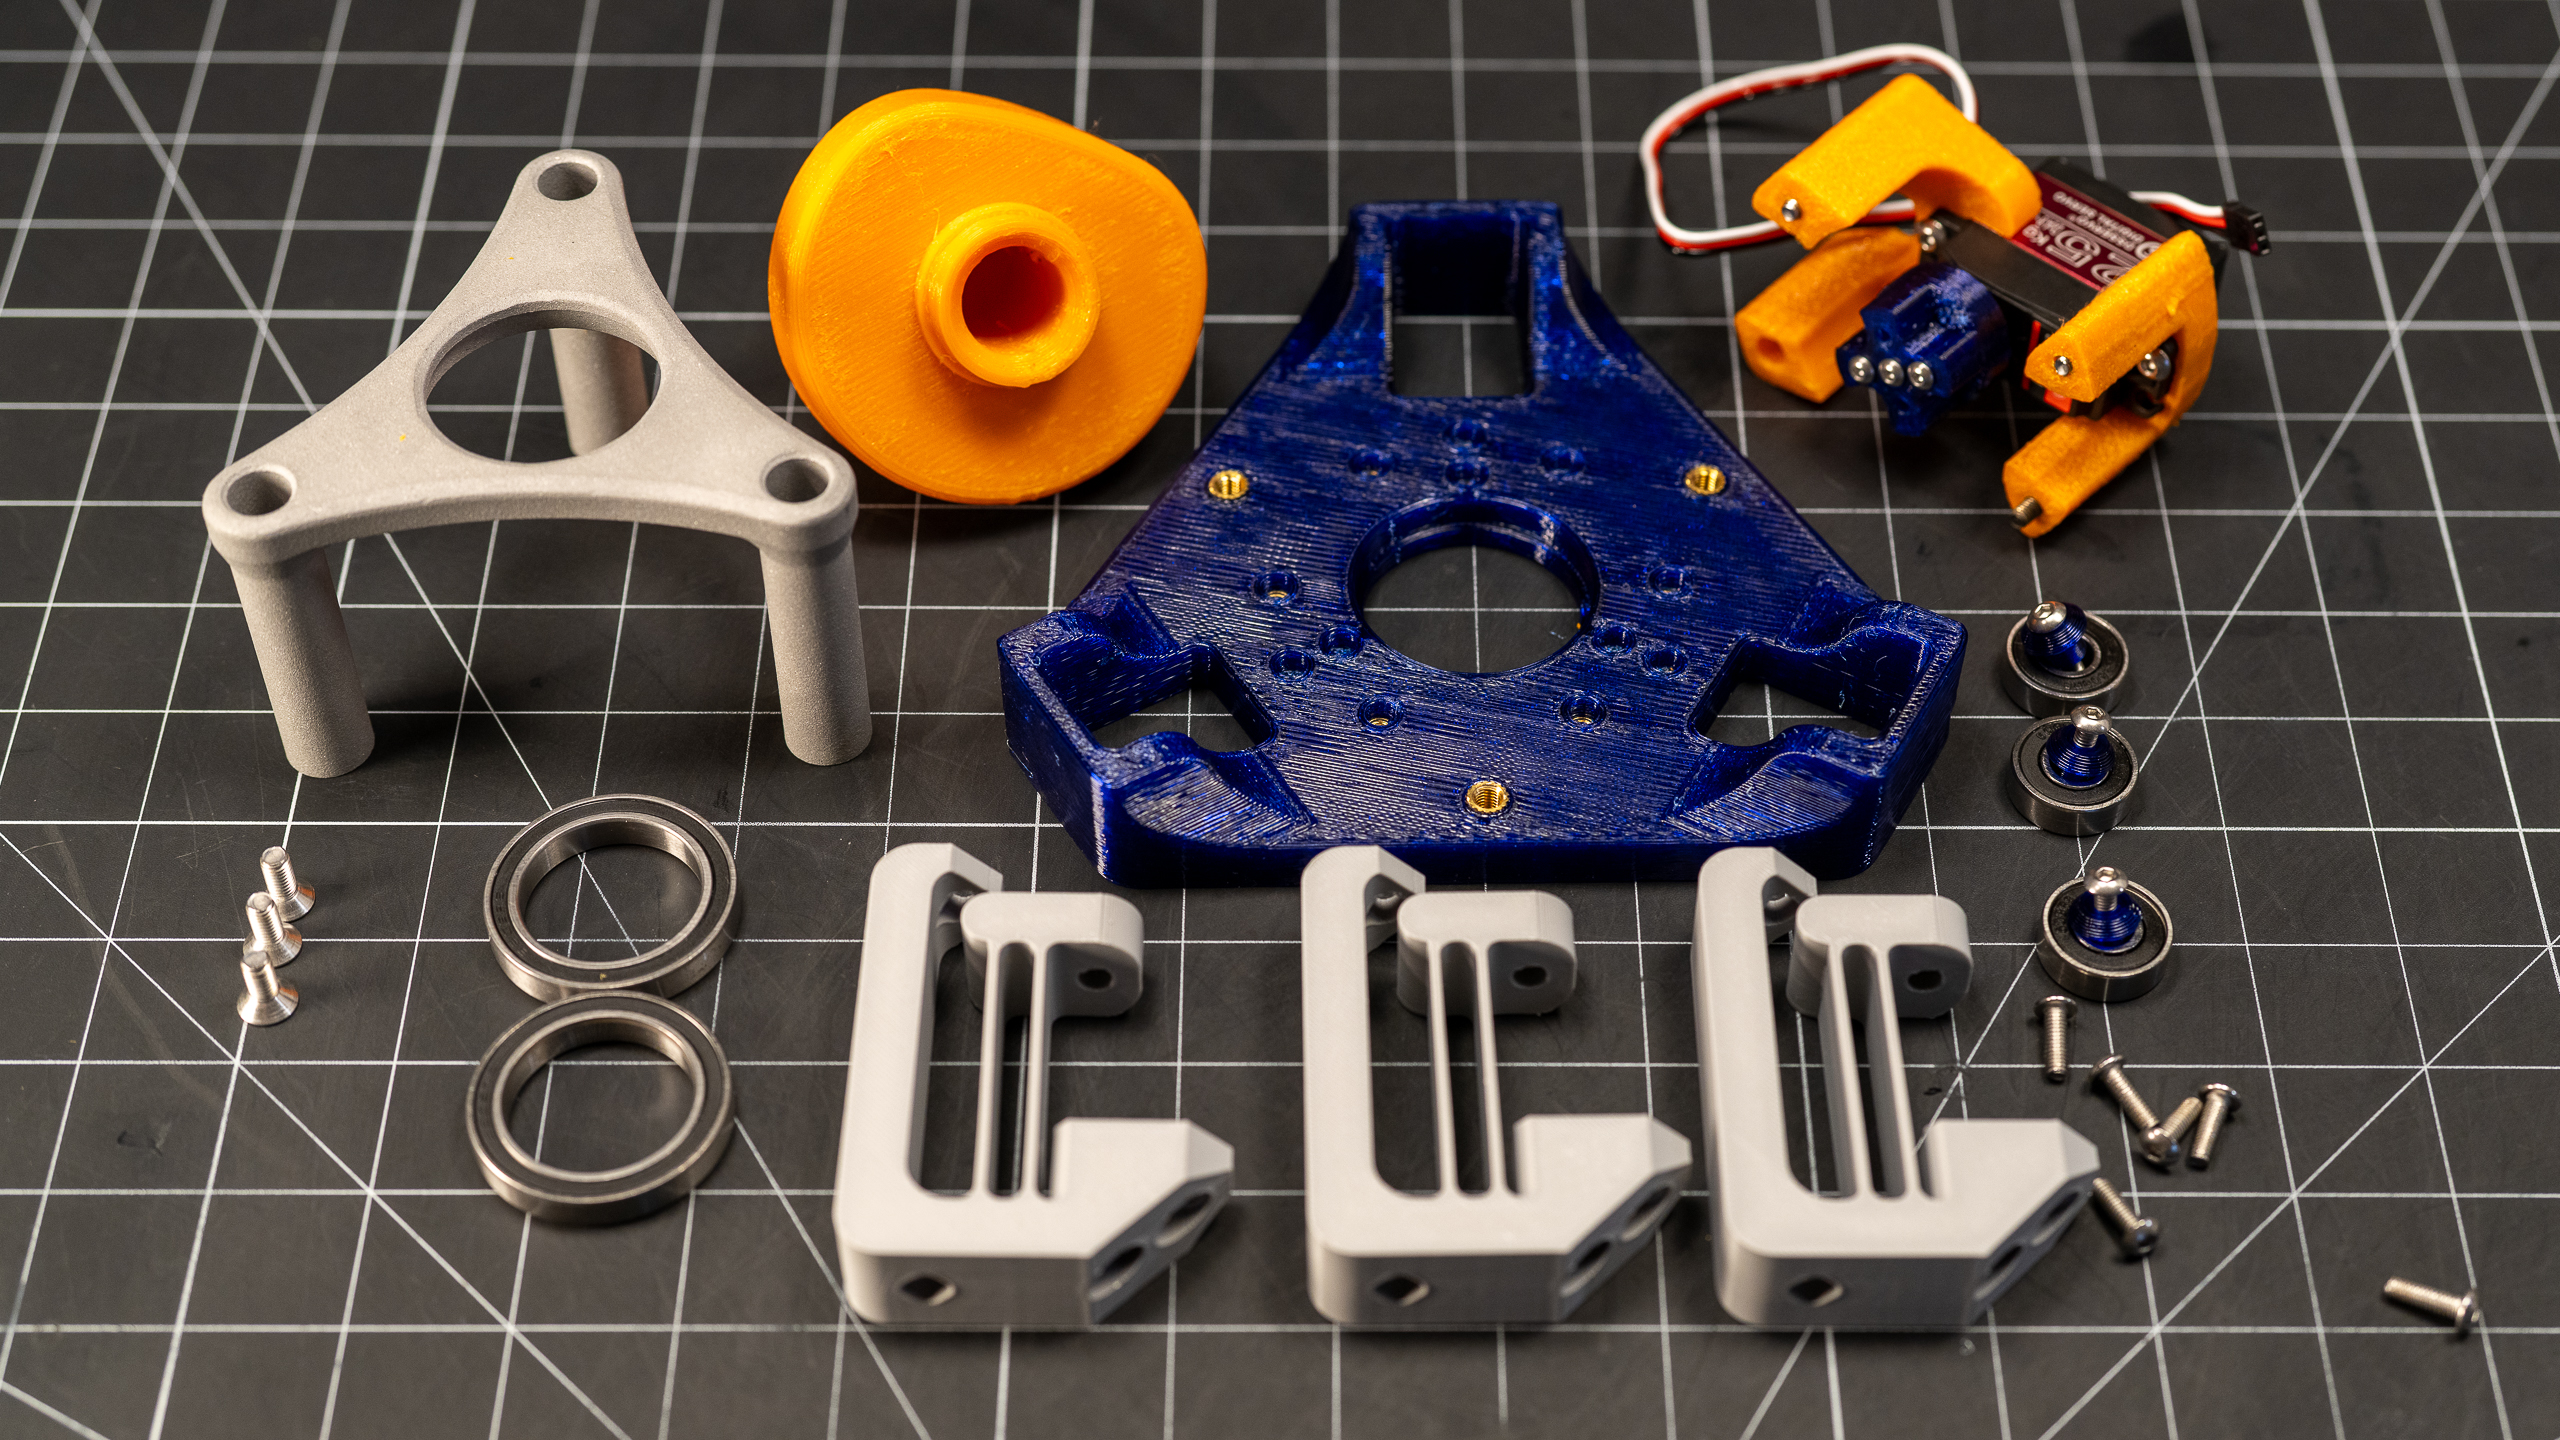
- Printed Parts
- (1) MainBody_3ch (aka "Base")
- (1) CamRetainer_3ch
- (1) Cam
- (1) Servo Mount A_3ch
- (1) Servo Mount B_3ch
- (1) Motor Coupler
- (3) Valve Flexure
- (3) Bearing Retainer
- COTs
- (17-19) M4 Heat set inserts - Min needed is 10, the 2 additional for extra mount points I included for symmetry/future uses.
- (3) M5 Heat set inserts
- (10) M4x12 BHCS fasteners - Six for attaching flexures to Base and four for attaching servo to Servo Mounts. The latter can be shortened to as short as 8mm.
- (3) M4x16 BHCS fasteners - For attaching roller bearings to flexures
- (4) M4x20 BHCS fasteners - For attaching Servo Mounts to Base. Should be ok anywhere from 18mm long to 22mm long.
- (3) M5x10 Flathead fasteners - For attaching Cam Retainer to Base. They don't need to be flatheads, that's just what I had, so what I used.
- (3-5) M3x18 BHCS fasteners - For attaching the Motor Coupler to the servo horn.
- (3) 608RS 8x22x7 Bearings - I bought this hundred pack since it makes the cost per bearing so damn lovely, but you obviously don't need nearly this many. This size bearing is the same as move roller skate bearings...FYI
- (2) 6806-2RS 30x42x7 Bearings - For supporting the Cam
- (1) 25kg RC Servo
- (1 - optional) Aluminum Servo Horn - I used these cause I had some extras from a previous project, but you could probably use the plastic one that comes with the servo if you prefer. Just have to find the right fasteners.
- Silicone Tubing - I've been using this aquirium air line tubing for a number of these projects recently. It's cheap and has seemed to work fine for me, but it's not technically made for liquids...so consider yourself informed. If you happen to know any reason I shouldn't be trusting this tubing, please do feel free to let me know!
NOTE: The linked product pages above are affiliate links, and I do earn a small commission on anything purchased through them. But the linked products are just what I've personally purchased and used for this build. Sometimes the quantities are more than what you'd need if this project is the only one you're planning on building with em. So you may want to look around for a package size that better suits your needs.
The first step was to get all of the parts printed. I used PETG for all of the FDM printed parts (which all parts can be FDM'd, but I did tinker with some other options as well). The only parts where this material choice is particularly important is for the Valve Flexures. These parts need enough compliance to not break when deformed, so I'd steer clear of any brittle materials, like PLA. For the Cam of the 6 channel version, I had PCBWay print it from SLA. The smoother surface finish is good for the rolling path of the bearing on the flexure, but if you print it FDM with the coupler facing down, the toolpaths follow the roller path and perform pretty well. The only other part I didn't FDM was the Cam Retainer for the 3 channel, which I had PCBWay print in Aluminum with SLM. This definitely wasn't necessary, but I want to experiment more with their metal-printing parts and this seemed like a good opportunity to do so. It came out great, and my gap choices for holding the bearing and fasteners came out nicely (getting a feel for tolerances on stuff like this is a big reason I want to experiment with the service).
With everything printed, the next step in the assembly process is to install the heat sets.
Each flexure gets a single M4 heat set inserted into the hole in the moving element of the flexure. I clamped mine in my panavise, with the rubber tips on the jaws holding onto the moving element to ensure I didn't accidentally buckle the blade flexures. They are quite thin, so they can't handle a ton of loading in that direction. If you push in the heat sets slow and with light pressure (as you're supposed to) this shouldn't be an issue anyway...but sometimes I get impatient.
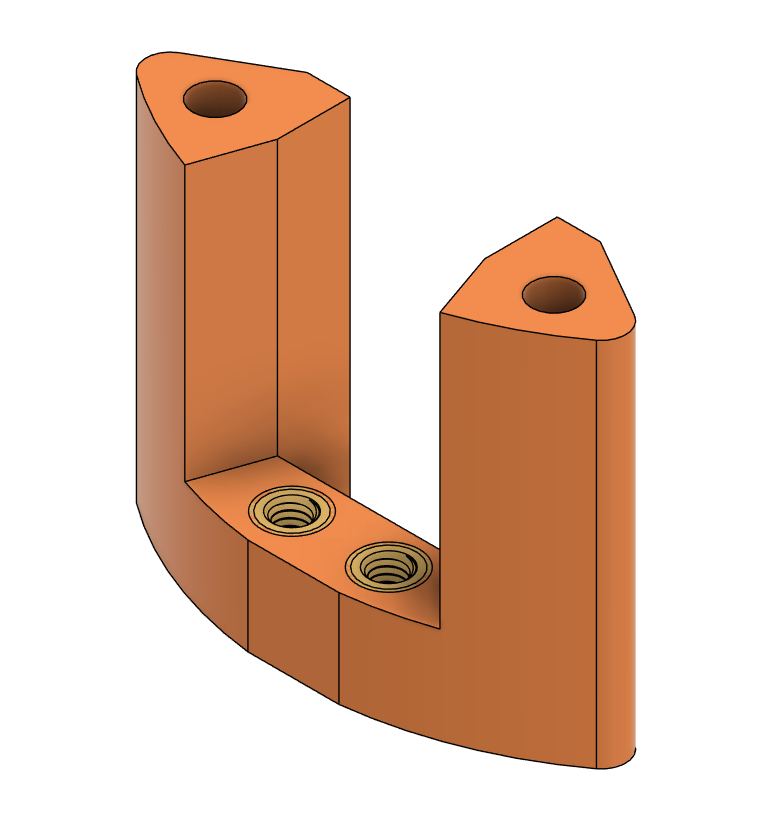
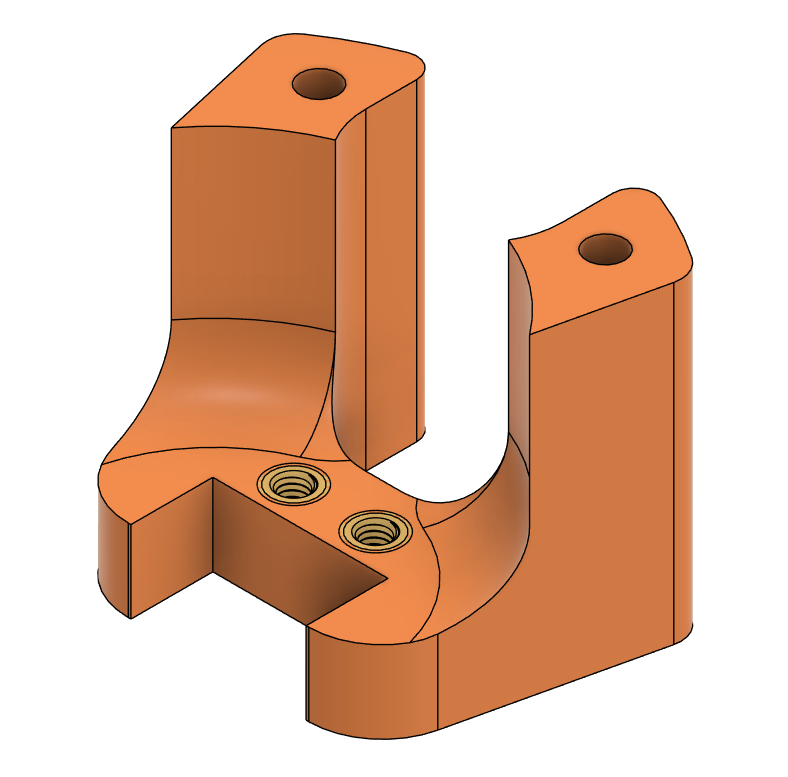
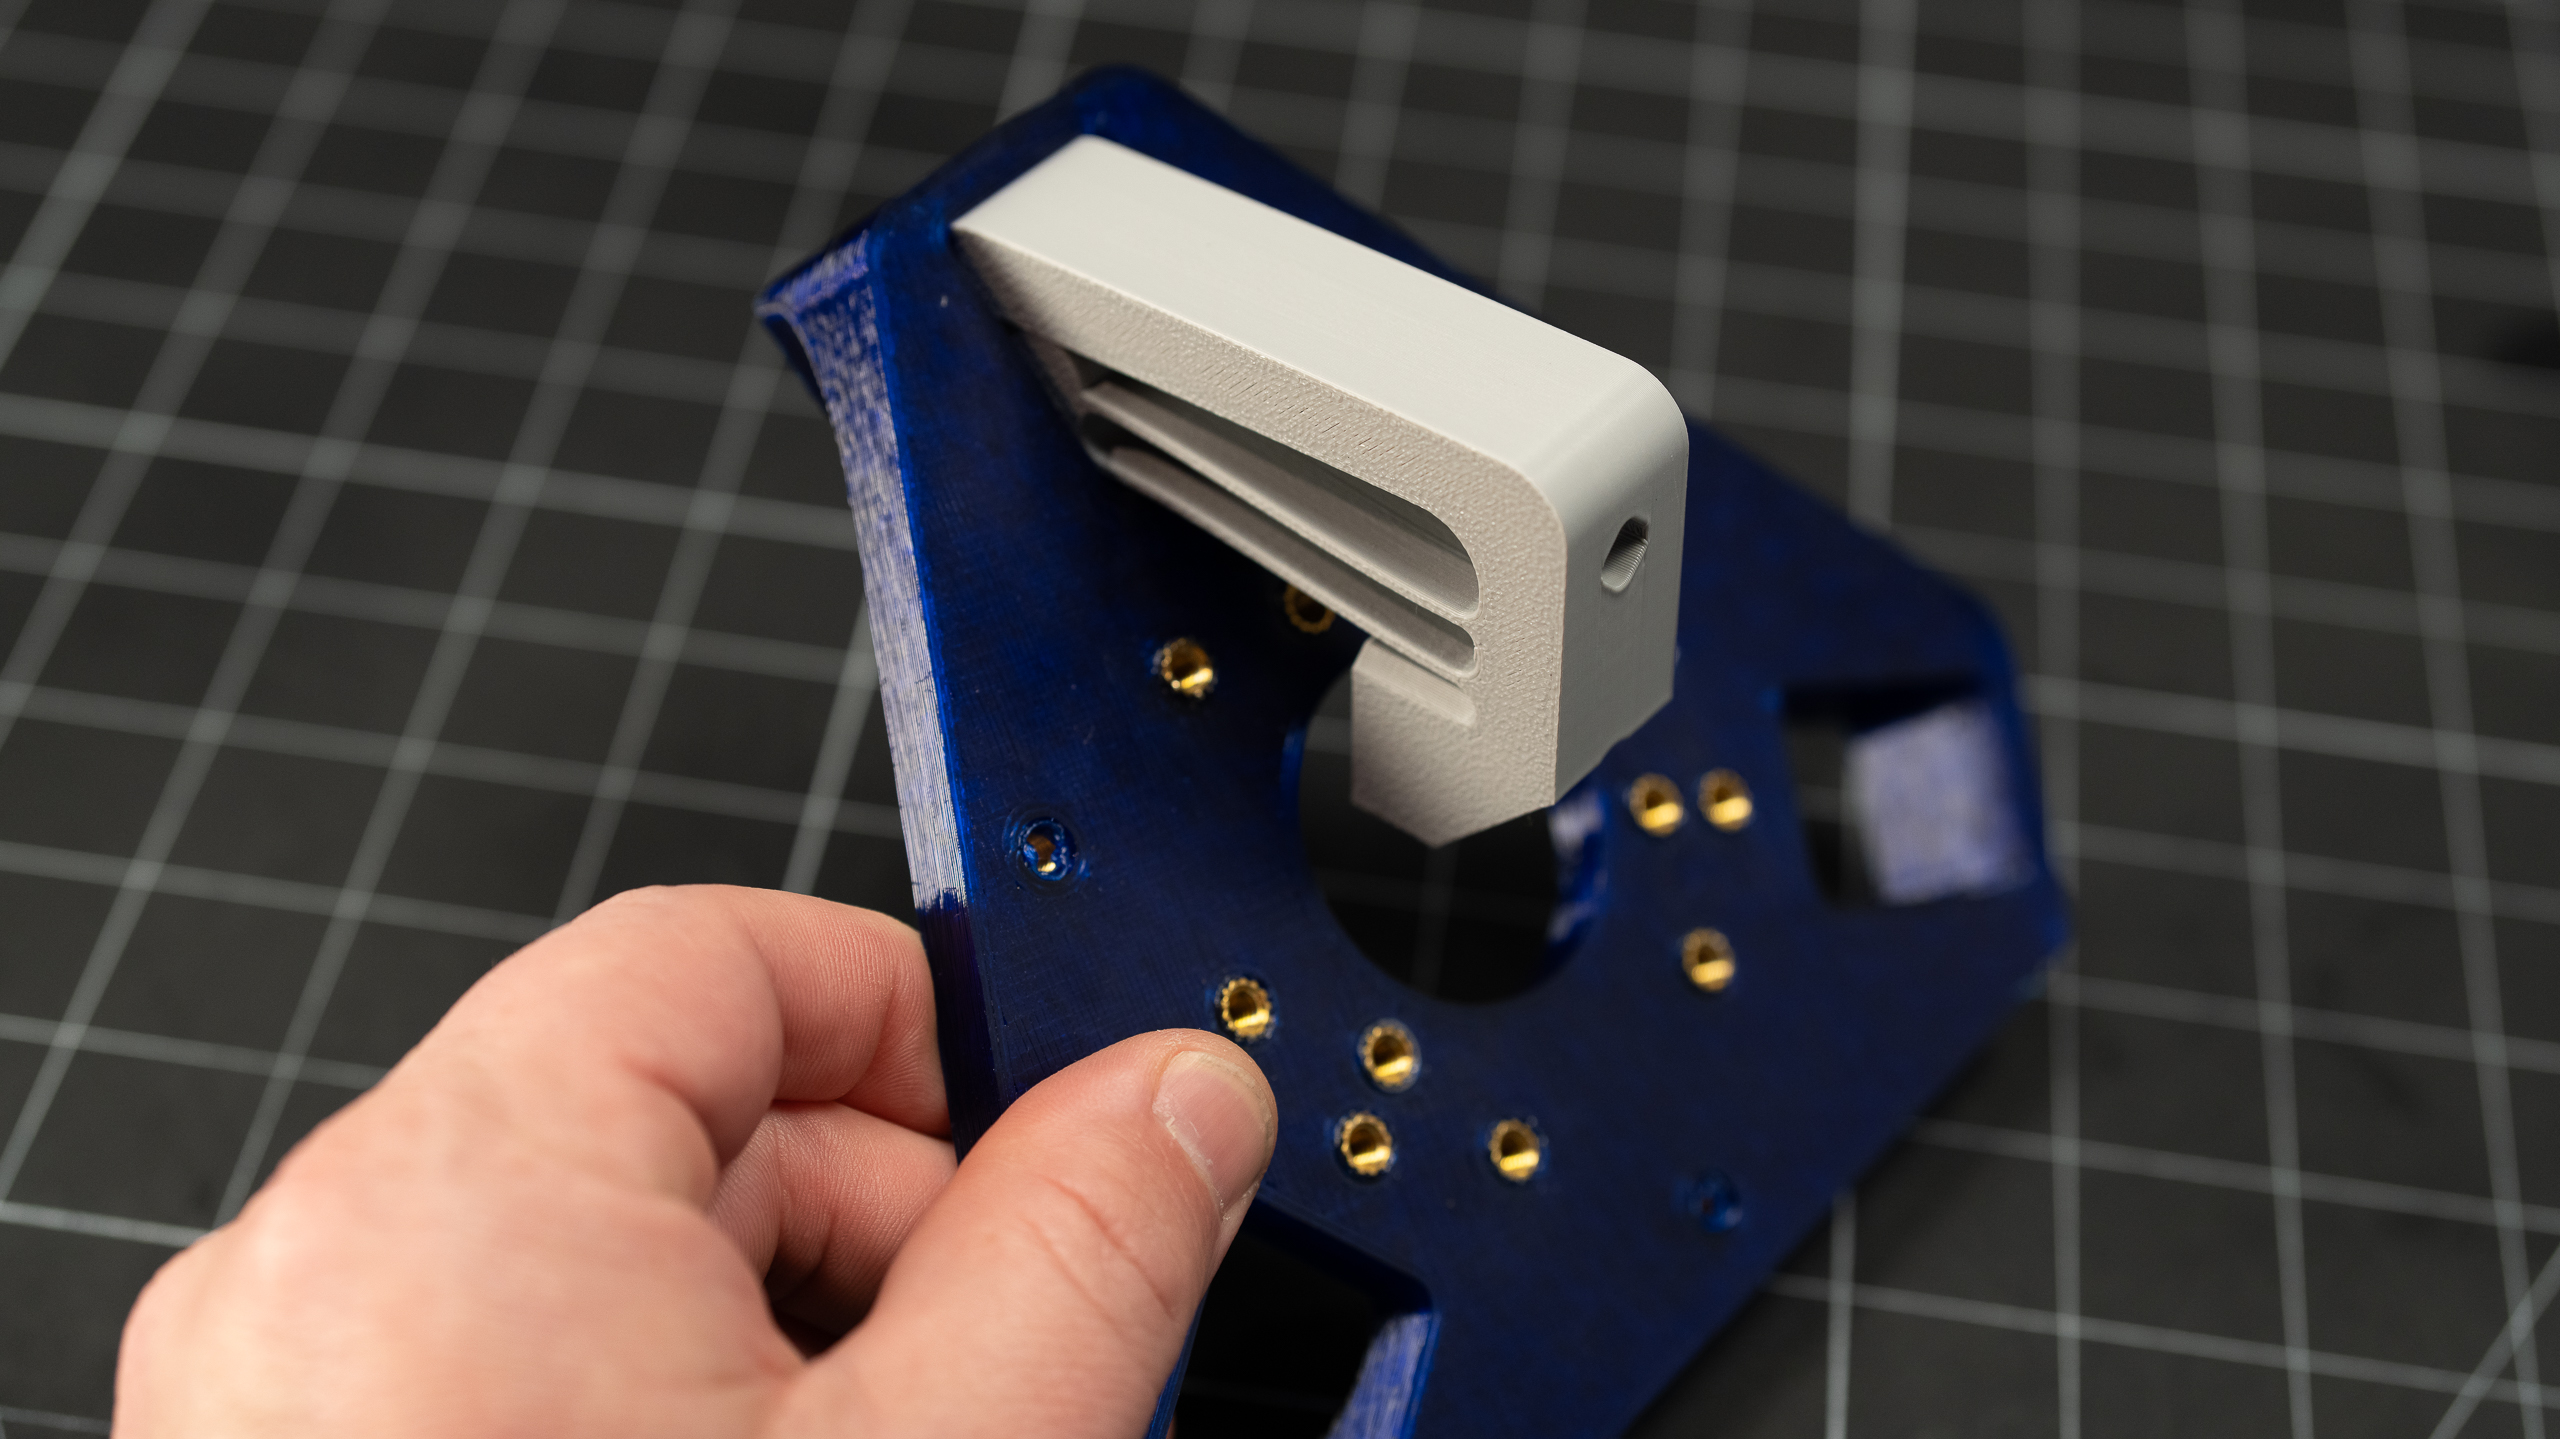
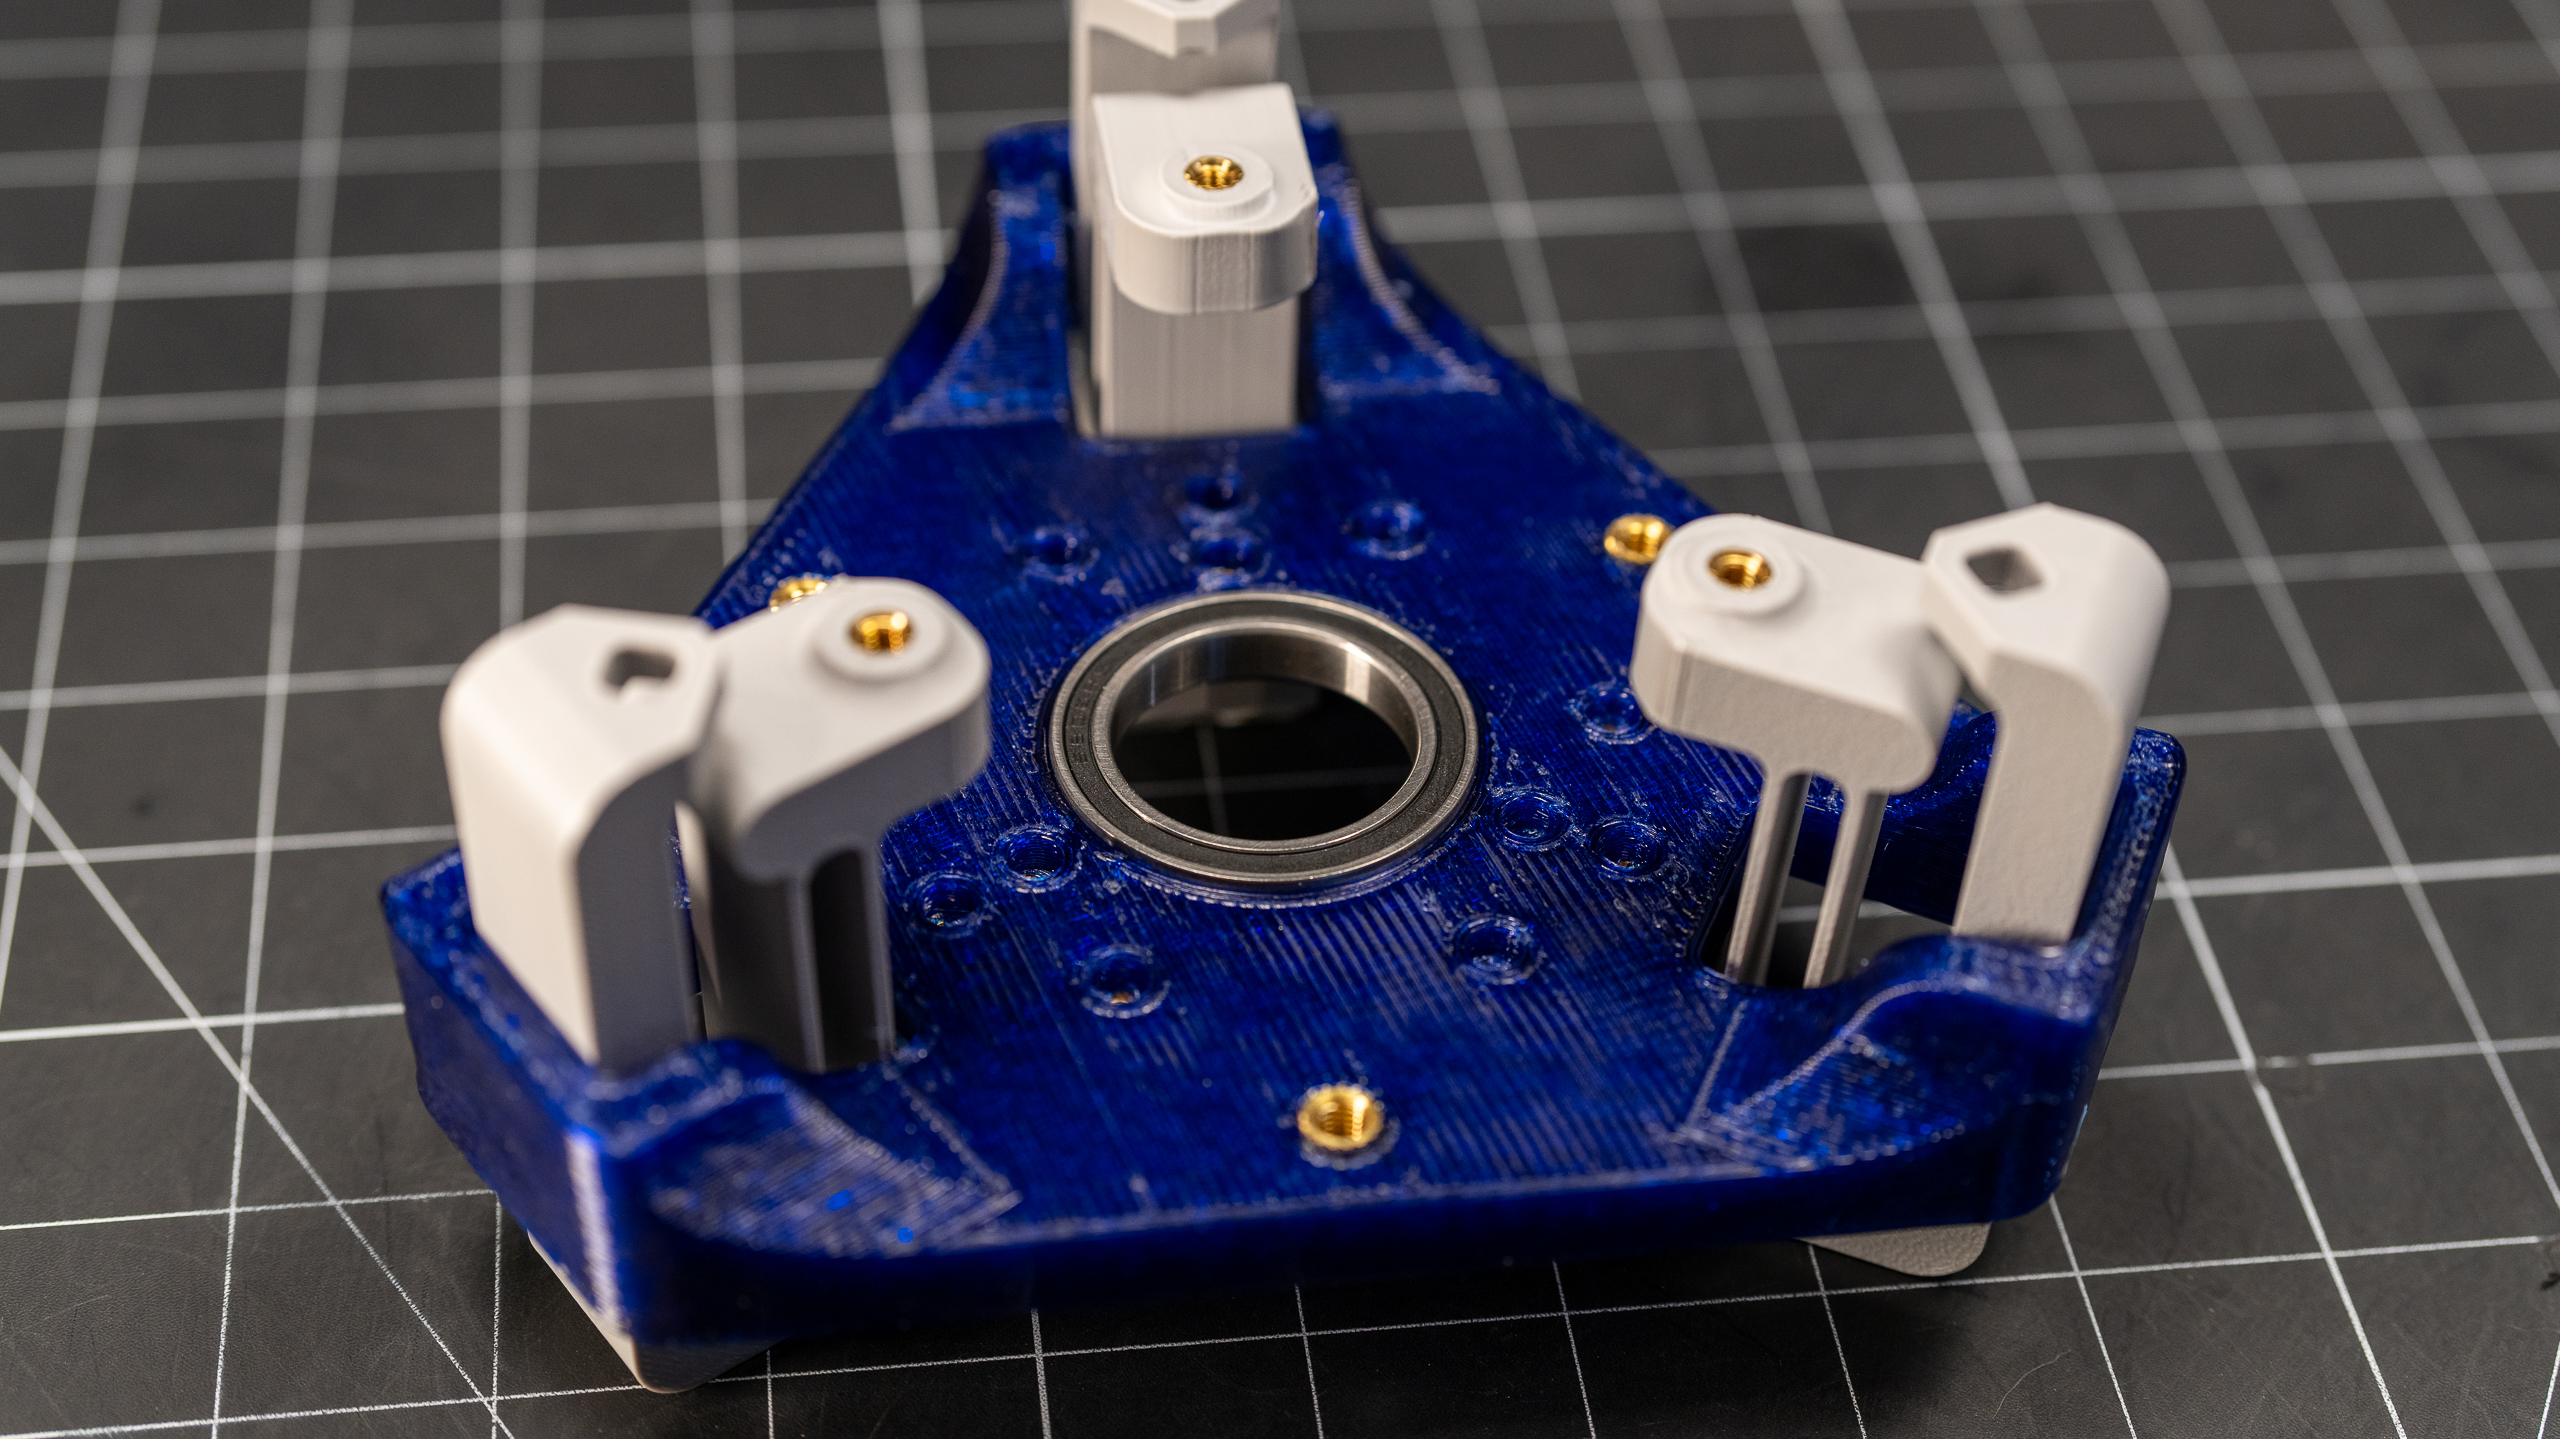
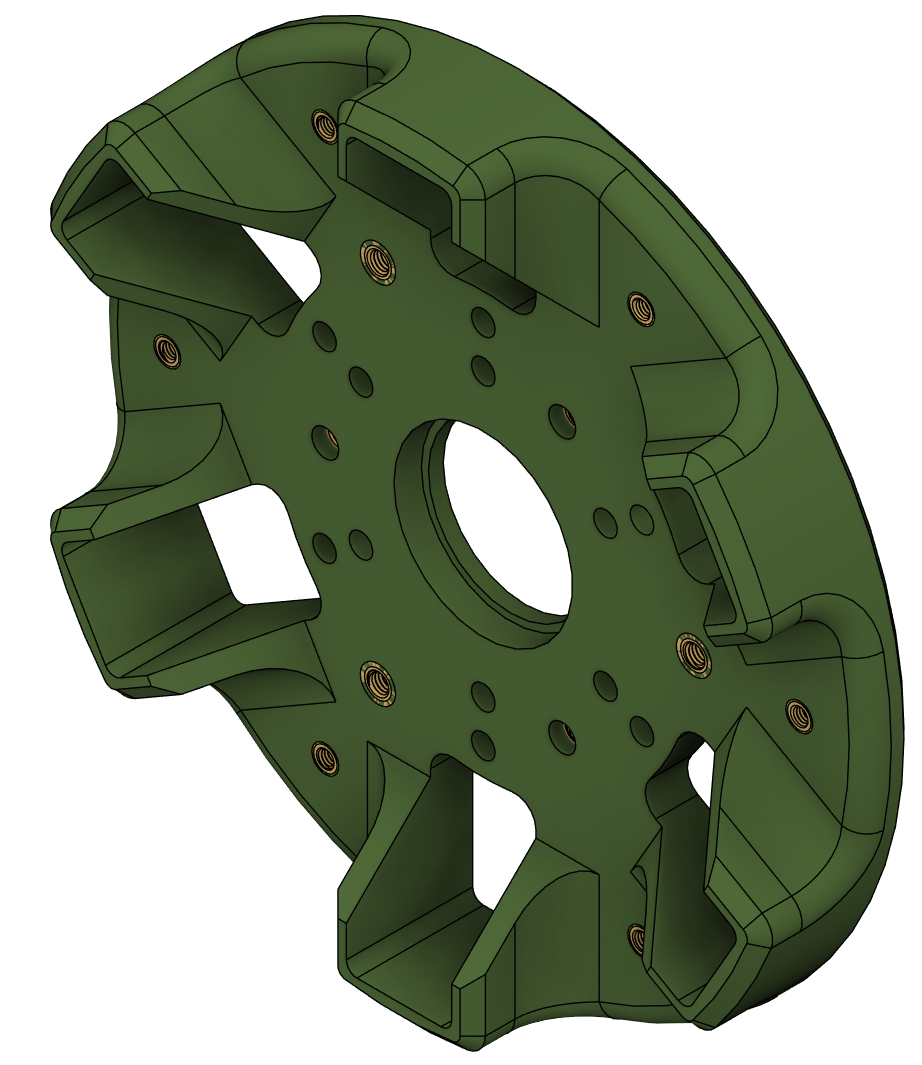
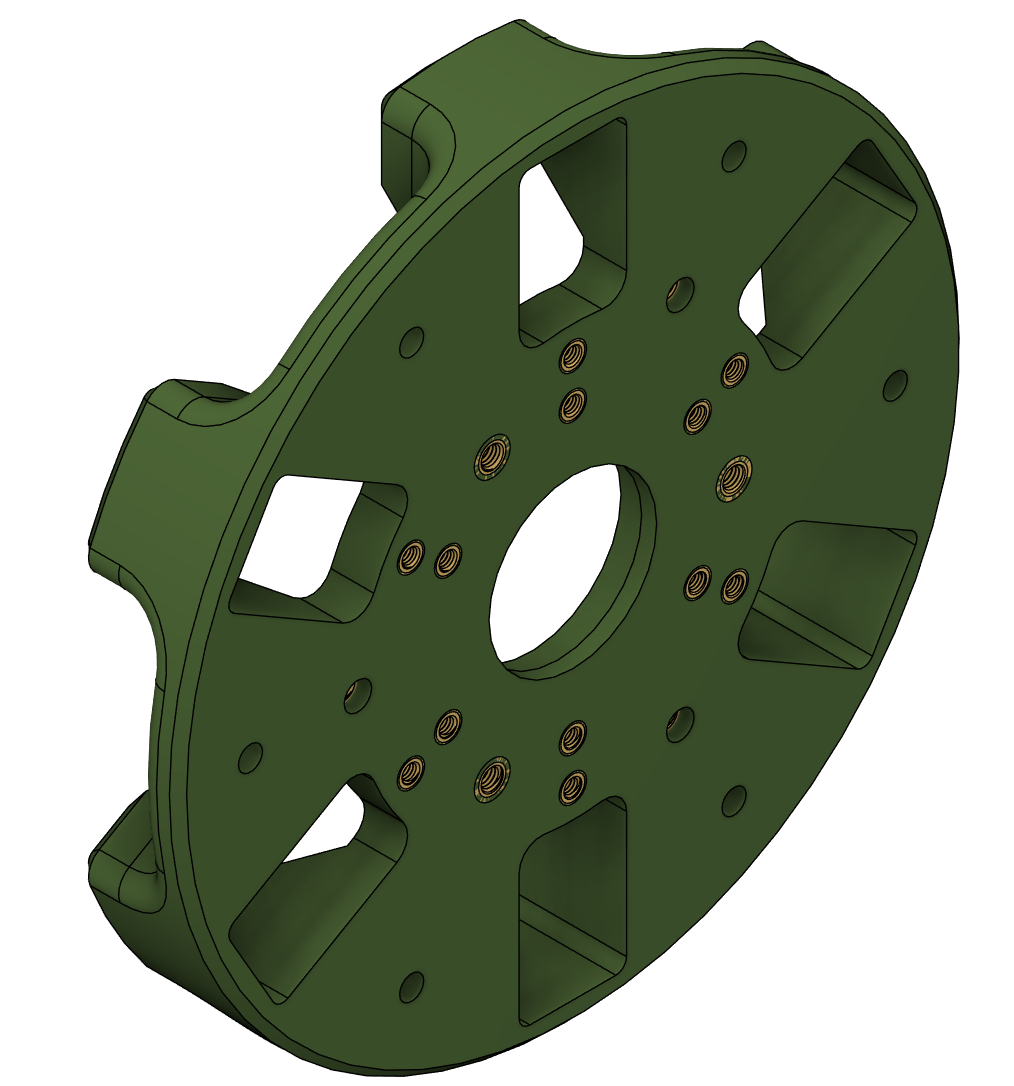
All of the remaining heat sets go into the Base. The three M5 inserts are for attaching the Retainer and should be inserted from the Front (as shown below). All of the remaining holes in the Base are for M4 heat sets and should be inserted from the Back.
FRONT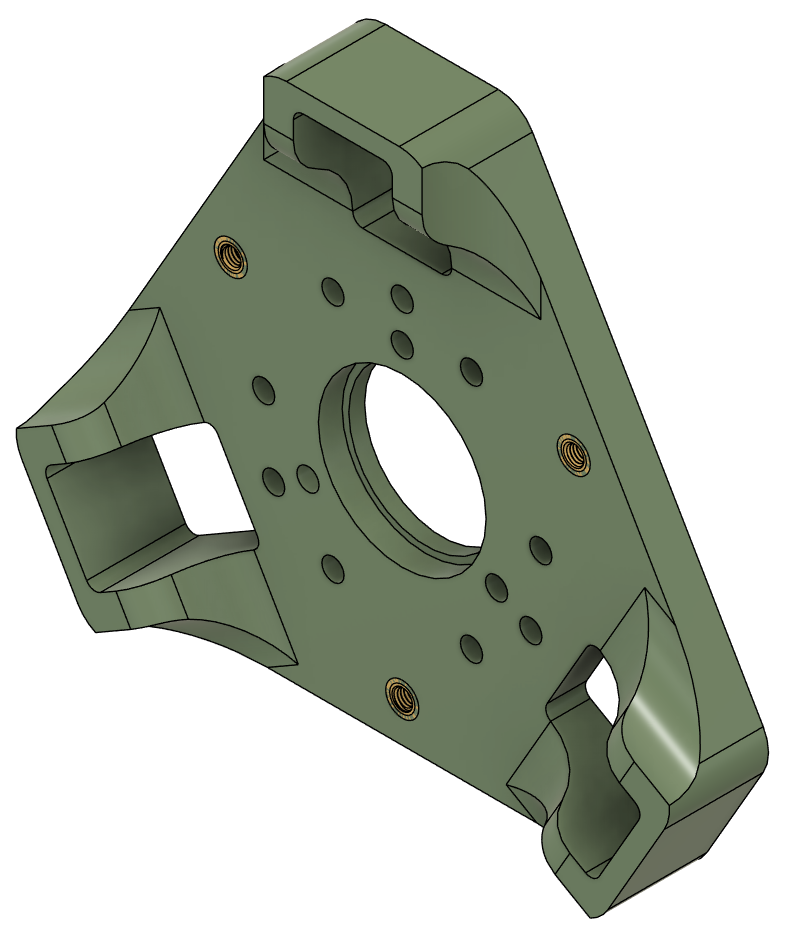 |
BACK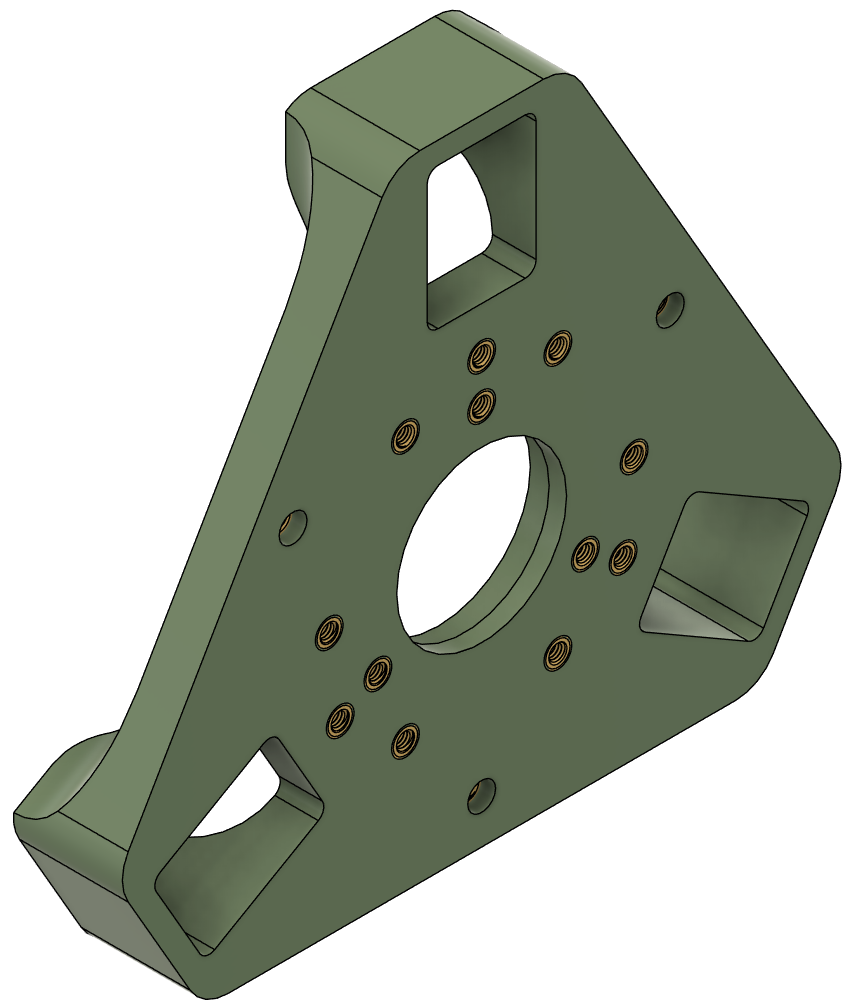 |
And the final parts that get the heat set treatment are the Servo Mounts. Each mount has two M4 heat sets for attaching the servo.
With all of the heat sets in place, I next installed each of the Valve Flexures. To fit them through their openings in the Base, rotate the flexure so that the moving part goes in first, then rotate it straight. Doing so will deflect the flexure, and it's a somewhat tight fit, but it should pop right into position and can then be tighted down with its two, M4x12 fasteners.
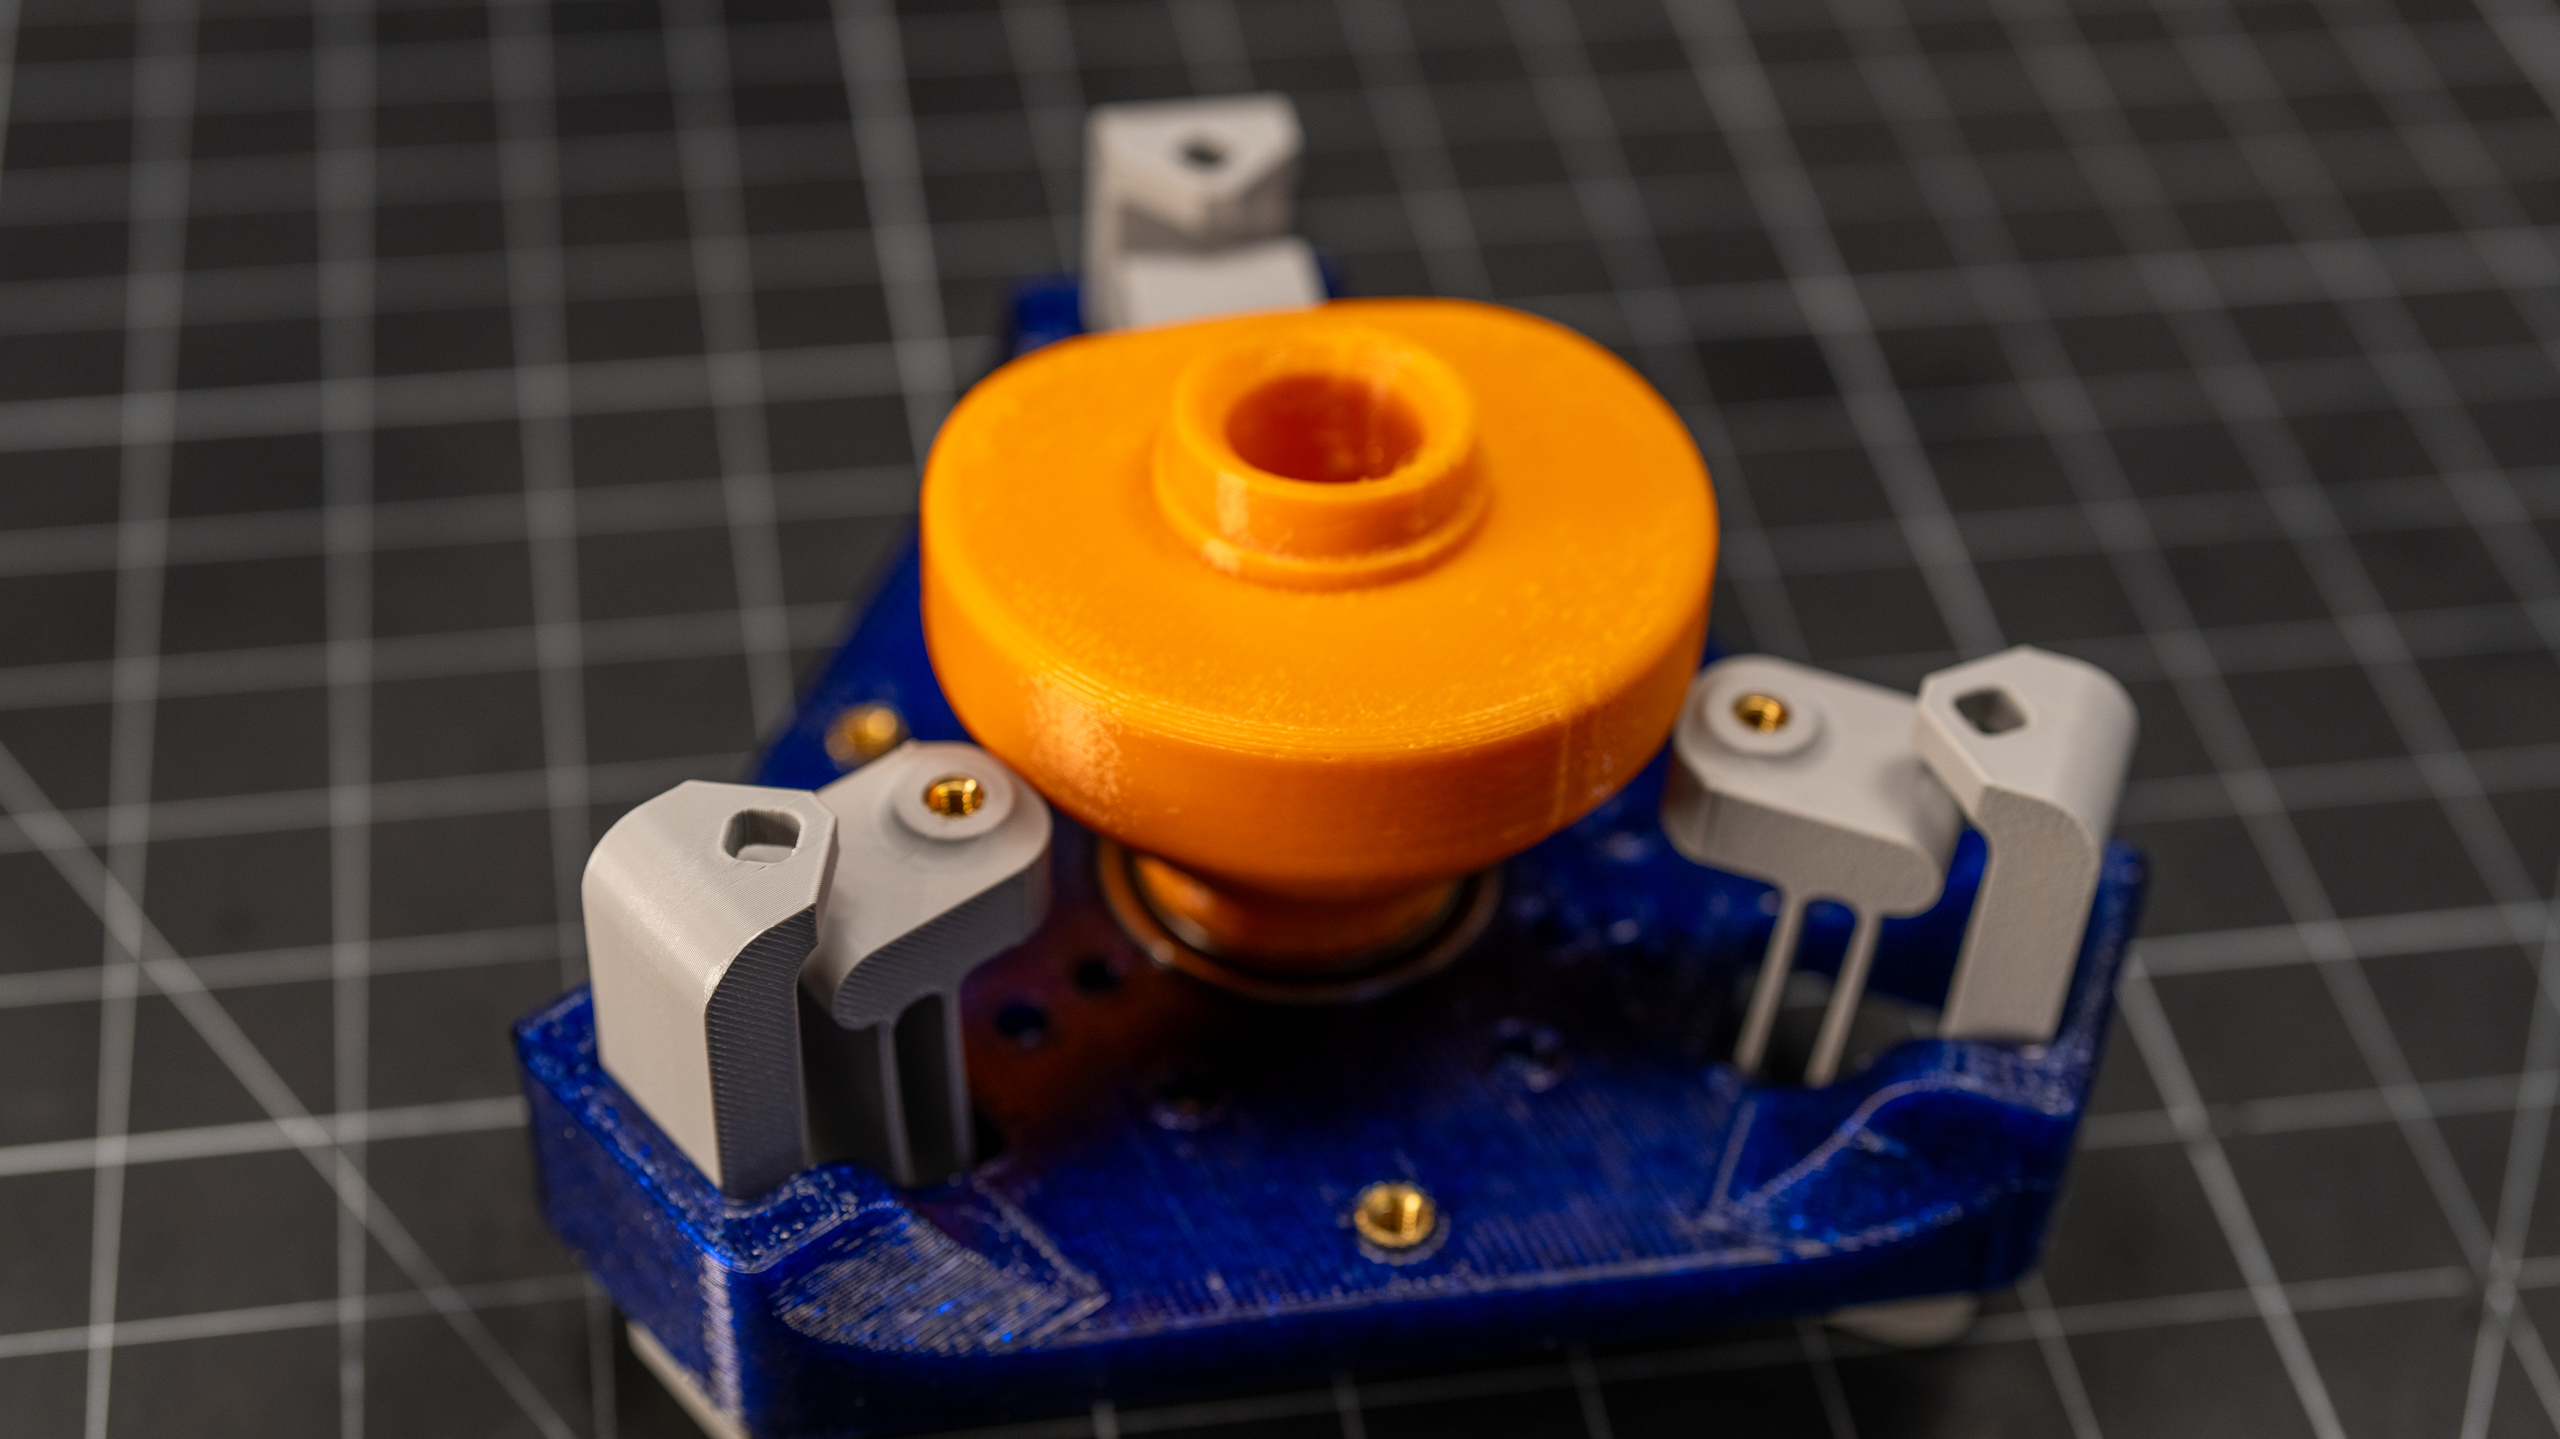
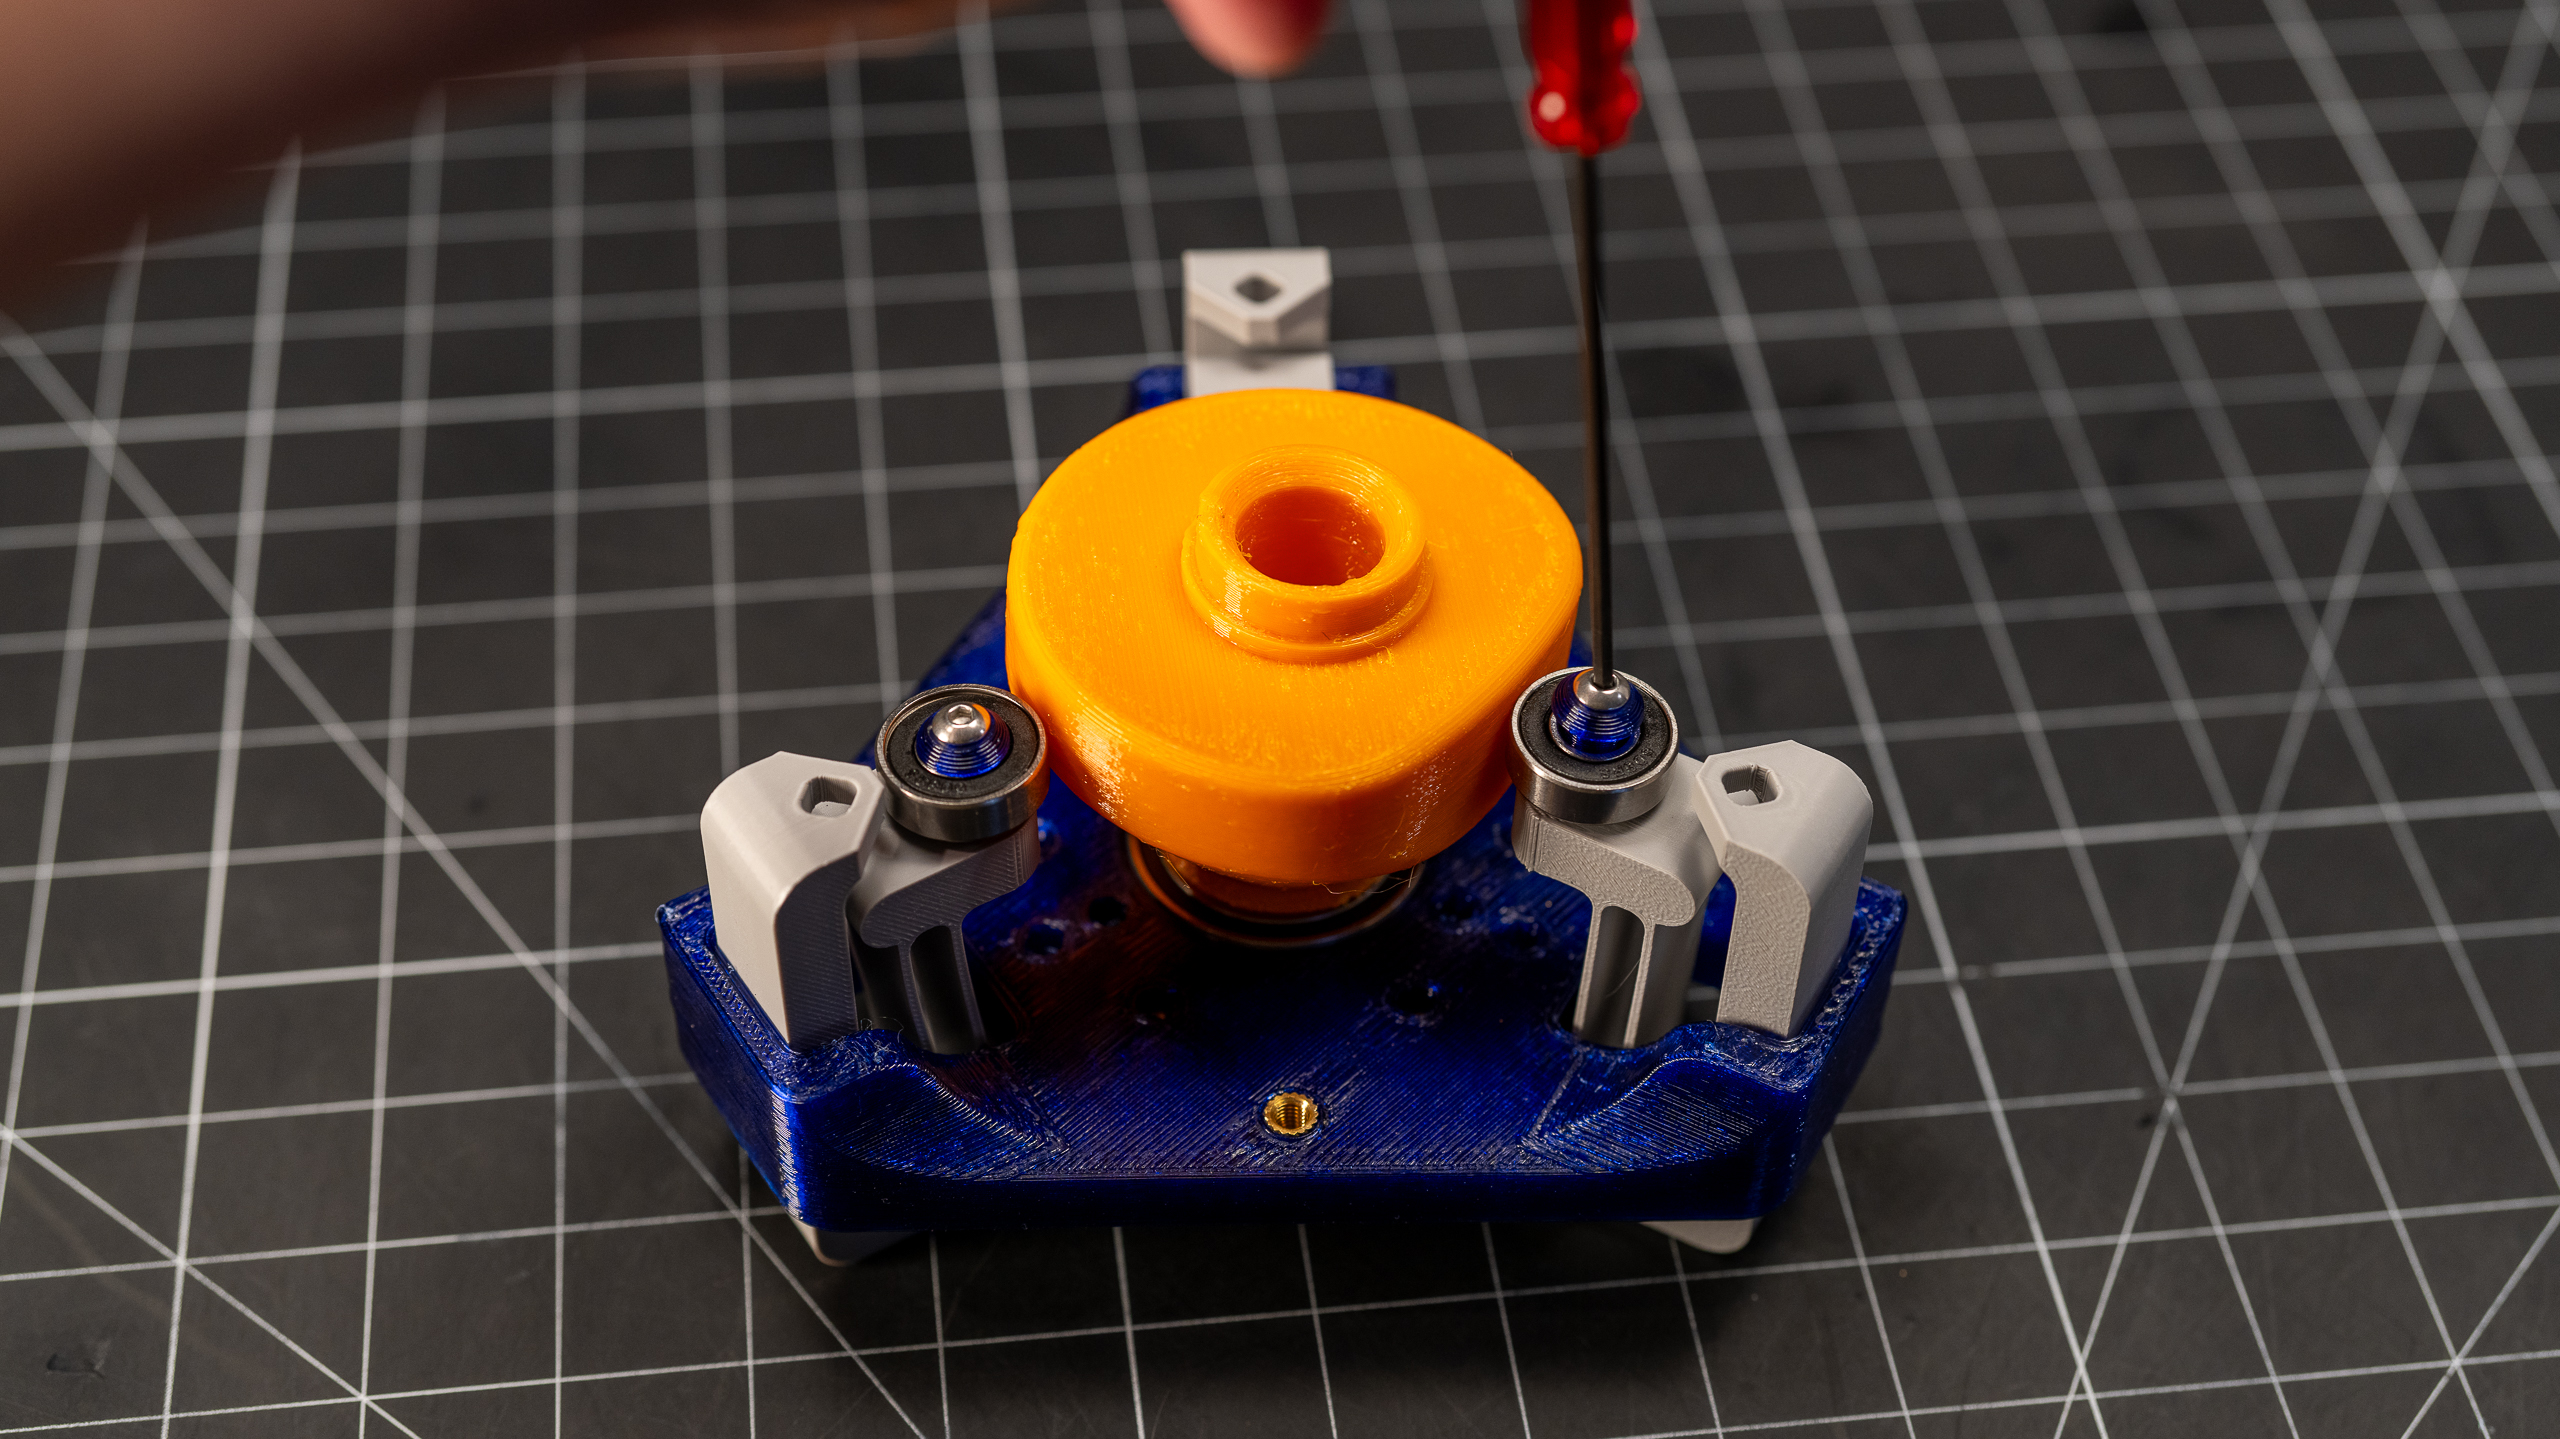
Once all of the flexures are attached, I next installed the Cam. First, popping the 6806-2RS bearing into place in the Base. Then the end of the Cam with the clover coupler is inserted into this bearing, and the second 6806-2RS is slid into position on the Cam. The Cam Retainer can then be lowered onto this bearing, and then its three M5 fasteners tighted down.
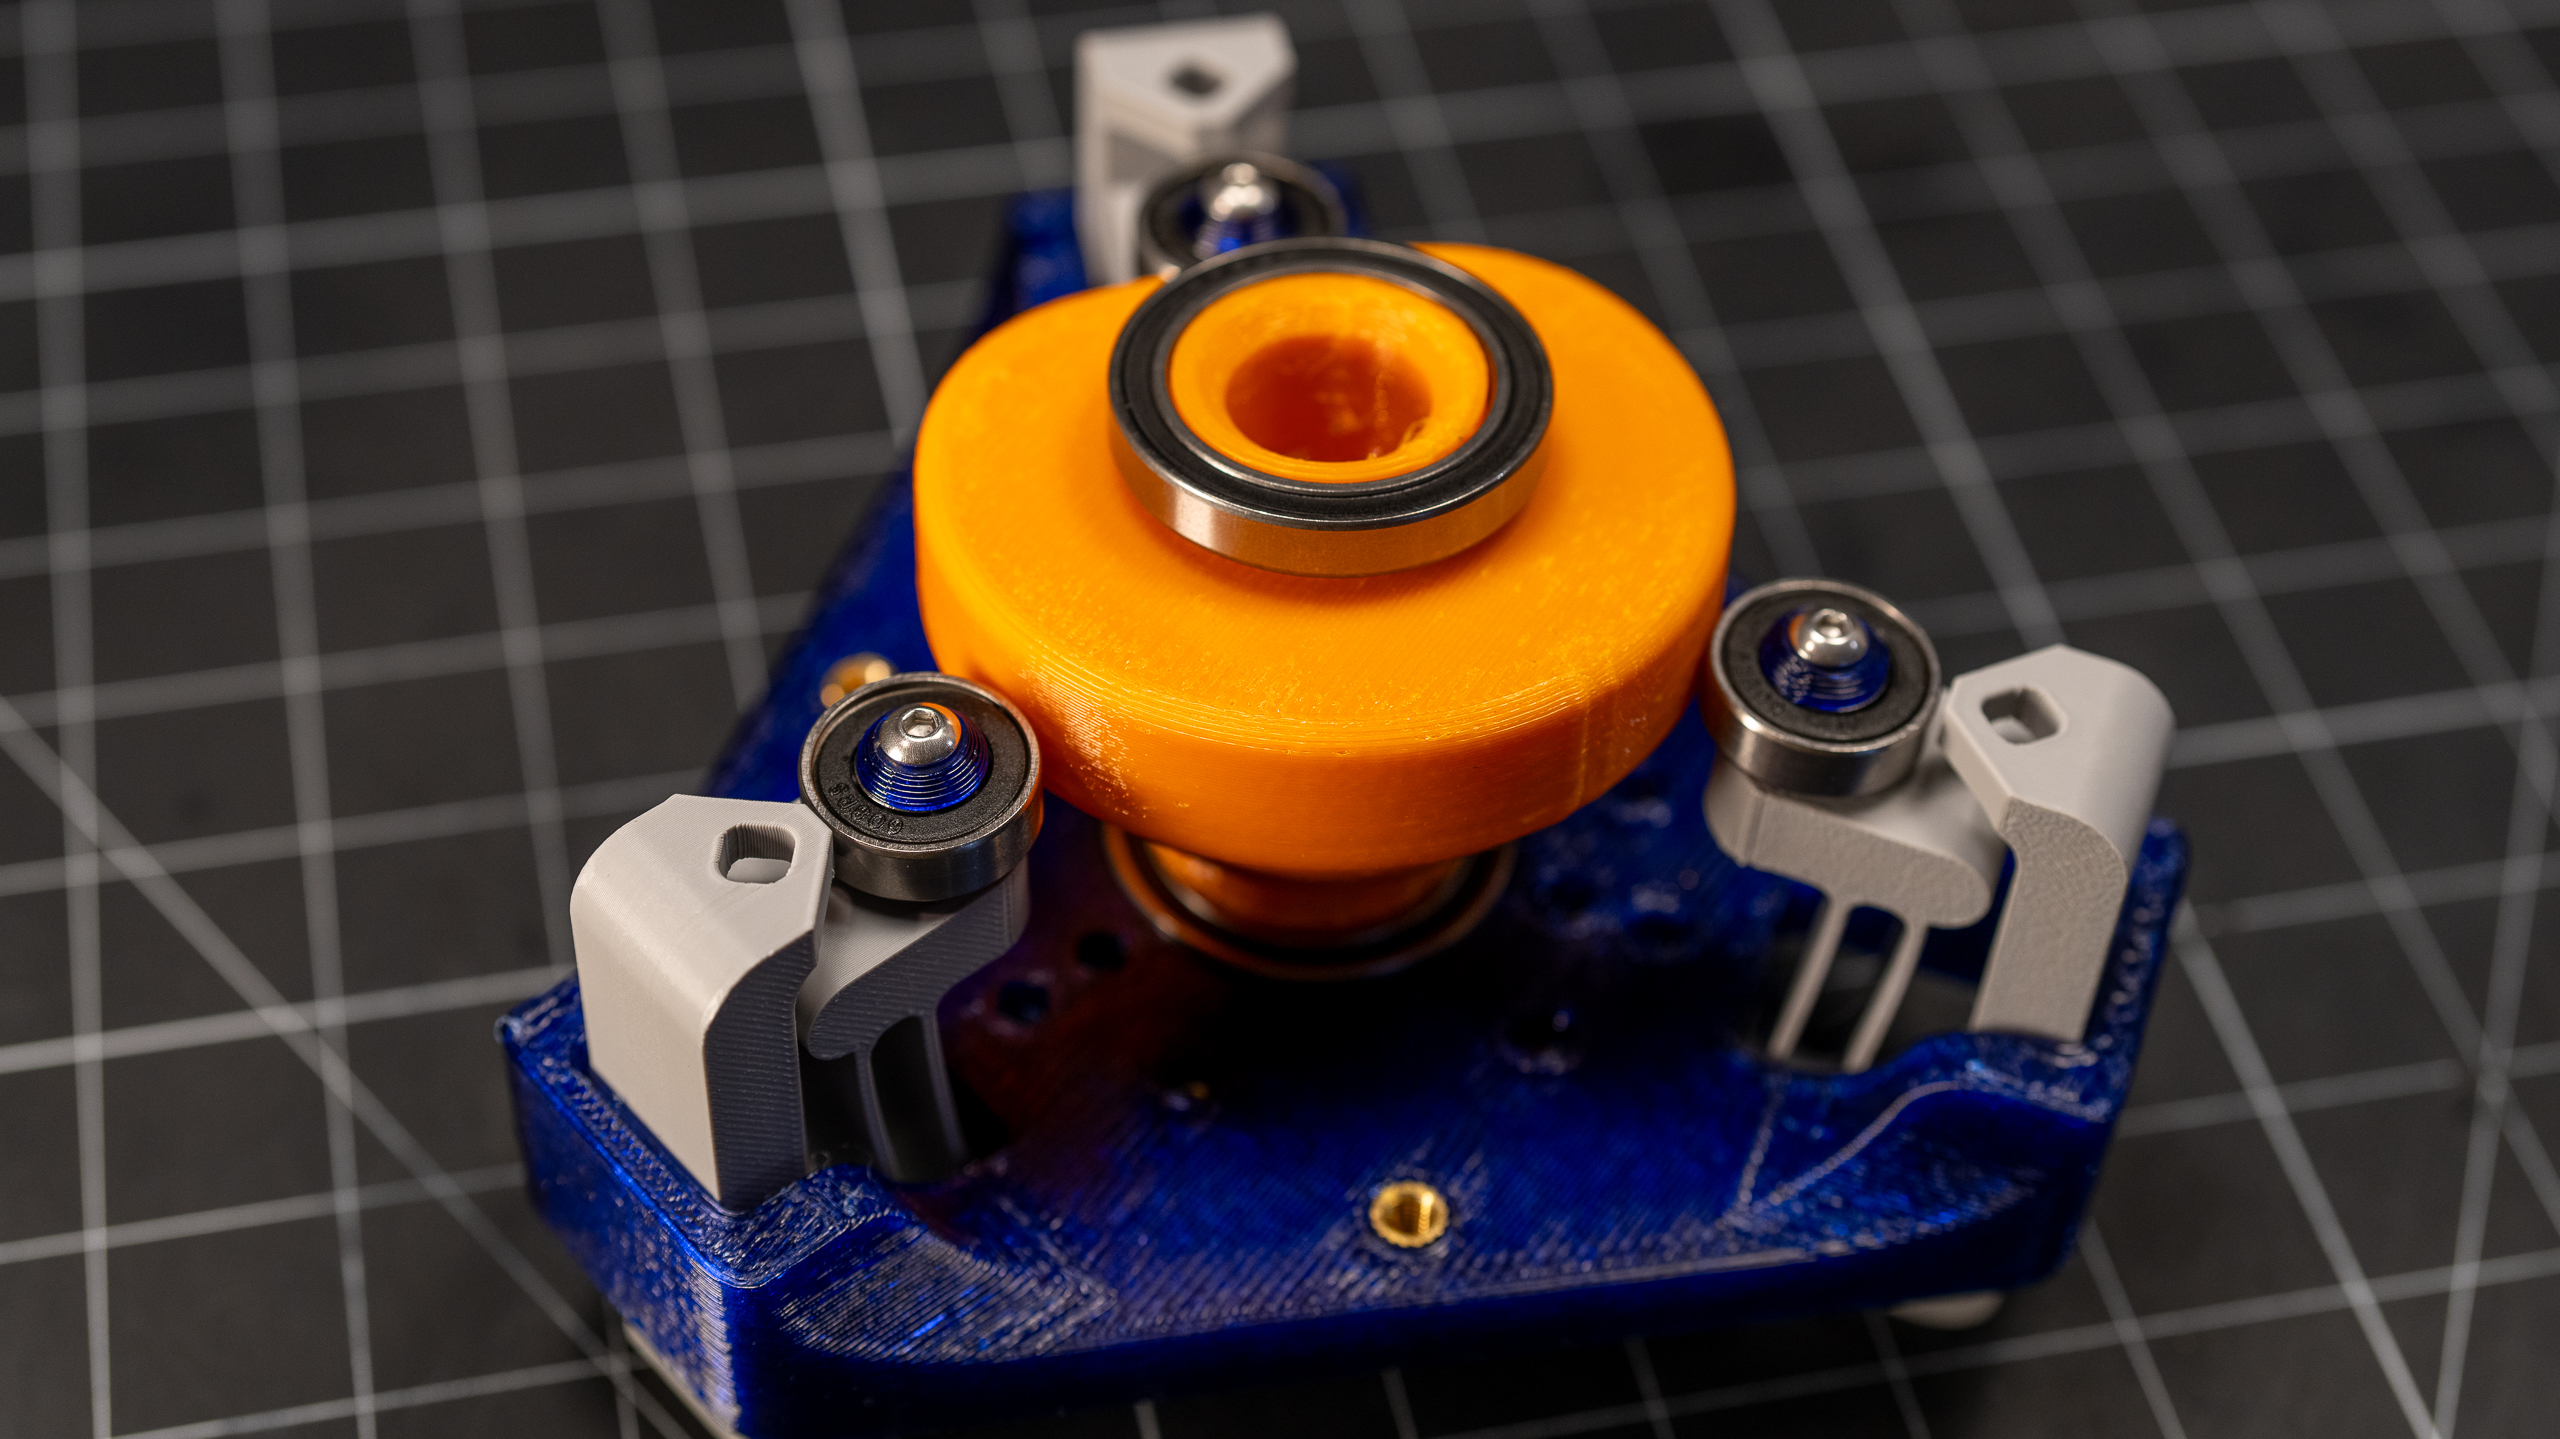
I then went around and installed each roller bearing on the end of the flexures. I rotated the cam so that the flexure I was working on was in the "open" position of the Cam to make things a bit easier. Each bearing gets a Bearing Retainer that sits inside of it and is secured to the flexure with an M4x16 fastener.
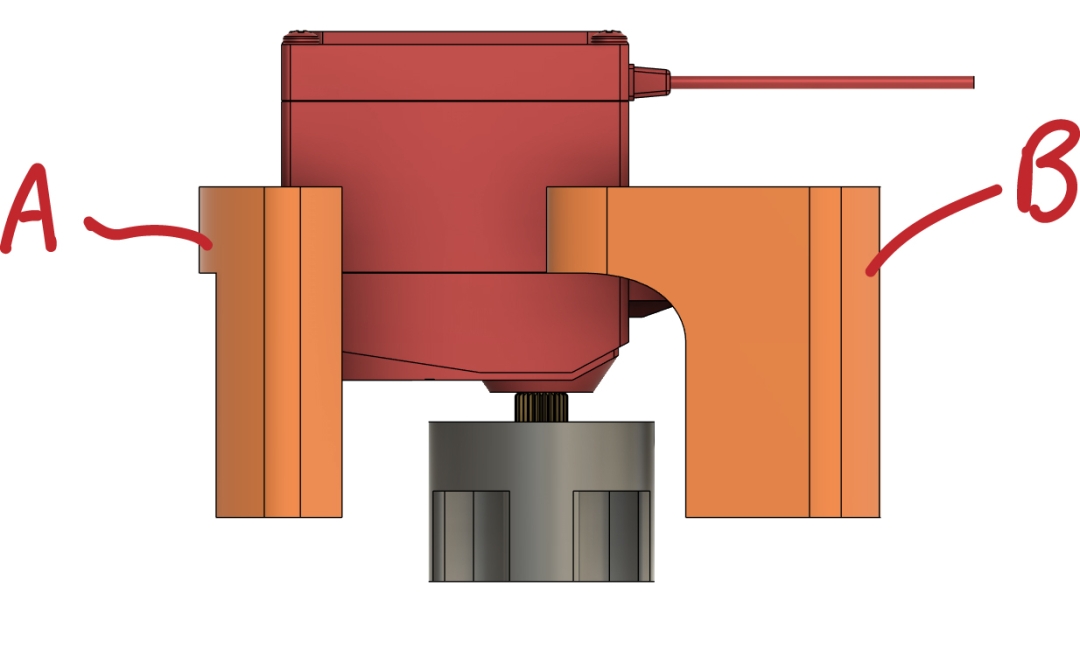
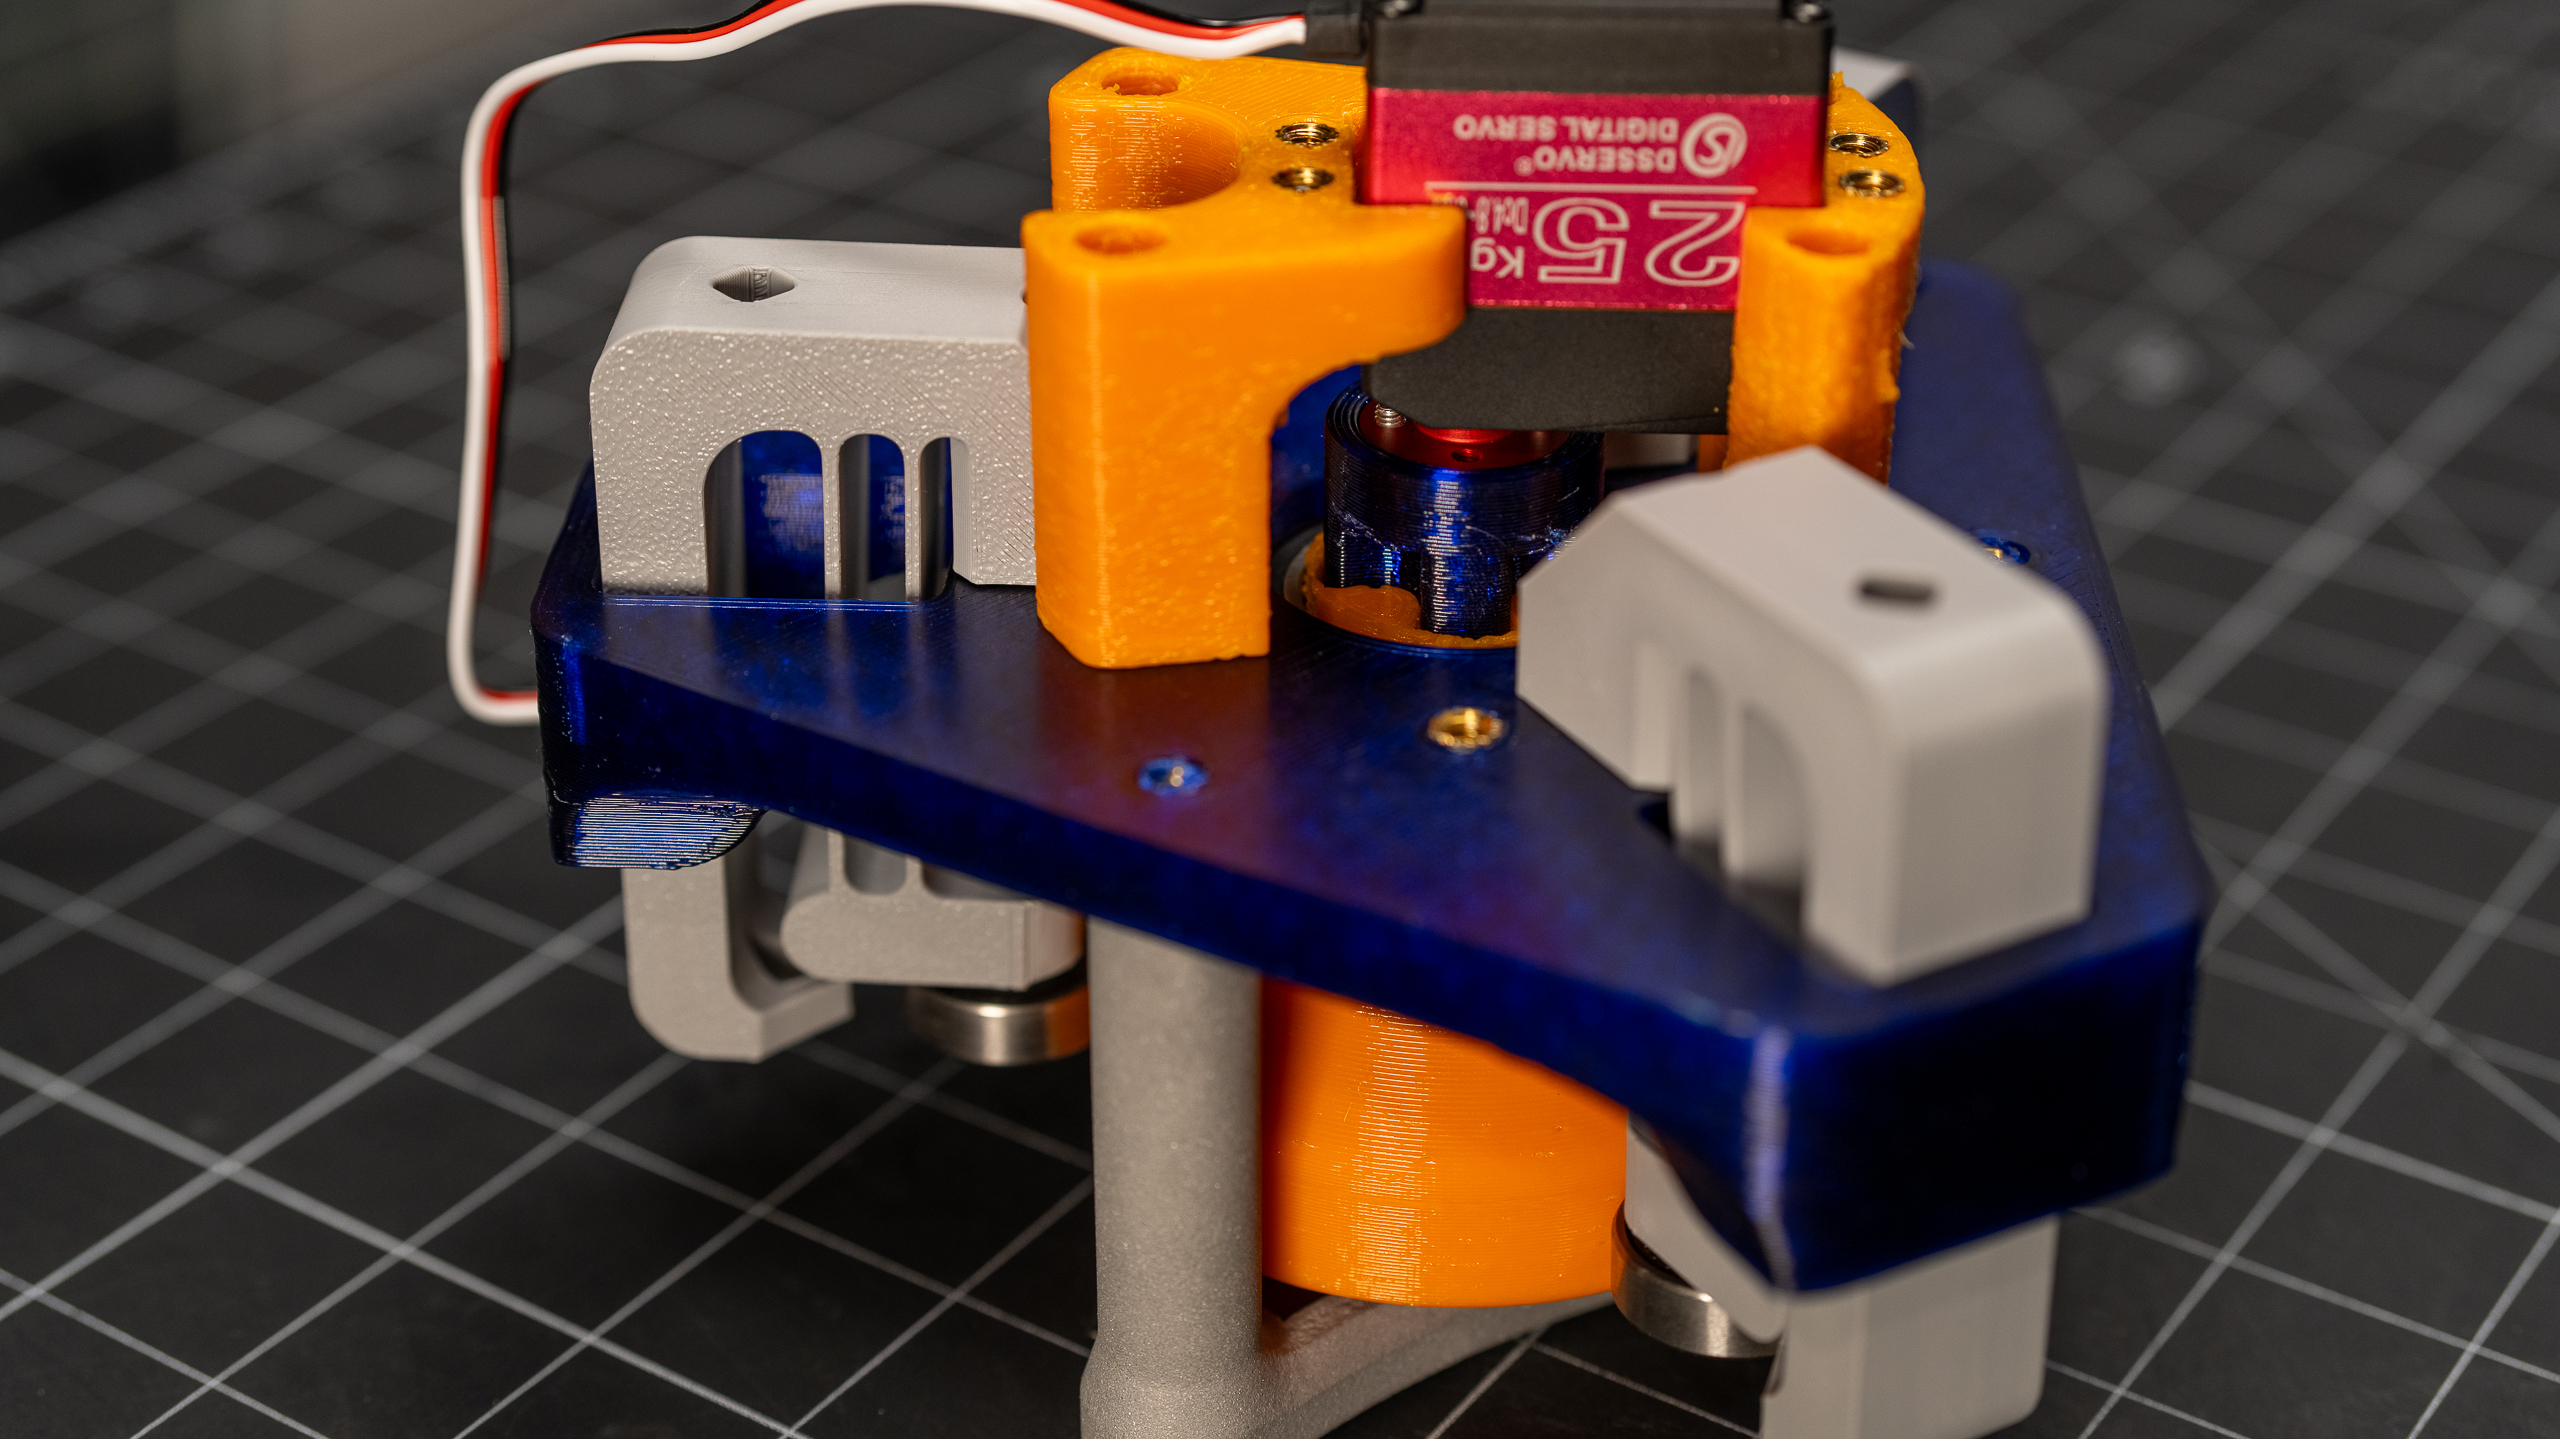
The next step was to get the servo installed. I started by attaching the servo to the two Servo Mounts. The Servo Mount A goes on the "long" side of the servo, where the mount is furthest from the rotational axis of the servo, as shown in the image below.
To get the servo horn aligned properly, I powered on the servo and set it to the 0 degree position. I then attached the Motor Coupler to the Servo Horn using two of the outer fastener locations (with the horn not attached to the servo.) Then I slid on the Servo Horn with the + shape of the clover aligned with the orientation of the servo. With it in position, I then tightened it down using the fastener through the center. I left the remaining two bolt holes unused.
With the Cam rotated so that a valve is open AND it's aligned with the coupler of the servo, I moved the servo into position and tightened it down with the four M4x20 fasteners.
The only thing left to do is to slide the tubing into position. I just moved each valve to the open position and laced the tubing through the two diamond-shaped openings.
6 Channel
NOTE: with a 270 degree servo, it should be possible to access all six channels, however, in my testing, I have only been able to use five of the six.
BOM
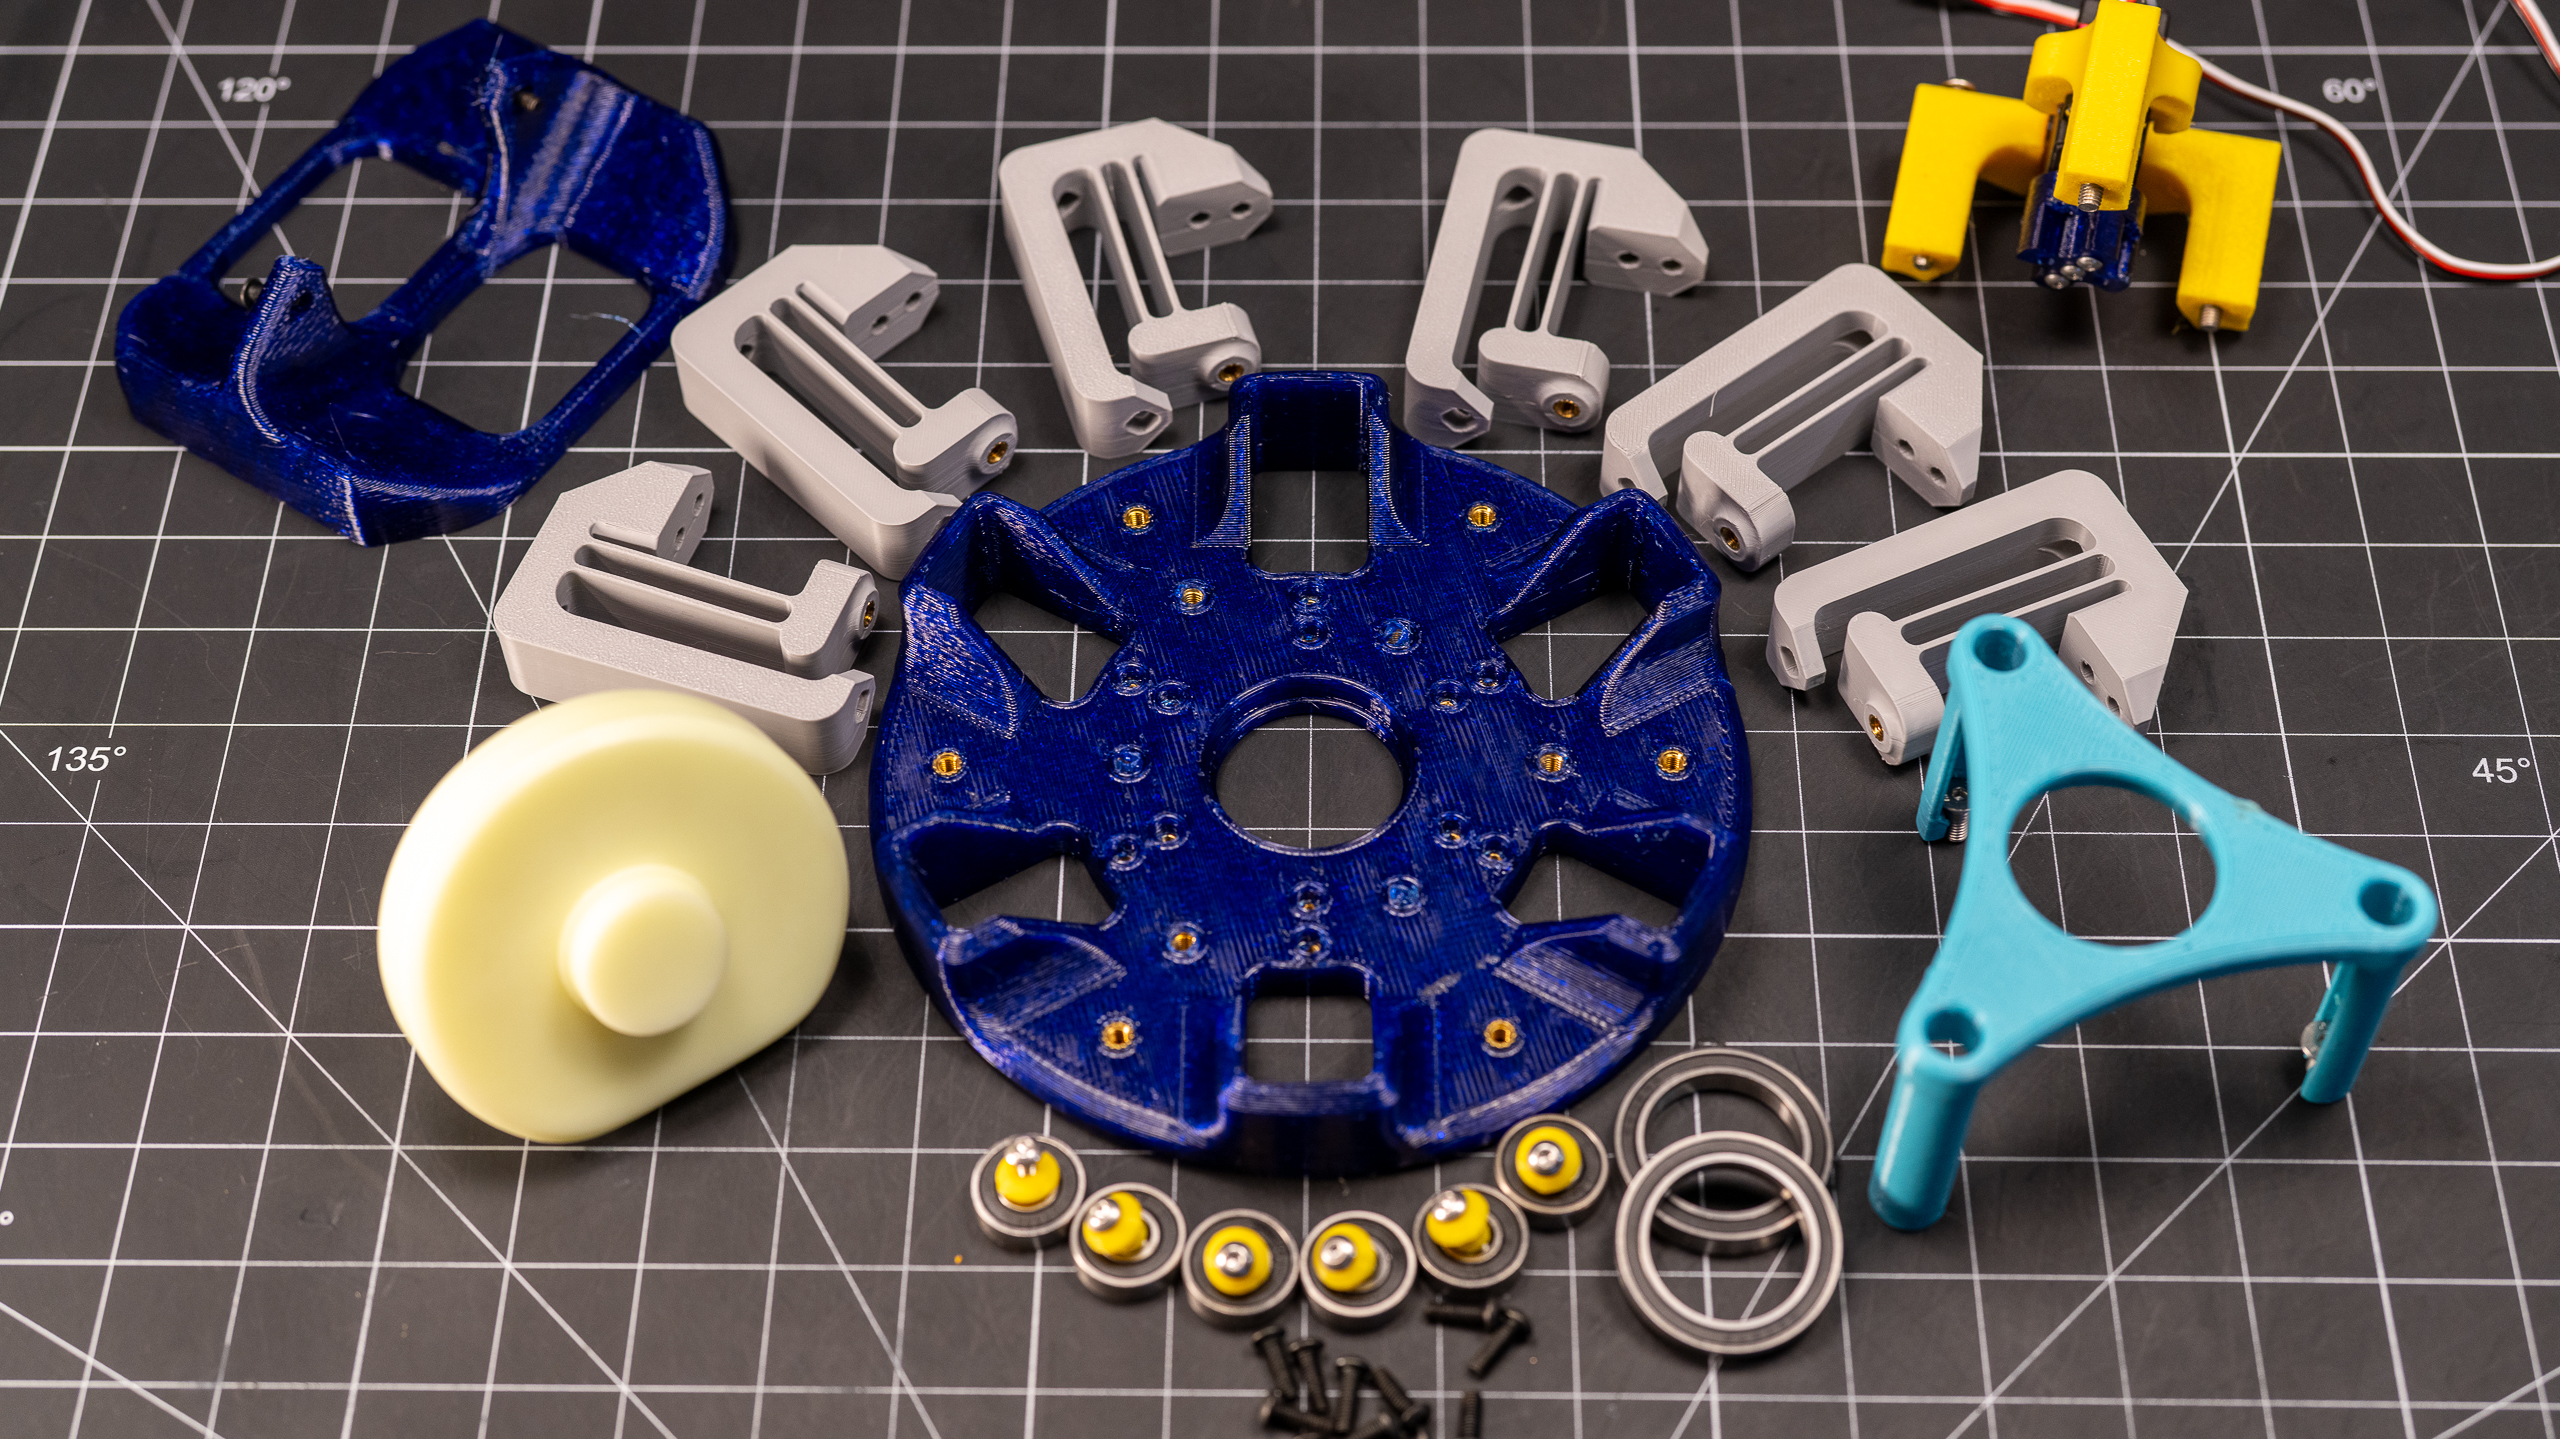
-
- Printed Parts
- (1) MainBody_6ch (aka "Base")
- (1) CamRetainer_6ch
- (1) Cam
- (1) Servo Mount A_6ch
- (1) Servo Mount B_6ch
- (1) Motor Coupler
- (6) Valve Flexure
- (6) Bearing Retainer
- COTs
- (28) M4 Heat set inserts
- (6) M5 Heat set inserts
- (16) M4x12 BHCS fasteners - Twelve for attaching flexures to Base and four for attaching servo to Servo Mounts. The latter can be shortened to as short as 8mm.
- (6) M4x16 BHCS fasteners - For attaching roller bearings to flexures
- (3) M5x45 BHCS fasteners - For attaching Servo Mounts to Base
- (3) M5x10 Flathead fasteners - For attaching Cam Retainer to Base. They don't need to be flatheads, that's just what I had, so what I used.
- (3-5) M3x20 BHCS fasteners - For attaching the Motor Coupler to the servo horn.
- (6) 608RS 8x22x7 Bearings - I bought this hundred pack since it makes the cost per bearing so damn lovely, but you obviously don't need nearly this many. This size bearing is the same as move roller skate bearings...FYI
- (2) 6806-2RS 30x42x7 Bearings - For supporting the Cam
- (1) 25kg RC Servo
- (1 - optional) Aluminum Servo Horn - I used these cause I had some extras from a previous project, but you could probably use the plastic one that comes with the servo if you prefer. Just have to find the right fasteners.
- Silicone Tubing - I've been using this aquirium air line tubing for a number of these projects recently. It's cheap and has seemed to work fine for me, but it's not technically made for liquids...so consider yourself informed. If you happen to know any reason I shouldn't be trusting this tubing, please do feel free to let me know!
The six M4 heat sets around the perimeter should be inserted from the front. Three of the M5s should also be inserted from the front, see image on the left below. The remainder should be inserted from the rear.
The remainder of the assembly is basically the same as described under the 3 channel version described above.
8 Channel
NOTE: with a 270 degree servo, it should be possible to access seven of the eight channels, however, in my testing, I have only been able to use six of the eight.
BOM
-
- Printed Parts
- (1) MainBody_8ch (aka "Base")
- (1) CamRetainer_8ch
- (1) Cam
- (1) Servo Mount A_8ch
- (1) Servo Mount B_8ch
- (1) Motor Coupler
- (8) Valve Flexure
- (8) Bearing Retainer
- COTs
- (32) M4 Heat set inserts
- (8) M5 Heat set inserts
- (20) M4x12 BHCS fasteners - Sixteen for attaching flexures to Base and four for attaching servo to Servo Mounts. The latter can be shortened to as short as 8mm.
- (8) M4x16 BHCS fasteners - For attaching roller bearings to flexures
- (4) M4x40 BHCS fasteners - For attaching Servo Mounts to Base
- (3) M5x10 Flathead fasteners - For attaching Cam Retainer to Base. They don't need to be flatheads, that's just what I had, so what I used.
- (3-5) M3x20 BHCS fasteners - For attaching the Motor Coupler to the servo horn.
- (8) 608RS 8x22x7 Bearings - I bought this hundred pack since it makes the cost per bearing so damn lovely, but you obviously don't need nearly this many. This size bearing is the same as move roller skate bearings...FYI
- (2) 6806-2RS 30x42x7 Bearings - For supporting the Cam
- (1) 45kg RC Servo - I originally assembled this with the same 25kg servo used on the others, but it struggled to rotated the cam consistently. So I swapped it with this 45kg one I had on hand that has the same outer dimensions. It's probably overkill, but it gets the job done.
- (1 - optional) Aluminum Servo Horn - I used these cause I had some extras from a previous project, but you could probably use the plastic one that comes with the servo if you prefer. Just have to find the right fasteners.
- Silicone Tubing - I've been using this aquirium air line tubing for a number of these projects recently. It's cheap and has seemed to work fine for me, but it's not technically made for liquids...so consider yourself informed. If you happen to know any reason I shouldn't be trusting this tubing, please do feel free to let me know!
The eight M5 heat sets go in the holes around the perimeter, and should be inserted from the front. All of the M4 heat sets should be inserted from the rear.
The remainder of the assembly is basically the same as described under the 3 channel version described above.
