
Build
BOM
Printed Parts
- (1) Rotor - 184g
- (1) StatorA - 287g
- (1) StatorB - 252g
- (3) Pins_Short - 20g (total)
- (3) Pins_Long - 20g (total)
- Optional
- Planetary drive - 231g (total)
- (1) PlanetaryHub
- (3) Planet
- (1) Sun
- (1) Ring
- Motor Mount - 119g
- Planetary drive - 231g (total)
COTS
- (~100) 3/8" Steel balls - I use this cheap slingshot ammo for these things
- (some length) 12mm OD x 9mm ID compliant tubing
- (3) 6303-2RS Roller Bearings - 17 x 47 x 14
- (3) M3x20 BHCS - For thru the contact posts
- (6) M3x14 BHCS - For around housing
- (9) M3 nuts - For contact posts and around the housing
- Alternatively, can also use M3x4 heat sets around rim, but have to be careful. Heat sets not recommended for contact posts
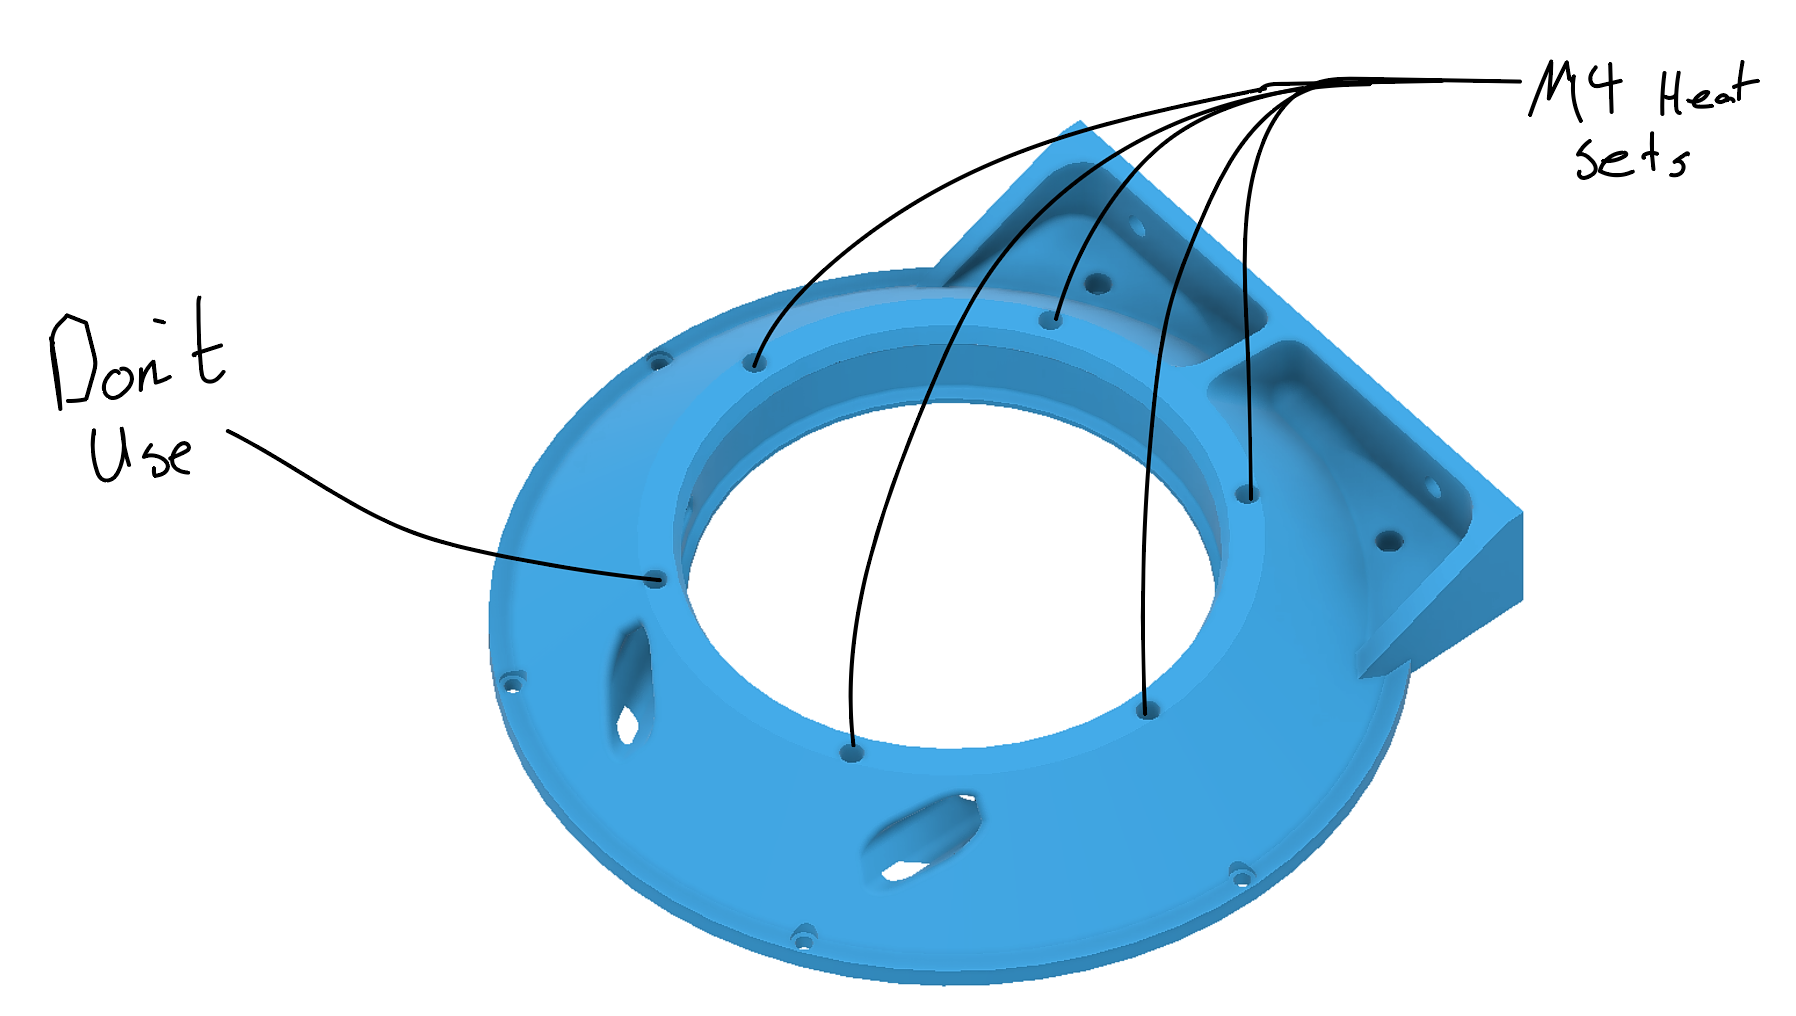
- (3) M4 x 8.1 Heat sets - For motor mount flange
- Optional - Planetary and motor
- (3) 608-2RS Roller Bearings, aka roller skate bearings. These go inside of the Planet gears
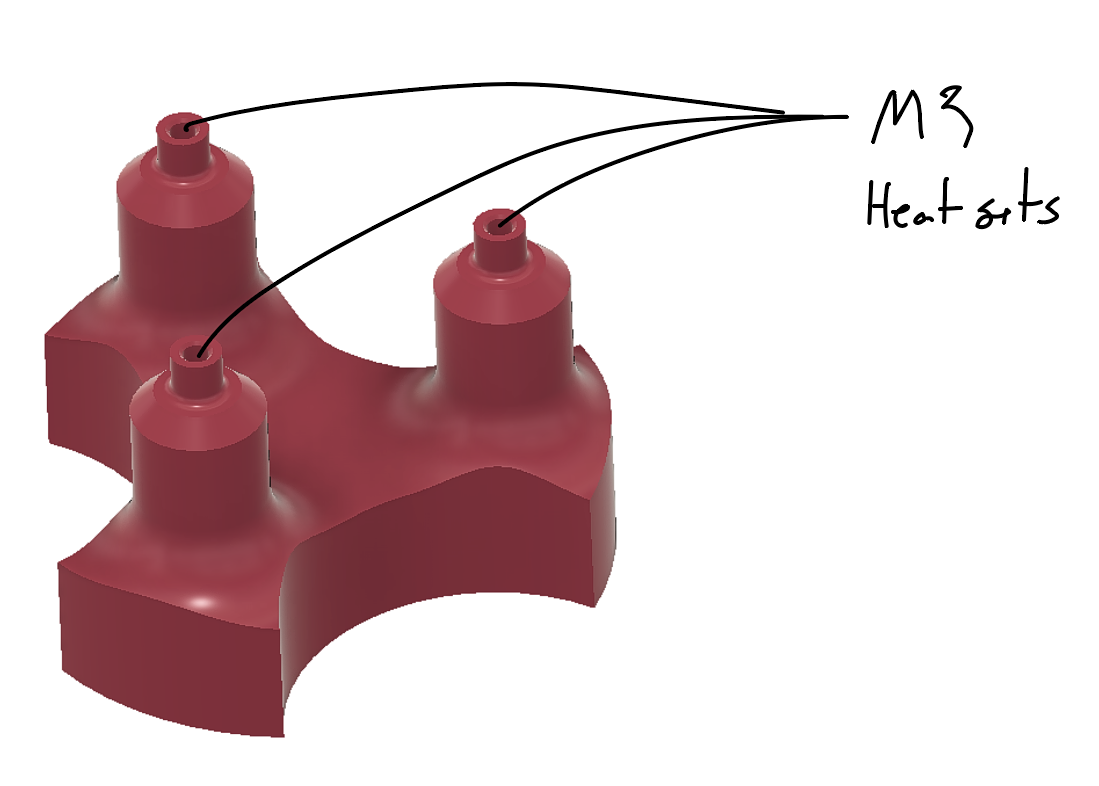
- (3) M3 x 5.7 Heat sets - Attach the planets to the PlanetaryHub
- (3) M3 x 6 BHCS
- (3) M3 washers
- (1) 150W Electric Motor - I used this 24VDC motor, but could easily be adapted to others by modifying the Motor Mount part (and possibly the sun gear)
Build Steps
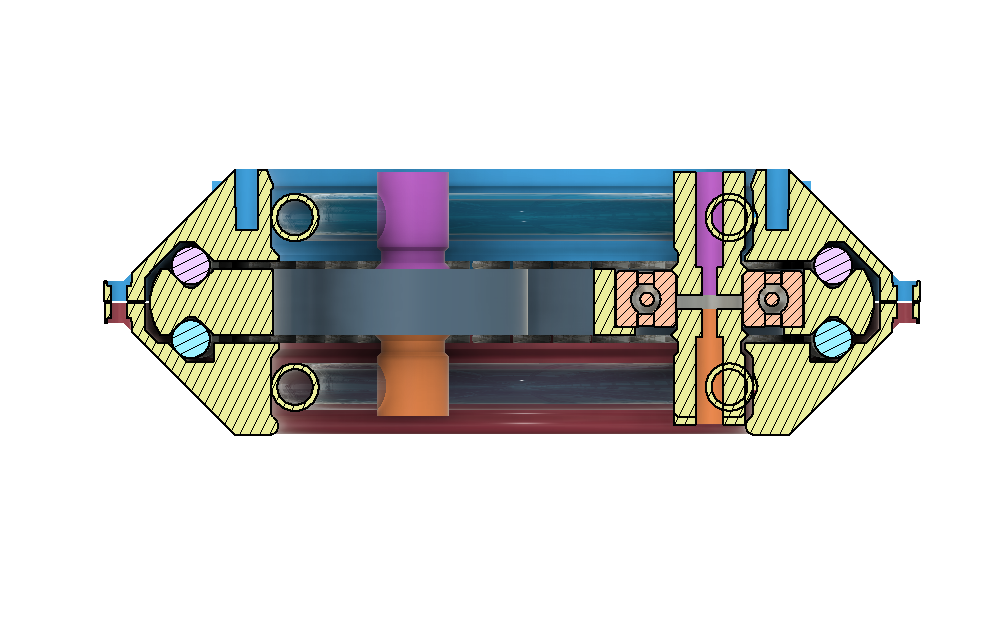
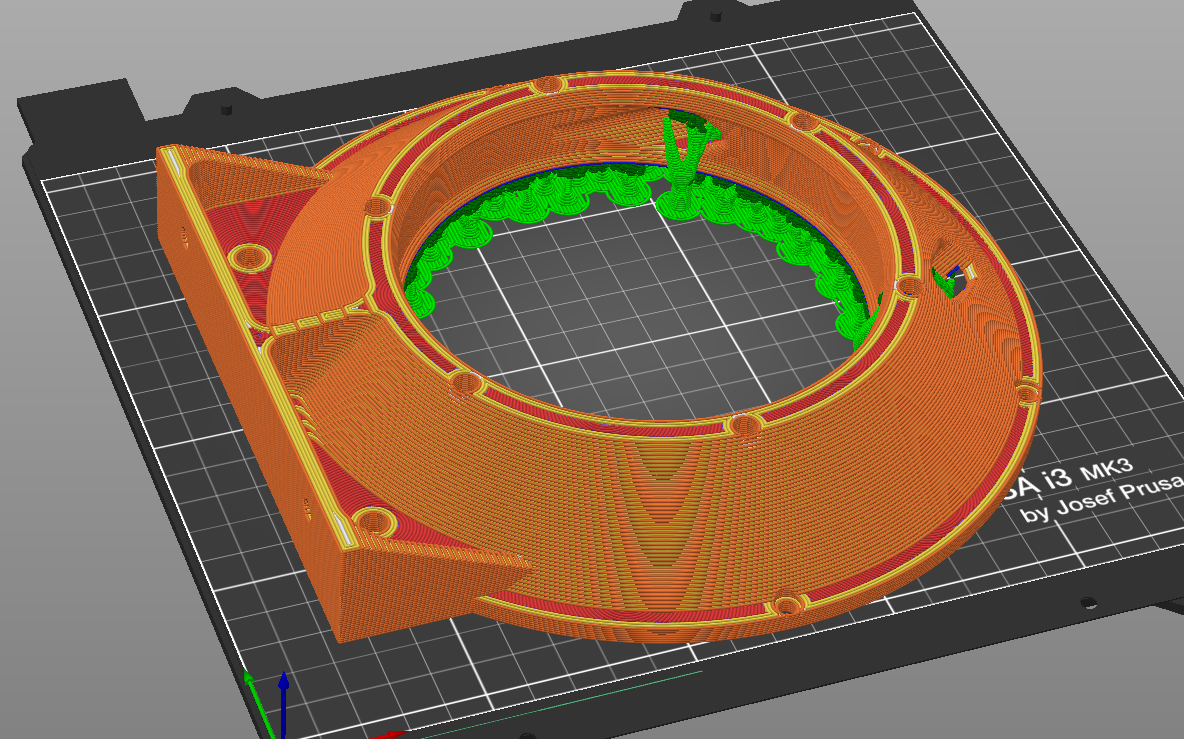
The first step was to get all of the parts printed. Both stators and the rotor are pretty large parts. So they each took up a full build plate for me on my Mk3s.
Unfortunately, they also require some supports. I used organic/tree supports, and they all popped off pretty easily. Main places to keep an eye on keeping reasonably smooth are 1) the bearing races and 2) the tube pass throughs in the housings. The smoother the bearing race is, the better (and quieter) the bearing is going to run, and any stray bits of support left in the pass throughs is likely to snag the tubing when trying to feed it in, making it almost impossible...and enraging, or so I'd guess...
I added some brims on the Pins, just to be safe, since they don't have huge contact patches relative to their height.
Hmm, ok, I think that's the main stuff for printing, if you run into any questions, feel free to find me in the comment section of your liking :)
Once all of the parts were printed, I put the motor mount heat sets into StatorA
And since i had the iron hot, went ahead and put the M3s into the PlanetaryHub as well.
Next, I assembled the bearing sub assemblies with the large roller bearings and both the long and short pins.
I assembled mine by putting the bearing into the Panavise, intentionally adding an angle to allow gravity to help me out with getting the nut started.
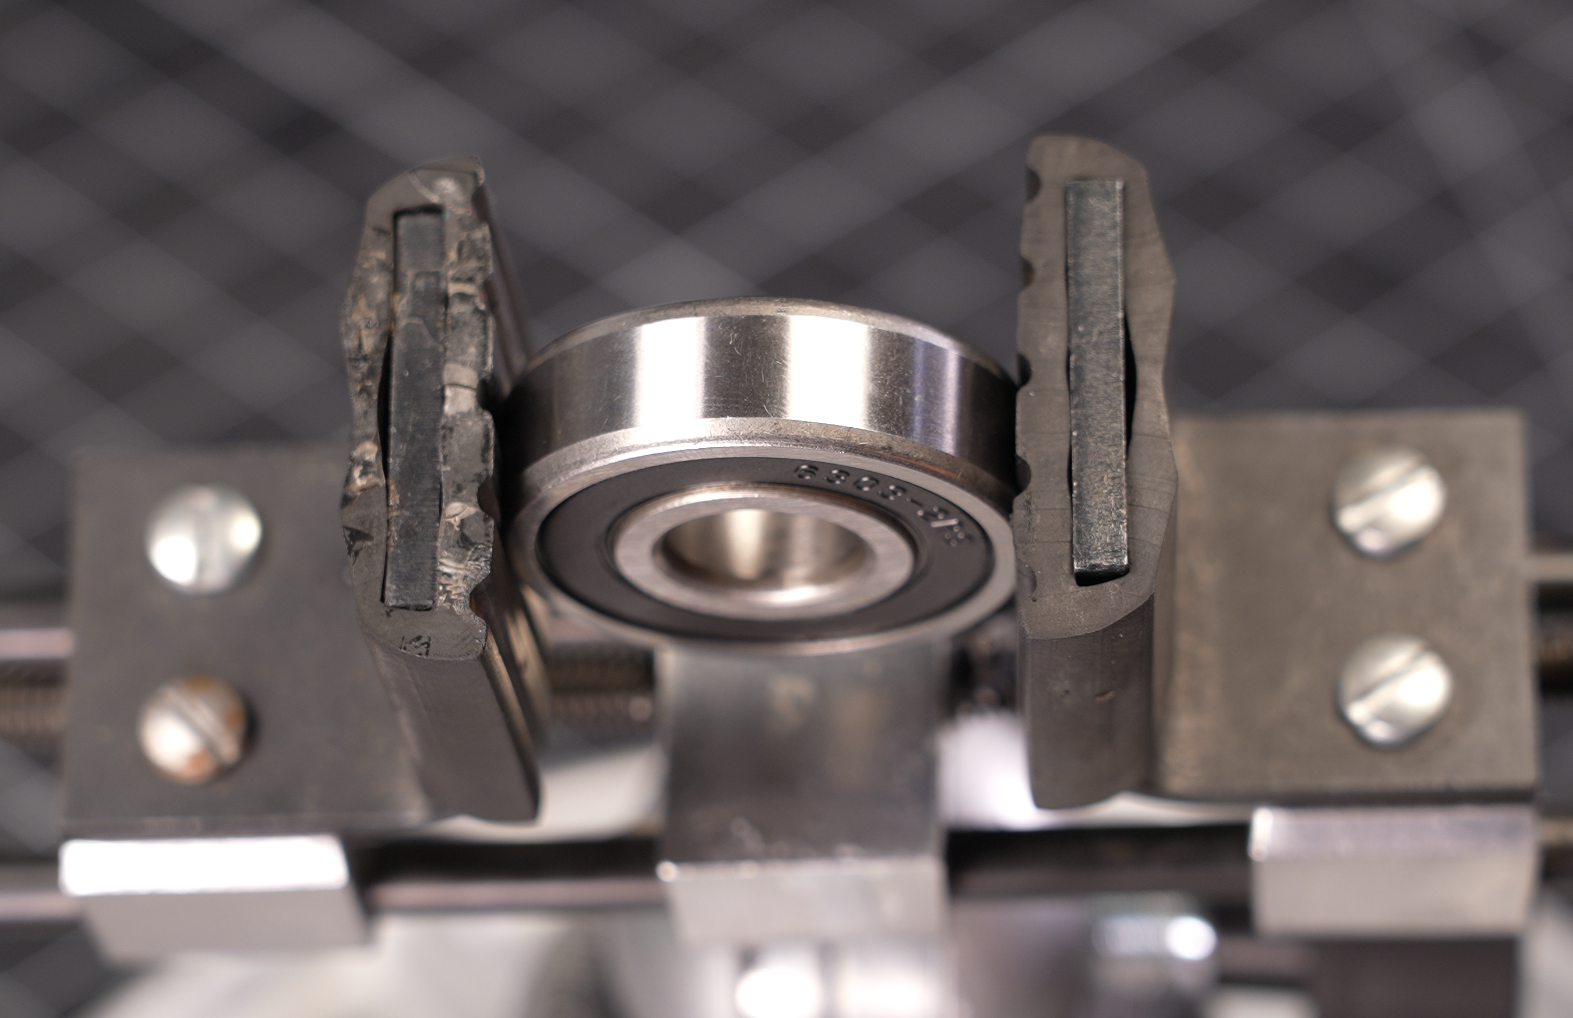
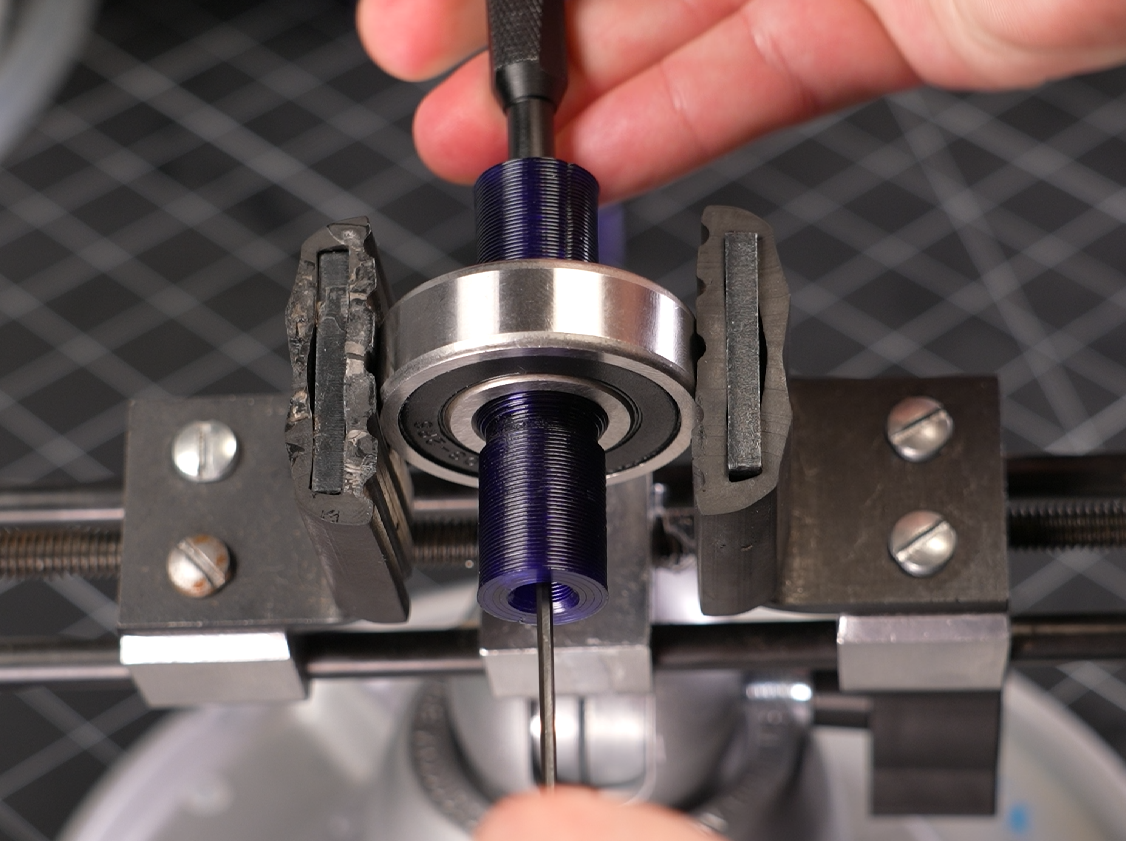
With the nut seated inside a small socket inserted into the Pin, and a hex driver preloading the M3 fastener into it's bore, I just brought the two together through the bearing and tightened up the fastener. To be honest, it went MUCH smoother than I expected :)
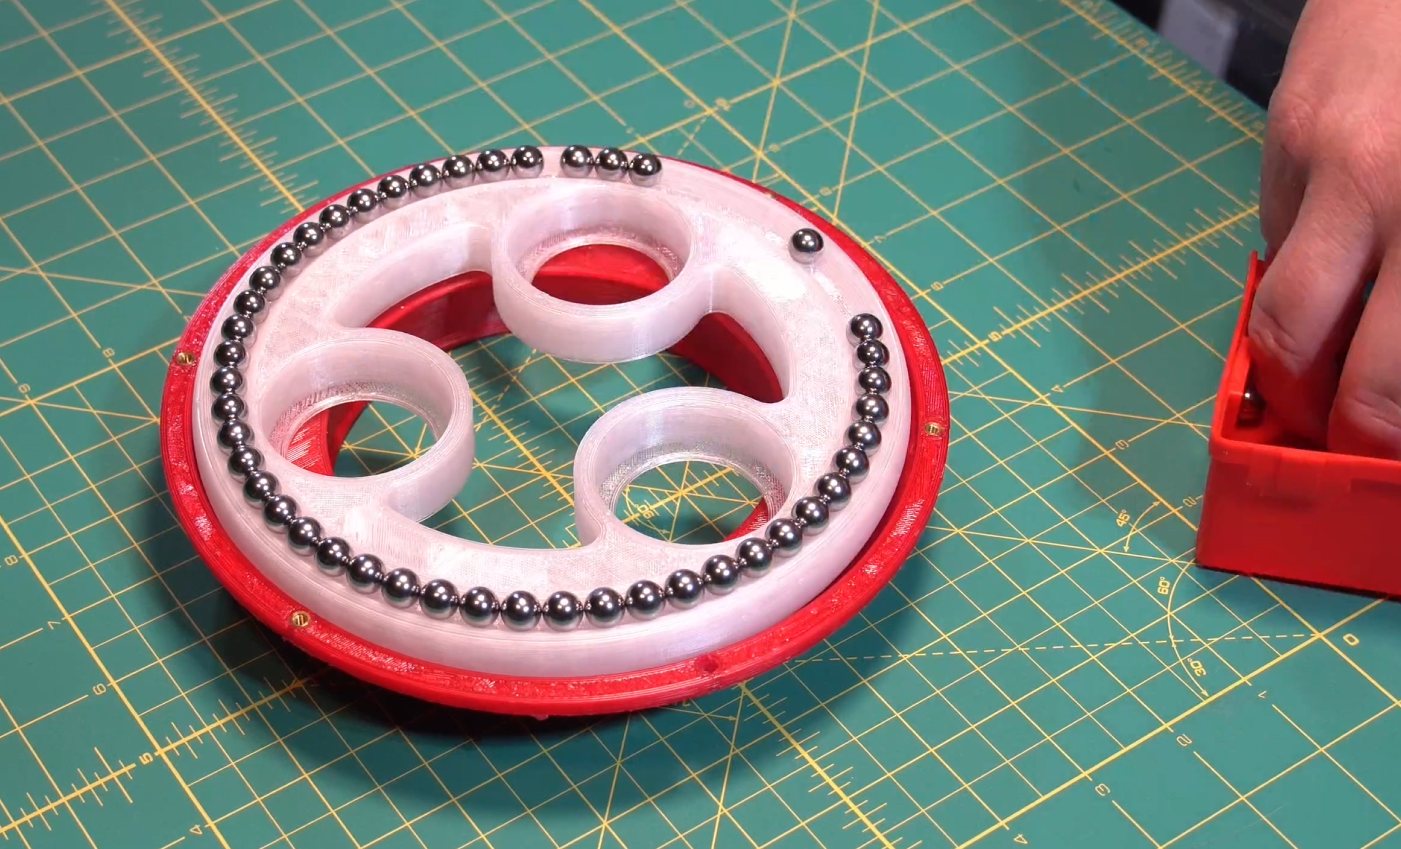
With the bearing subs assembled, it was on to the fun part, aka trying not to make a mess with steel balls. First filling the bearing race of one housing (it doesn't really matter which side you start with, it should be symmetrical.)
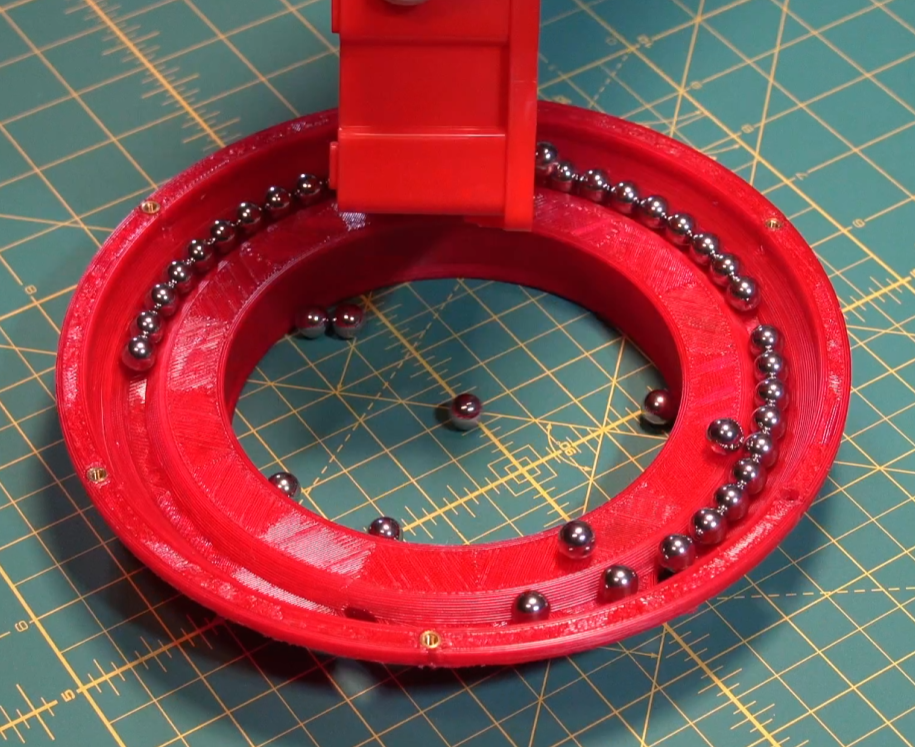
You want to err on the side of a missing ball vs having one too many if the count isn't exact around the race. A one ball gap won't hurt anything. Once the housing race is full, set the the rotor down on to the balls. It should spin freely and smoothly, but don't get too excited, it can be easily to get a little carried away spinnin and make a mess.
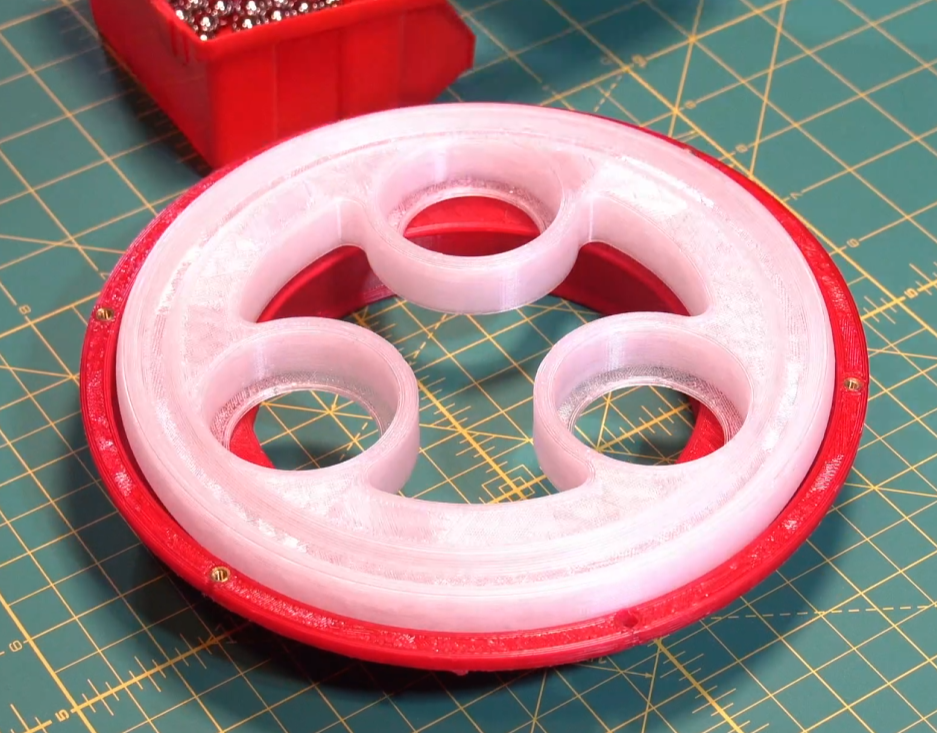
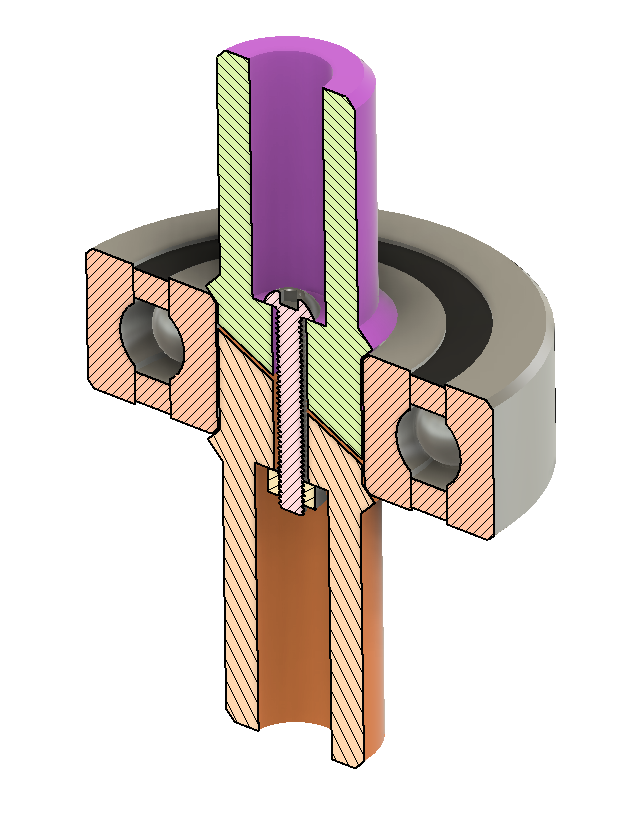
Install the rotor so that the side with the ledges for securing the roller bearings is facing down (like shown above). That lip is also the reason there is a "long" and "short" set of pins. The longer pins go on the side with the lip. The extra length on those pins is to compensate for the thickness of the ledges.
But before I inserted the bearing sub assemblies, I added the steel balls for the other half of the main bearing.
The bearing assemblies then just slide into their pockets, and the other housing can be lowered and secured into place.
If the bearing feels tight after tightening the housings together, you may want to add some washers or other spacers to the gap between the housings. Having it tight will make it more resistant to heavy loading (for example if you wanted to run it with only a single tube installed, you'd want a good preload), but it will also make it harder to turn and could get interesting if run long or at high speed...although I can't help but wonder if this would just melt and shape the bearing smooth. I feel like it depends on if any melted plastic adhered to the balls. But anywho, I digress :)
Now just lace it up with some tubing! And if using it with a drill or the like, you're ready to go!
I need to grab some sleep, so the planetary gear drive and notes on the design will have to wait. If you have questions or comments, I'd love to hear em!
Cheers,
Bubs