Herb Planter - 3 position
Design goals
- Provide at least 3 locations for 1.5" Rockwool cubes
- Fit within Prusa Mk3s build plate (actually limited allowable box to 200mmx200mm in XY
- Provide secure mount point to 2020 aluminum extrusion
- Integrated mounting/guiding of at least two moisture sensors.
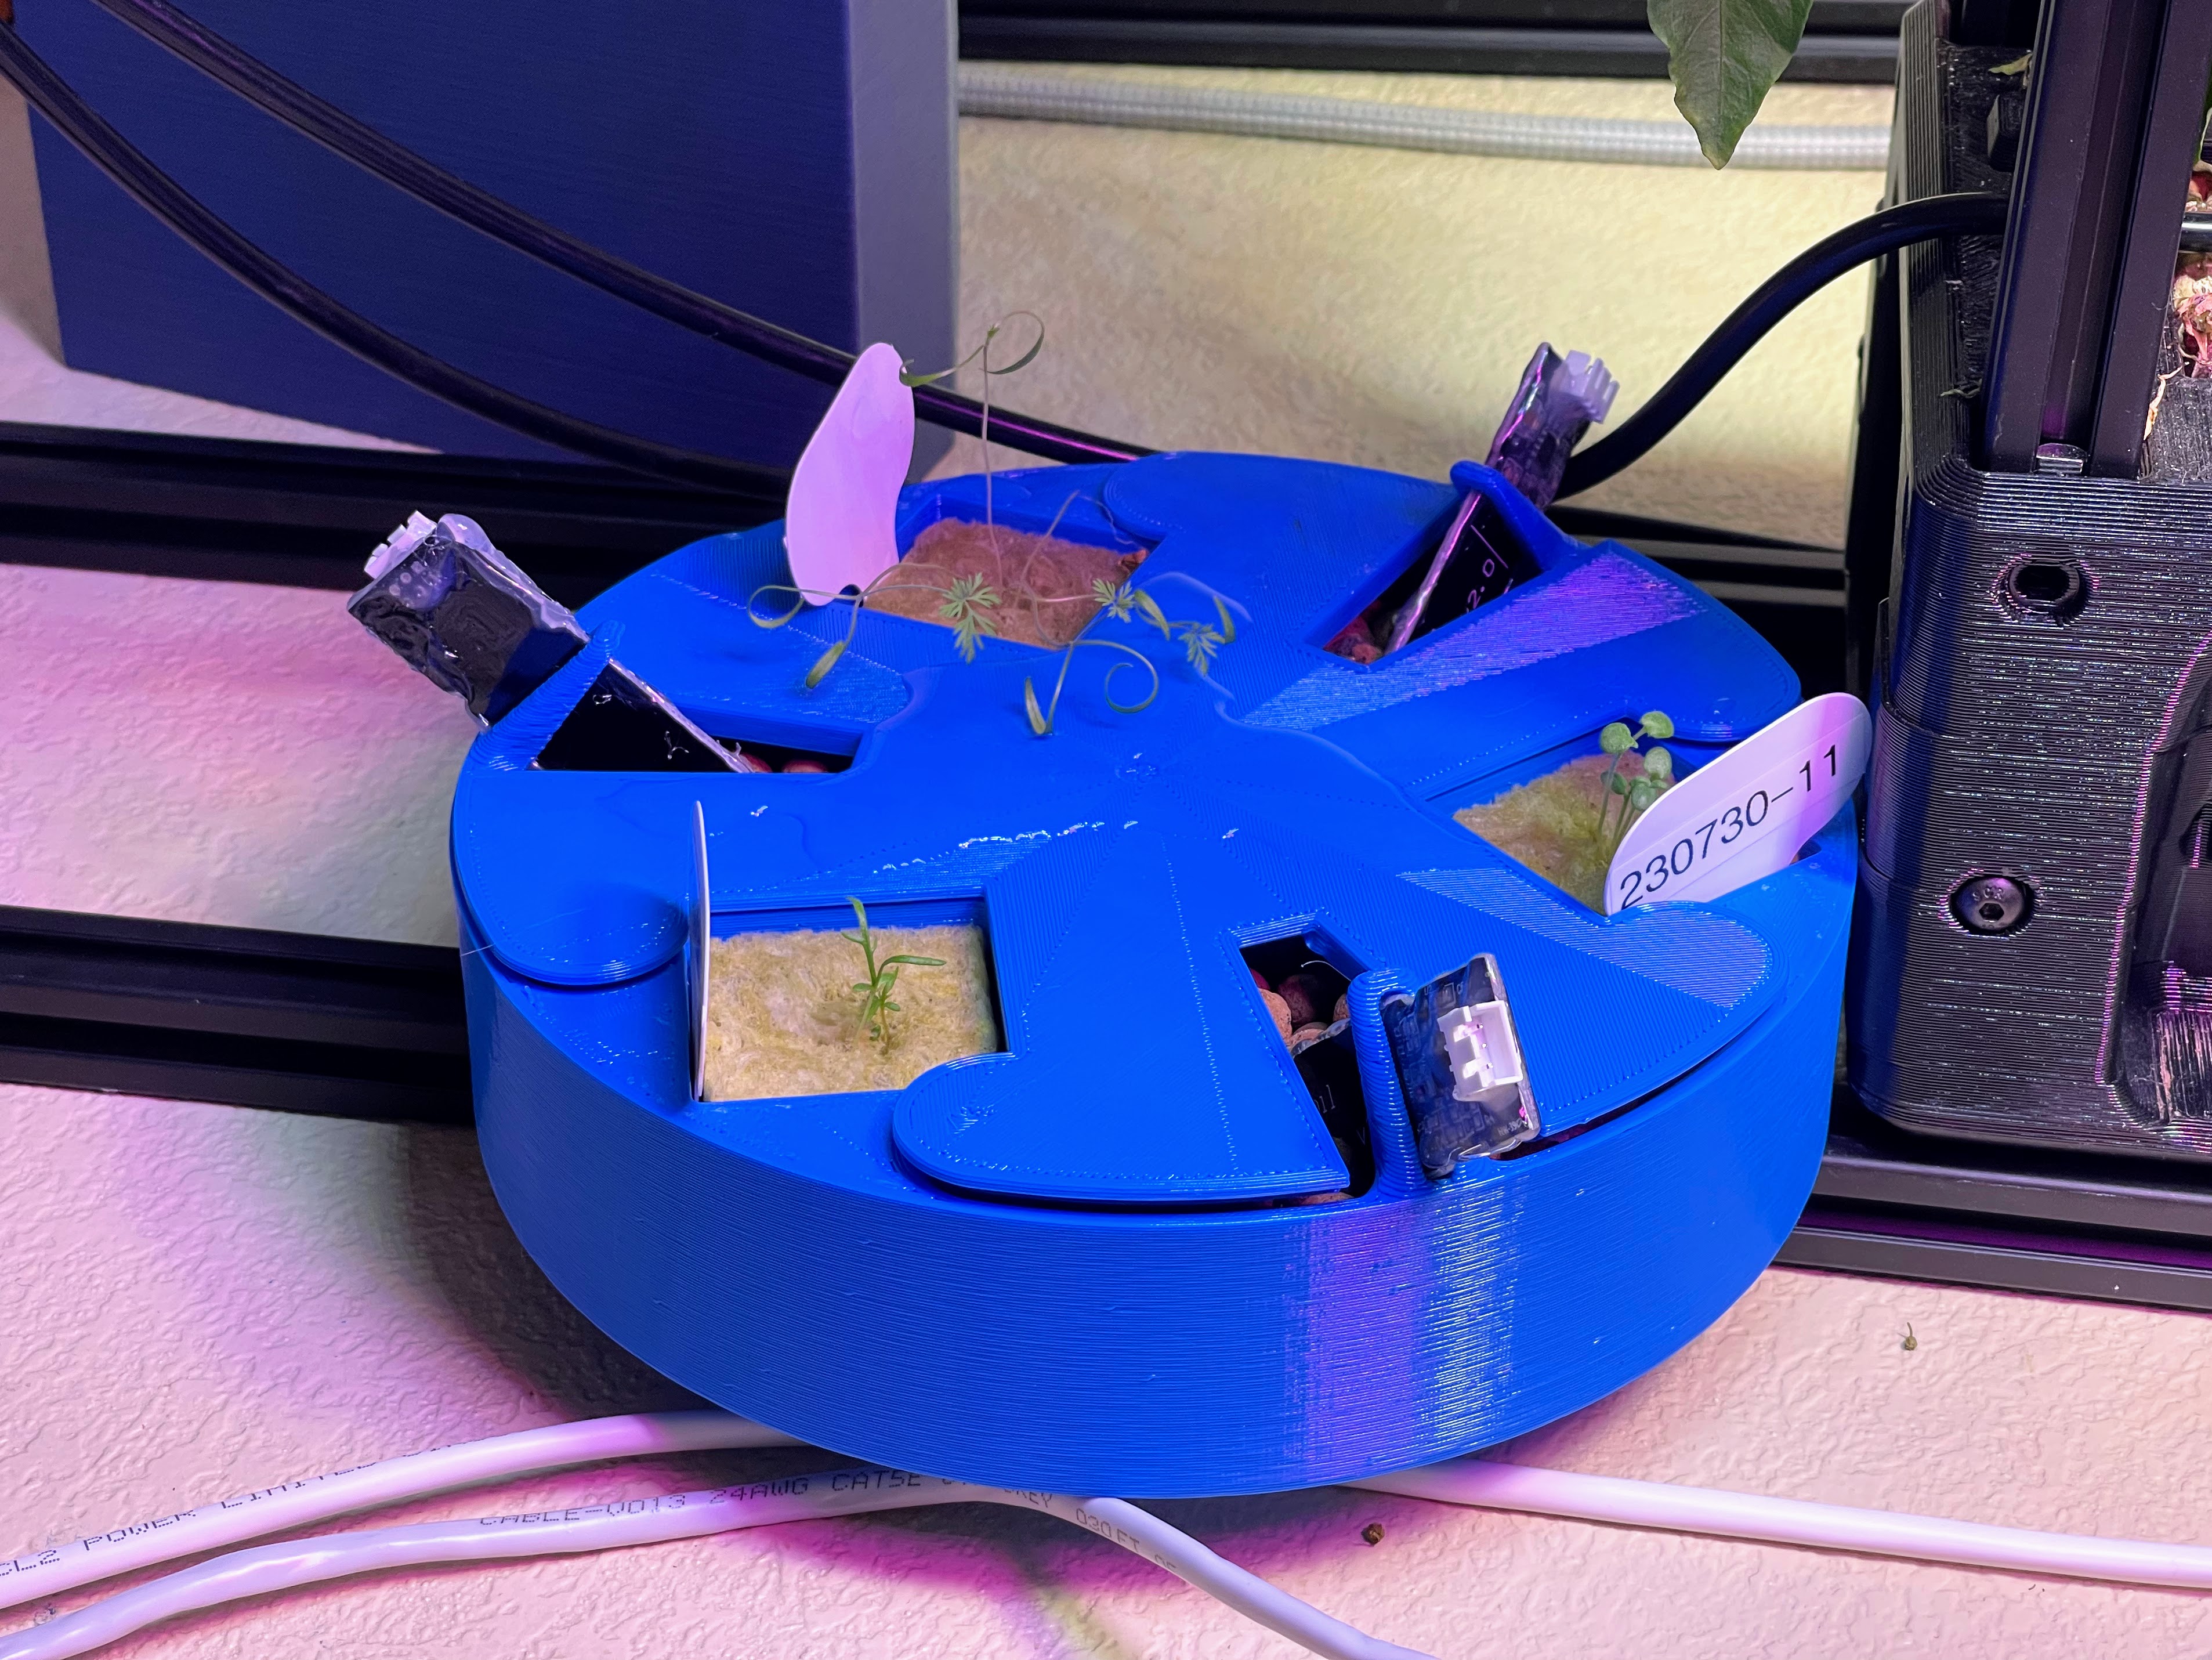
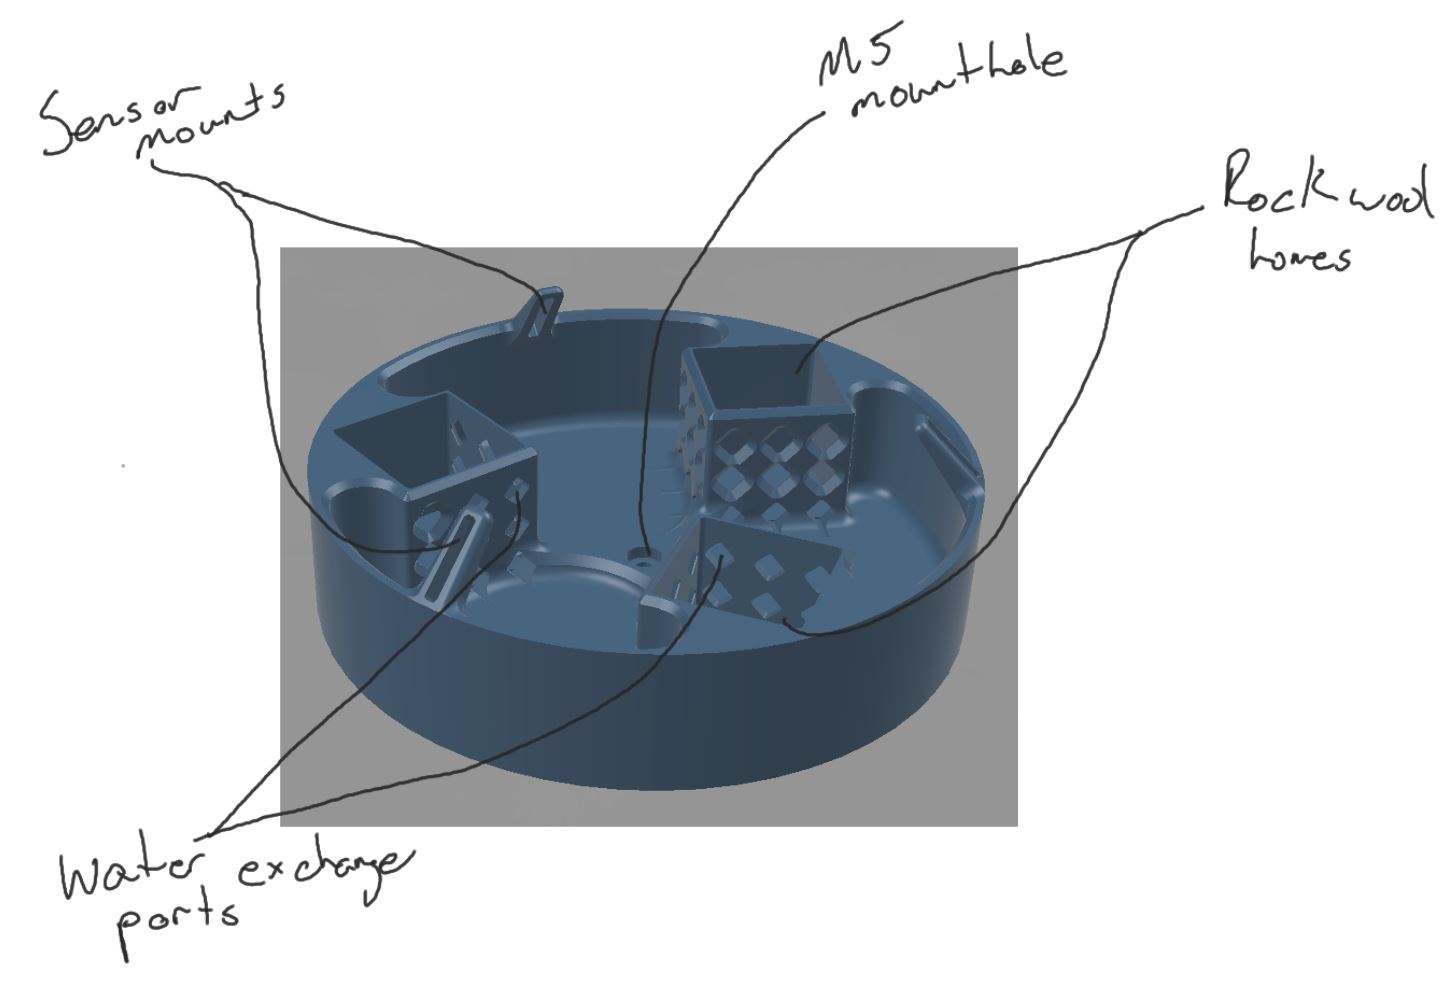
The design concept I settled on is a circular footprint with the three cube locations evenly spaced at 120 degrees. To help improve moisture retention, I decided to have the center region open, and filled with expanded clay pellets (aka hydroton). So the inner walls of the cube holders are 'vented' with relatively large diamond-shaped openings in the hopes of getting intimate contact between the rockwool and the hydroton.
The planter is secured to 2020 extrusion via a single M5 mount hole in the center of the part. The intent (and implementation) is to secure the planter in location, and then fill/seal it with hot glue prior to filling with hydroton. This planter is intended only for use in a flat orientation, and no real dynamic loads (other than some light wind load). So this single M5 should be plenty to handle any asymmetric loading caused by different plant sizes at this size.
I have used these capacitive soil moisture sensors for previous builds using hyrdoton as the grow medium, so I know they can give a usable signal for closed-loop control. In my initial tests, I wasn't sure if it would work since there are air gaps caused by the spherical pellets limited packing factor. That being said, I'd LOVE to find a better, more scalable option for moisture sensing. The linked sensors are fine, but each needs to be sealed (the driver circuit is fully exposed, and the sides of the boards are raw-cut PCB, which will uptake water over time) and their form factor isn't always ideal. But I digress...

To locate the sensors within the assembly, I added some slotted risers on the sides. The slots are oriented at 45 degrees, partially to make them printable without supports, but primarily because the 'nose' of the sensor is a right angle. So by having the slot at 45, the edge of the sensor should sit flush against the base of the planter. Between the slot and the planter base, this provides a reasonably repeatable constraint for the sensor.
The reason I care about having the positioning of the sensor somewhat repeatable/consistent within the planter, is because the moisture readings are very sensitive to their depth within the medium. So the goal with this constraint scheme is 1) to try to reduce sensor drift by limiting physical movement within the medium, and 2) to try to improve the interchangeability of the sensors and be able to compare channels directly...This second goal is less of a driver, since my experience with these sensors is that there are MANY factors that contribute to the sensors response curve (another reason I'd really like to find an alternative tech for this.)
And finally, I added a lid to help reduce the rate of water loss and to reduce the growth of unwanted extras in my grow medium.
The Build
The build on this one is pretty straight forward, I suppose, but here goes :)
BOM:
- Printed Parts - I printed mine from Blue Overture PETG
- Planter Body (aka "Circular_3loc_1p5cube.stl")
- Lid (aka "Lid.stl" ¯\_(ツ)_/¯)
- COTS
- (Qty 3) 1.5" Rockwool cubes
- Expanded clay pellets
- (Qty 3 or less) Moisture sensors
- M5 fastener of your choice, if you're mounting it to something (could also just seal up the hole and have it lay flat on a surface ifn ya want)
- Hot glue or other sealing material of your choice (just make sure you're ok with that sealant coming into contact with your food...or at least the food of your food, but transitive property, ya know)
When printing the Planter, I'd recommend at least 3 perimeters to improve water retention.
My order of operations was:
- Secure planter to frame with M5 fastener in a t-nut. Then seal up counterbore with hot glue.
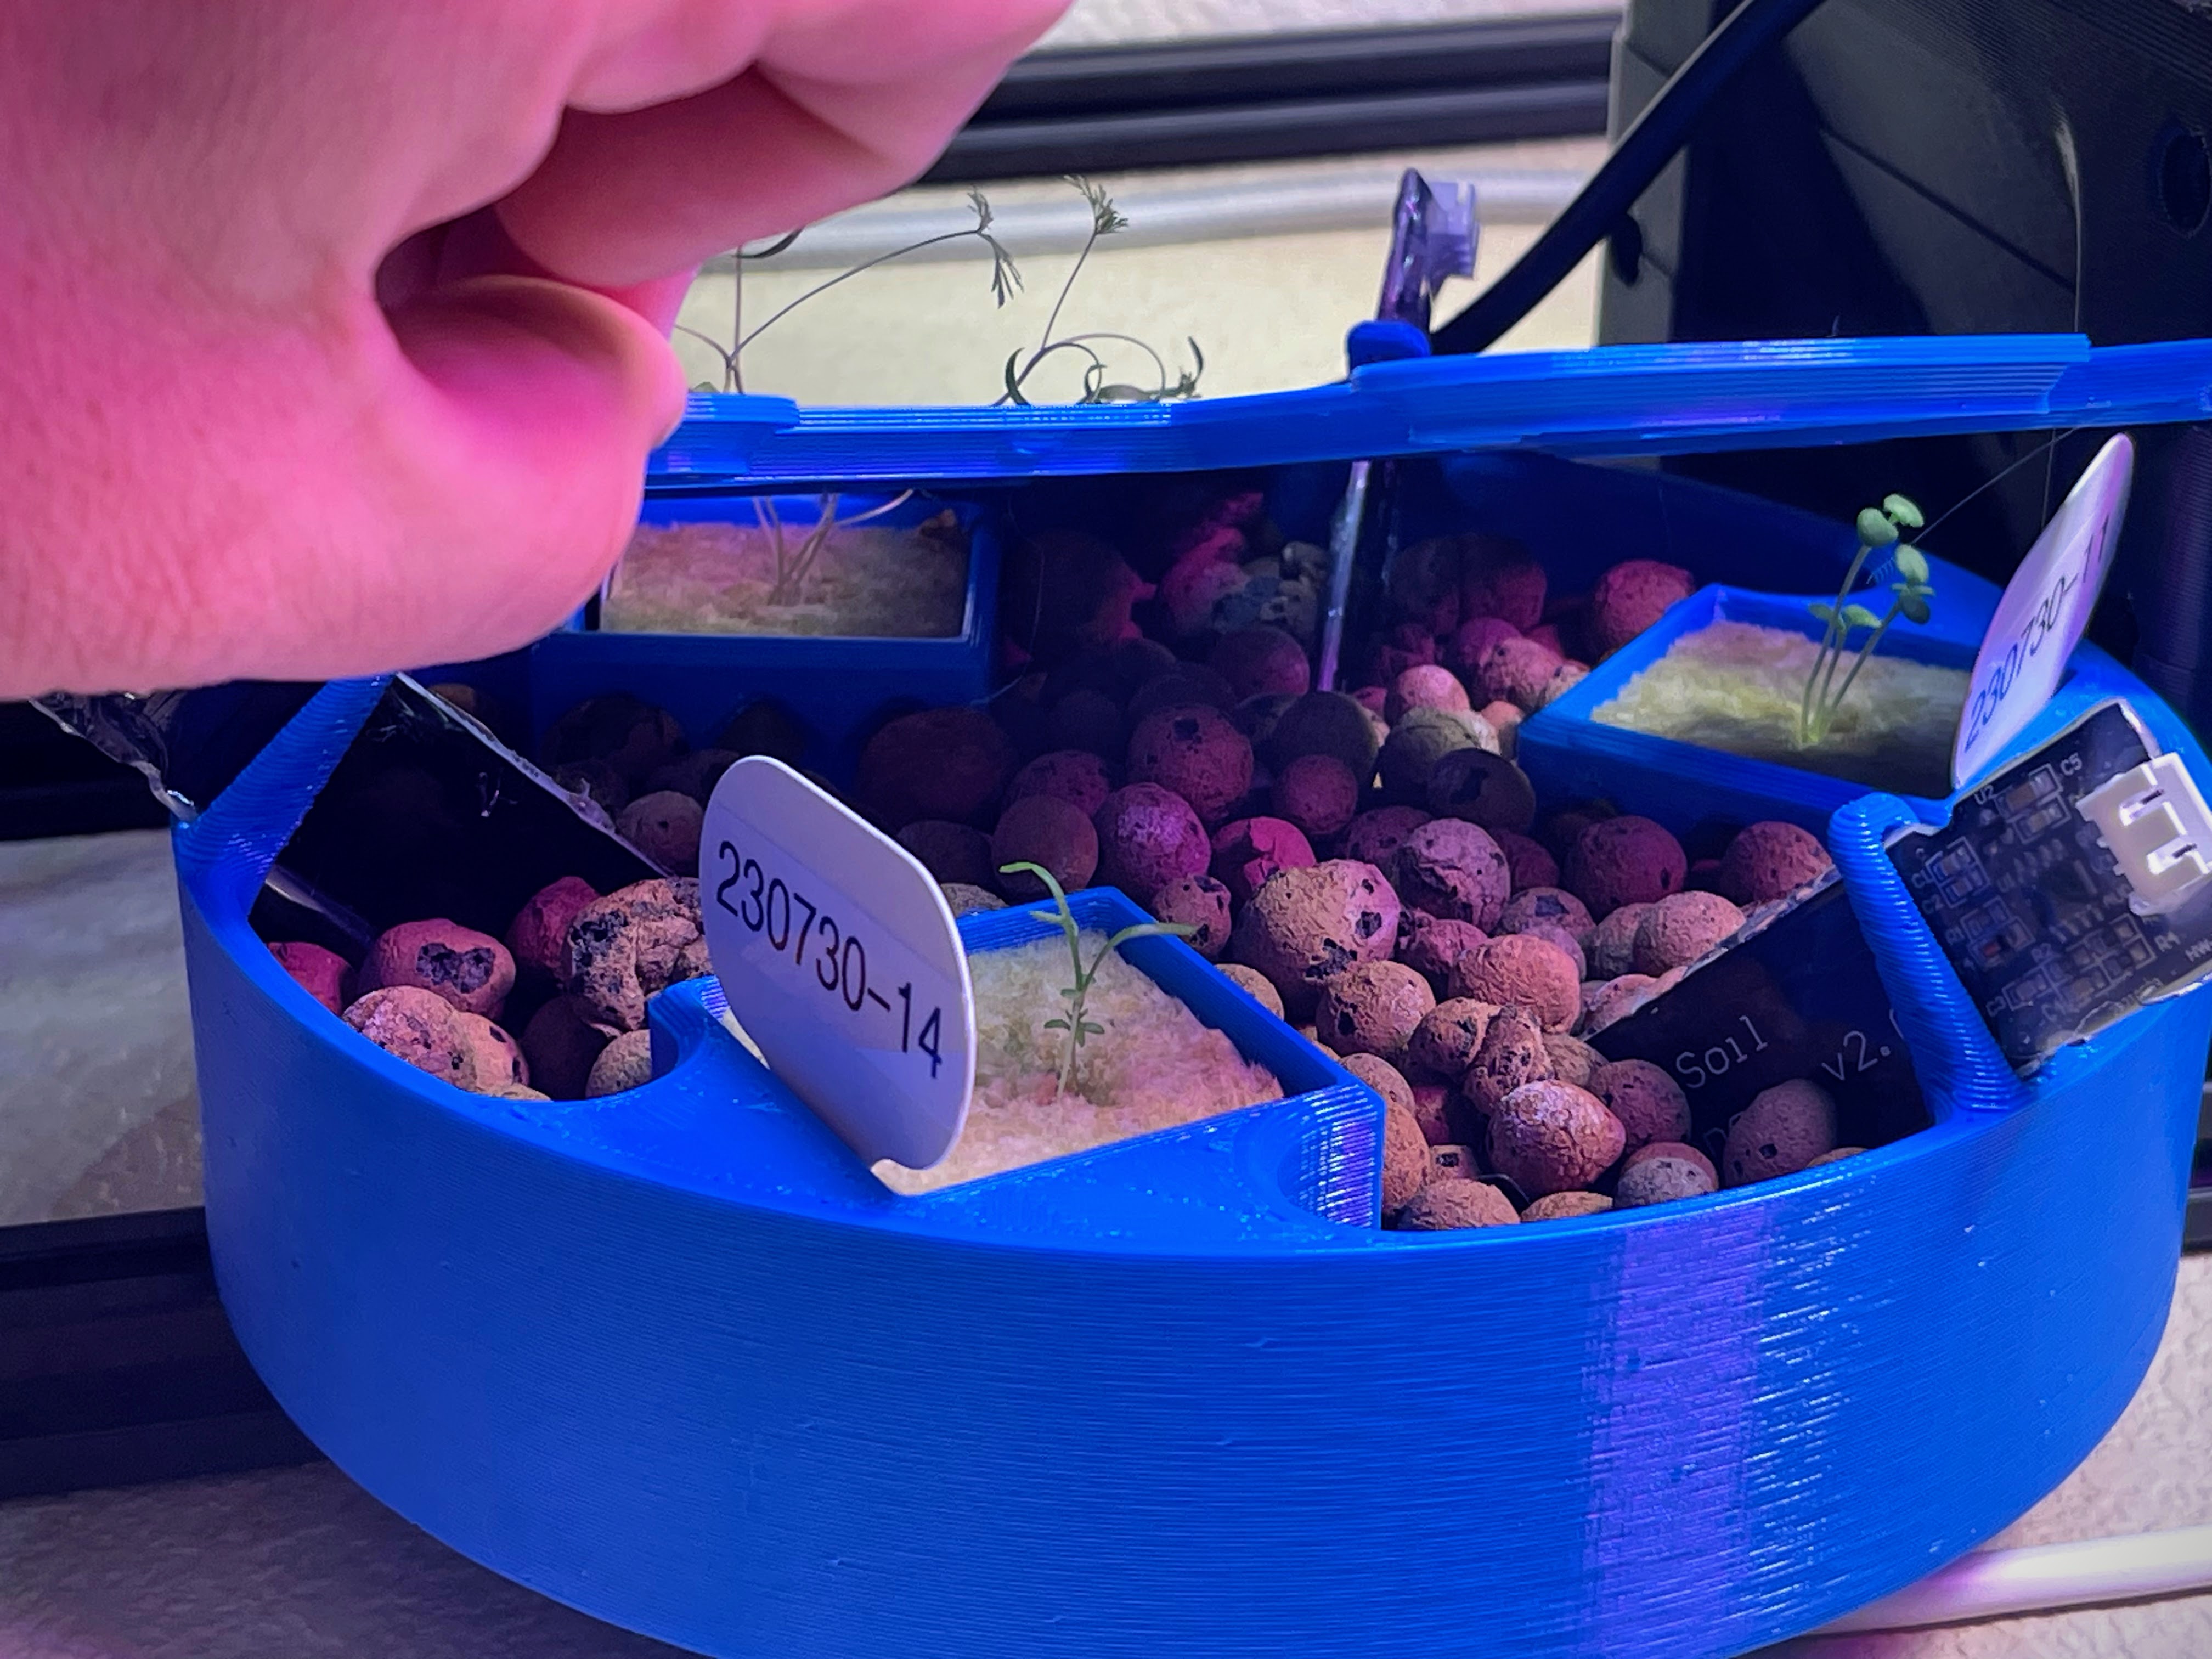
- Insert rockwool cubes with seedlings (would presumably be easy enough to set these up as seed starters, but I started mine separately.)
- Seal up soil moisture sensors and then put them in their respective homes.
- Soak, drain, and rinse clay pellets, then add to planter.
- Add lid
However, for future assemblies, I'll likely change that order to 1, 3, 4, 5, 2. There is no reason the plants can't be put in last, and this reduces the risk of accidental damage when putting on the lid.
The sensor wires run to a small board to consolidate them down to a single, Cat5 cable that then heads over to the Data Maker Electronics Enclosure.
Thoughts/Notes
One major omission I've discovered was on the irrigation supply side...guess I got stuck on the 'feedback' side of things, and kind of forgot the other, somewhat crucial side of a closed-loop system :) Luckily, I think this omission may be something I can integrate well into a revision of just the lid.
Although I didn't want to give up the 'wet volume', I think if I do a full rev of this planter (although I don't currently plan to) and in future, related builds I will go with fastening points outside of the sealed region. It hasn't been an issue for me yet, but just in assembling them I was imaging me frustrated at not being able to easily reposition the planters on their rails without having to empty and dry out the clay pellets.