It’s an automated cat torture device! Ok, not exactly, it’s a 2-axis turret with a cheapo laser pointer mounted in it, run off of a budget microcontroller :) But as shown in the little clip below, my little dude finds it quite entertaining (I actually have to hide it in a drawer if I’m not letting him play with it…I’m actually working on an idea for an upgraded version that I hope will help with this, but who knows if I’ll actually get to it ¯\(ツ)/¯)
*If you have any questions or if you want to cast a vote for me to write up a detailed assembly how-to, drop me a comment!
BOM
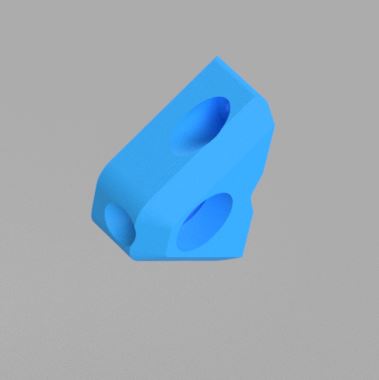
Printed Parts
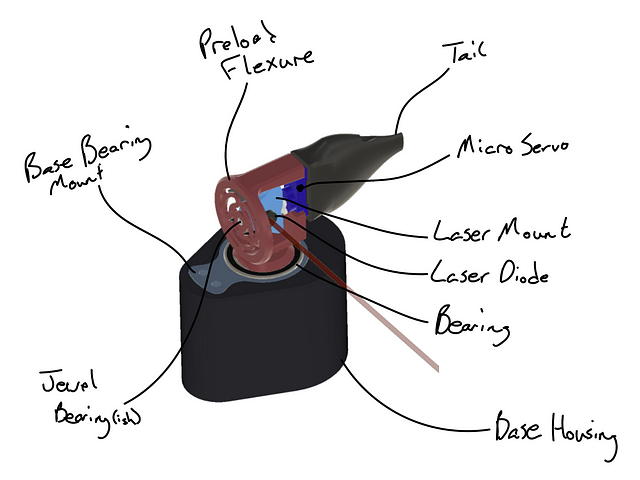
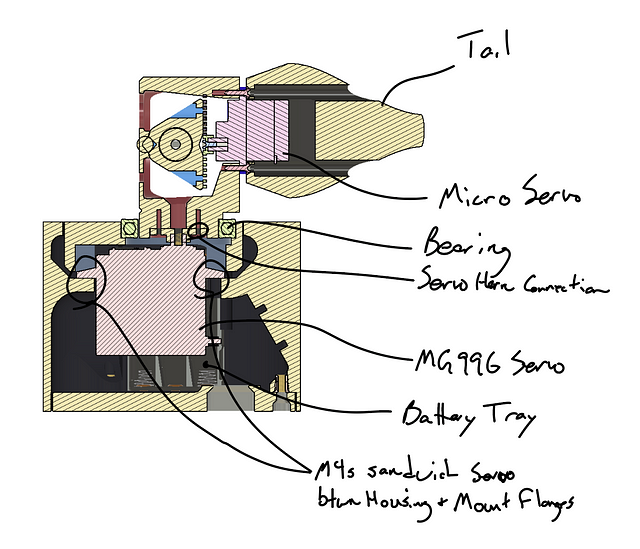
- Base_Housing (heatsets)
- Base_Lid
- Base_BearingMount
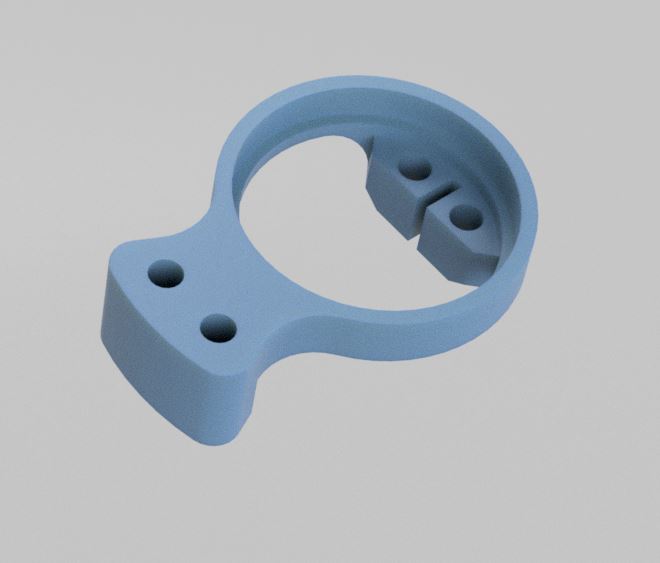
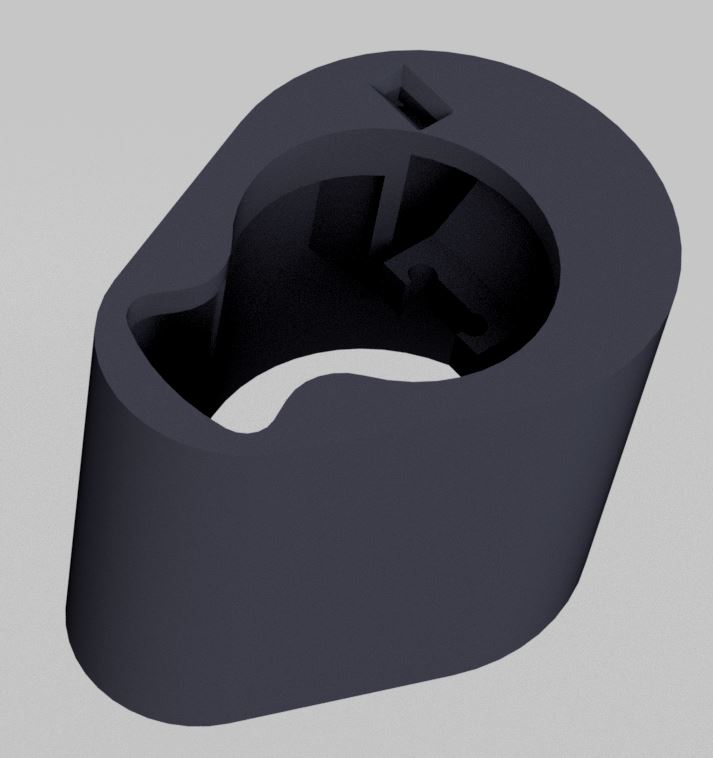
- LaserMount
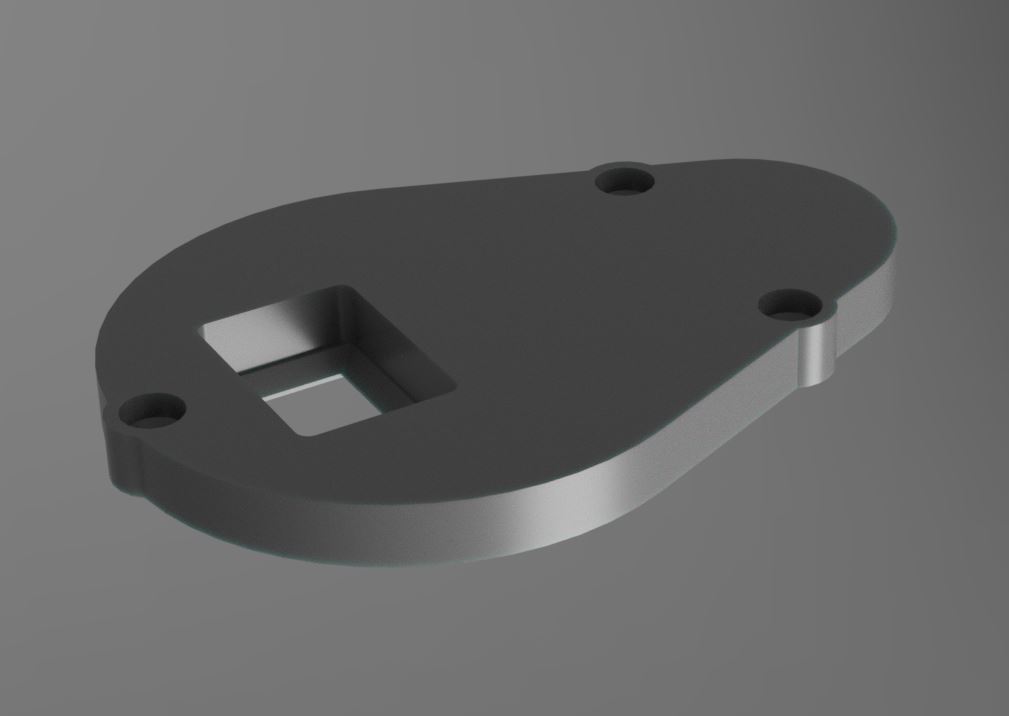
- PreloadFlexure
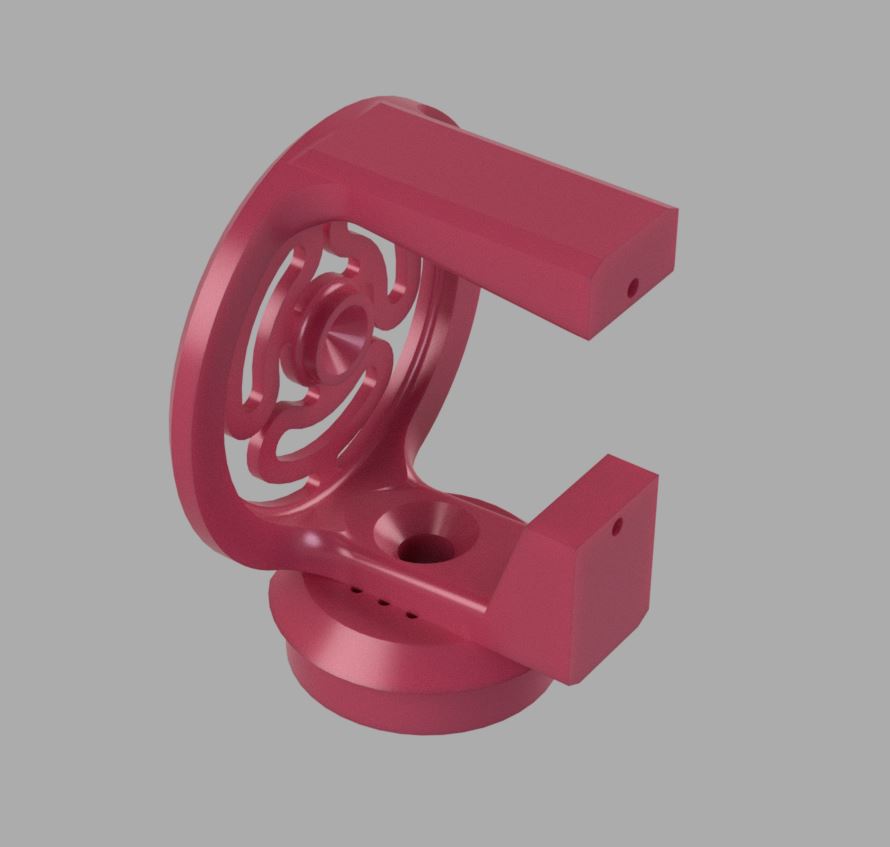
- Tail (optional)

Purchased/COTS Parts
- SG90 Micro Servo — I have bought this 10 pack twice now, but obviously for this project you’ll only need one (I just can’t resist me a bulk discount on motors :) ). Any SG90 Micro Servo should work just fine.
- MG996R Servo — Again, this is the multi-pack that I have bought a couple of times now. Of the twelve servos in those, I’ve had one break….but I hesitate to blame the servo on that one…tee hee ¯\(ツ)/¯
- Kitty laser pointer — Unfortunately on this one, you would likely need to make your own custom “LaserMount” part if you go with an alternative option. Any laser pointer should work, but just keep in mind that you will want one that you can somehow commandeer from a microcontroller if you want the fully automated ability. NOTE: While you don’t HAVE to get this hot pink one….you CAN….just sayin
- 6806–2RS Bearing — I’ve been absolutely loving using these large ID bearings for servo-driven projects lately. So damn convenient being able to just run the horn right up the middle! That being said, you definitely don’t need 10 of them if you aren’t going to make use of them elsewhere. So any 6806–2RS is fine (really you can probably get away with any bushing/bearing that’s 30x42x7mm given the low loads, but I personally think it’s worth the couple of bucks for that buttery smoothness :)
- 3xAAA Battery Holder — Ok…so I feel a smidge bad about this one….the battery trays I used for this are ones I bought from a Radioshack going out of business…I told you! I’m a sucker for a bulk discount!!…But these are the same type of 3-battery, plastic tray with leads. If anyone tries these and they don’t fit, or if there is some awesome battery holder out there, please do let me know and I will update this accordingly.
- Seeeduino Xiao — This project was my first time working with the Xiao, and I’m immediately a fan! I continue to be amazed at the power per dollar of microcontrollers hitting the market, and in a tiny form factor, and supporting Arduino and MicroPython…just delightful… But anyway, while I went with the Xiao, at a minimum you really just need two PWM outputs to give the servos their position duty cycle (and I’d recommend another I/O for on/off, but your call if you prefer minimalist).
- Heat Set Inserts — I used Three (3) — M3x6 and Four (4) — M4x8 heat set inserts. You can safely go a couple of millimeters longer or shorter for either without issue. The link is to an assorted pack that I have and really like (although it has long been emptied of any M3s or M4s). If you would like some additional info on heat sets, I’ve started jotting some additional notes here also.
- ON/OFF Switch — This is the one that I sized the hole for in the Base_Lid, but there are tons of options in this size range if you switch-specific.
- Transistor for switching ‘da laser — Now we’re getting in to territory where I don’t feel like I should be making recommendations :) I know how to make these things work (usually), but I really can’t say enough how much I’m not an electrical engineer….or even a particularly good mechanica….huh? but seriously, this is what I used and it works, but I’m all ears for anyone pointing out better approaches for this stuff!
- Breadboard — I used this lil feller to tie the room together
Code
I will never pretend to be a competent programmer, so please feel free to talk s*** on my code, but I will say, I was actually kinda proud of the randomization routine I cooked up :)
My apologies for the lack of annotation, but I originally didn’t intend it for others’ eyes (and still am not sure it will see any, haha). But I’m more than happy to answer questions if you reach out to me
#include <Servo.h>;
Servo serRot;
Servo serEl;

int pinRot = 7;
int pinEl = 10;
int pinLas = 5;
int minEl = 60;
int maxEl = 90;
int minRot = 90;
int maxRot = 180;
int nseqEl, nseqRot;
int iseqEl = 0;
int iseqRot = 0;
int stepEl, stepRot;
int signRot, signEl;
int posRot, posEl;


void setup() {
  pinMode(pinLas, OUTPUT);
  pinMode(pinRot, OUTPUT);
  pinMode(pinEl, OUTPUT);
  serRot.attach(pinRot);
  delay(50);
  posRot = (minRot+maxRot)/2;
  serRot.write(posRot);
  delay(100);
  serEl.attach(pinEl);
  delay(50);
  posEl = (minEl+maxEl)/2;
  serEl.write(posEl);
  delay(500);
  nseqRot = random(5, 30);
  nseqEl = random(1, 10);
  signRot = random(0, 1); // Sign = 0 = increasing angle
  signEl = random(0, 1);
  stepRot = random(1, 5);
  stepEl = random(1, 3);
  digitalWrite(pinLas, HIGH);

}

void loop() {
  // Calc next Rot position
  if (signRot == 0) {
    posRot = posRot + stepRot;
    if (posRot > maxRot) {
      posRot = posRot - (2 * stepRot);
      signRot = 1;
    }

  } else if (signRot == 1) {
    posRot = posRot - stepRot;
    if (posRot < minRot) {
      posRot = posRot + (2 * stepRot);
      signRot = 0;
    }
  }
  iseqRot = iseqRot + 1;
  if (iseqRot > nseqRot) {
    nseqRot = random(5, 30);
    posRot = random(minRot, maxRot);
    signRot = random(0, 1);
    iseqRot = 0;
  }
  serRot.write(posRot);

  // Calc next El position
  if (signEl == 0) {
    posEl = posEl + stepEl;
    if (posEl > maxEl) {
      posEl = posEl - (2 * stepEl);
      signEl = 1;
    }

  } else if (signEl == 1) {
    posEl = posEl - stepEl;
    if (posEl < minEl) {
      posEl = posEl + (2 * stepEl);
      signEl = 0;
    }
  }
  iseqEl = iseqEl + 1;
  if (iseqEl > nseqEl) {
    nseqEl = random(1, 10);
    posEl = random(minEl, maxEl);
    signEl = random(0, 1);
    iseqEl = 0;
  }
  serEl.write(posEl);
  delay(random(1,400));

}