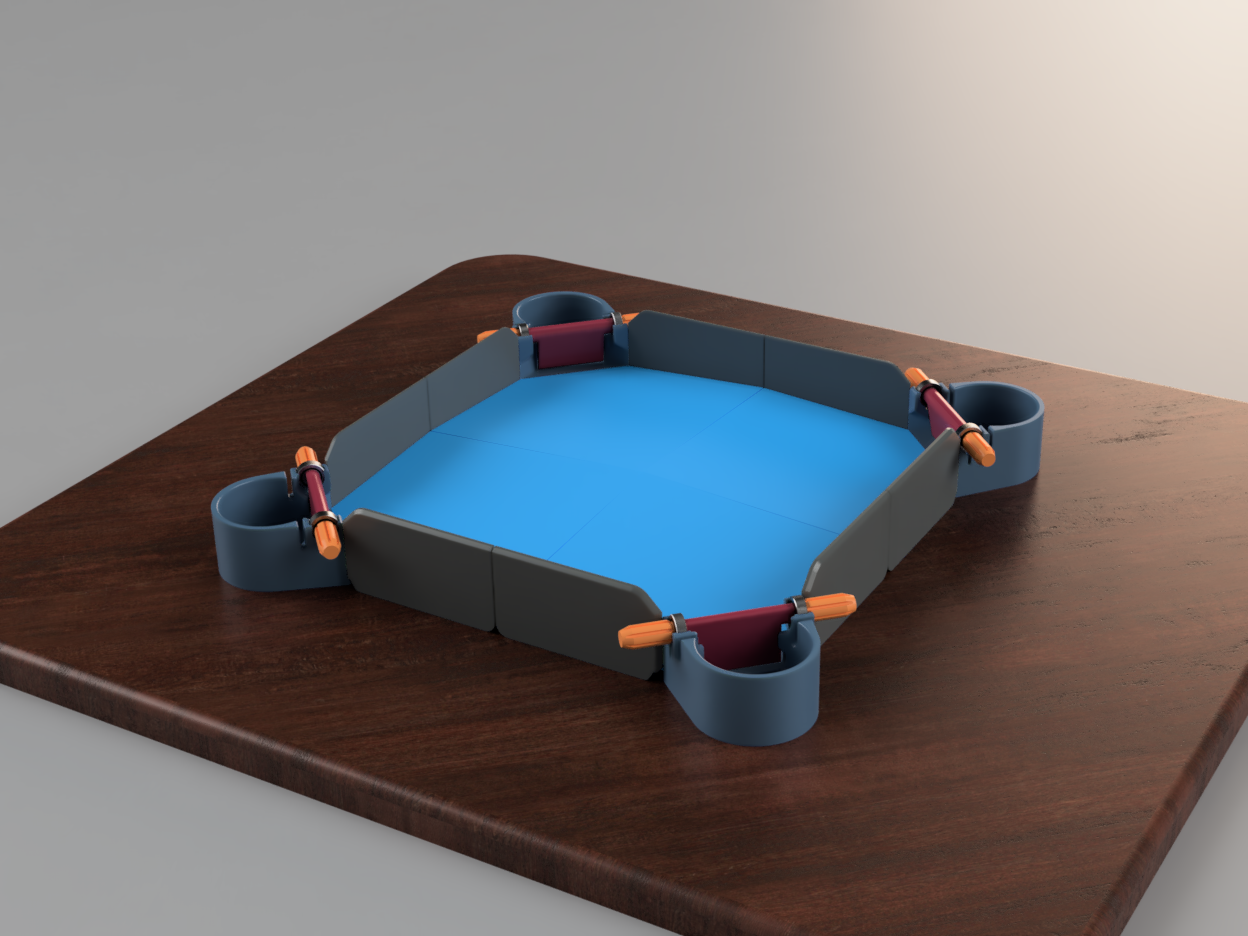
This game was a guaranteed part of every major family get-together with one set of my grandparents (and the exponential growth that followed from their 5 kids). Ok, well not "this" game, but the game that this was inspired by. The idea of the game is you drop balls into the center, and each player is trying to keep their pocket empty and their opponents' full.
I am just printing the last few parts for my first build, and it will be getting its first game night battle testing within the week!
The Build
All files for the printed parts can be found at:
BOM:
- Printed Parts:
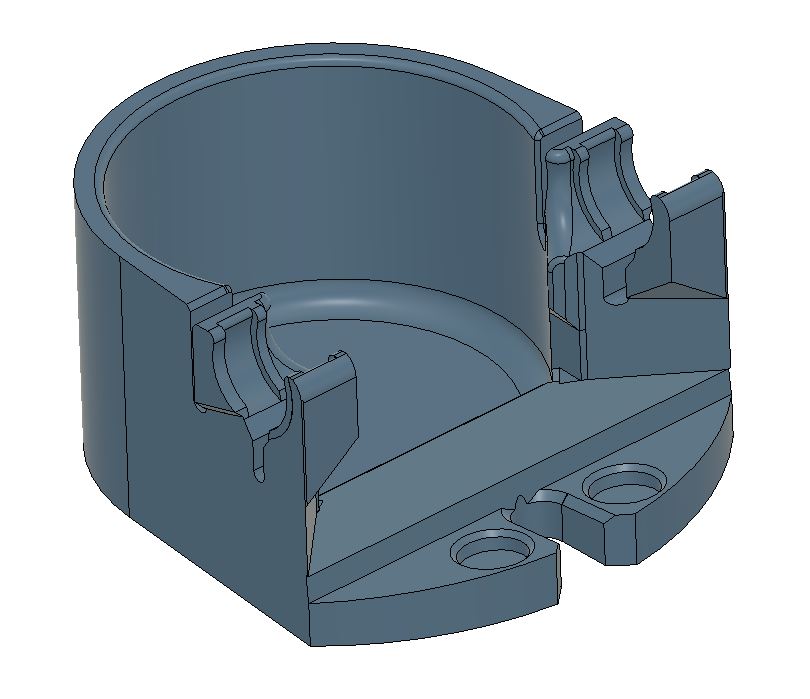
- (Qty 4) Pocket_gen1.stl
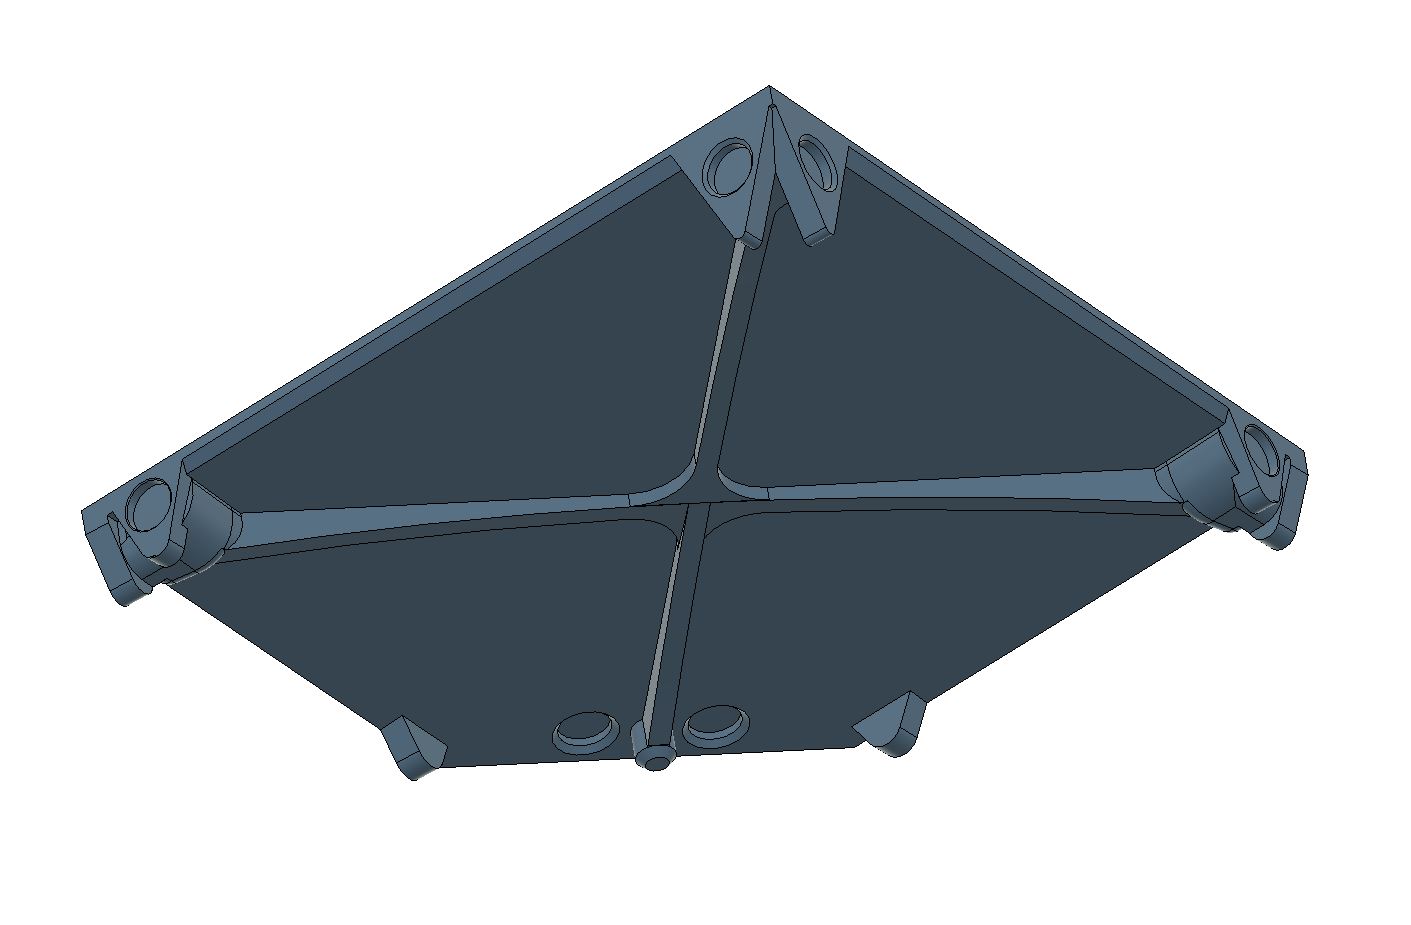
- (Qty 4) Quad_gen1.stl
-

- (Qty 4) Wall_1.stl
- (Qty 4) Wall_2.stl

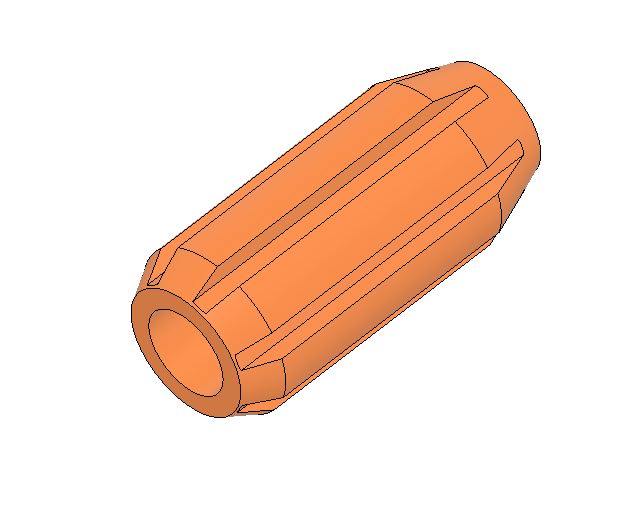
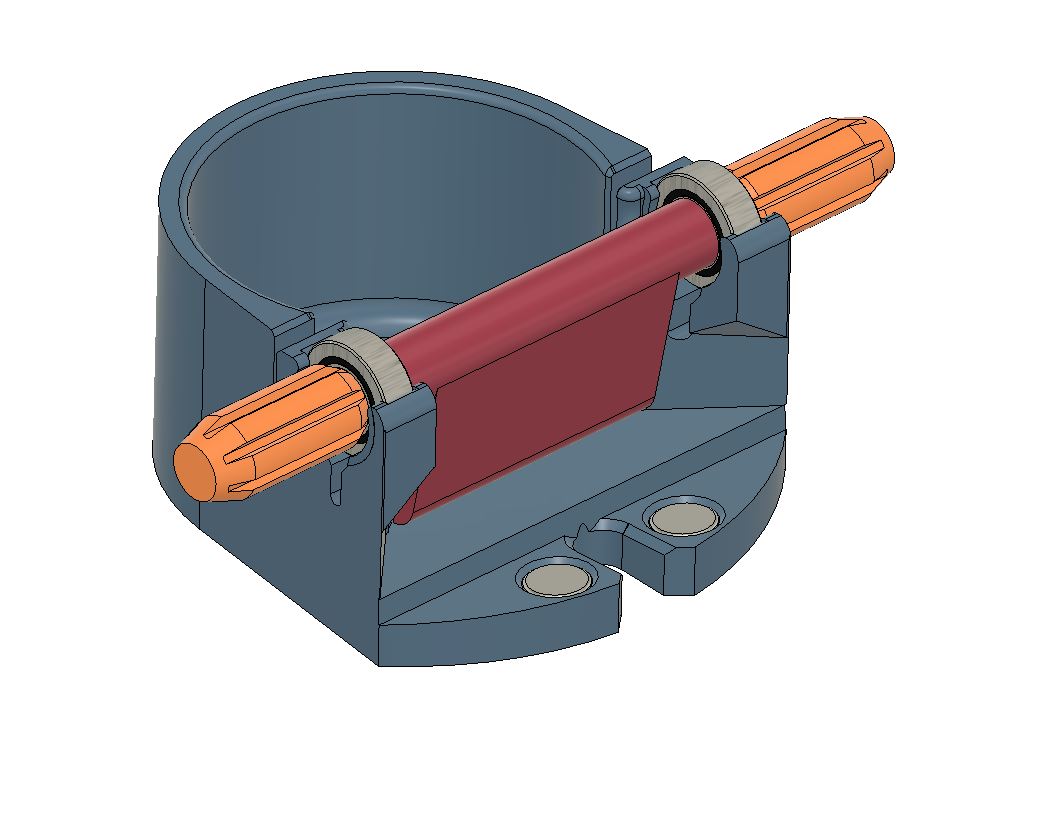
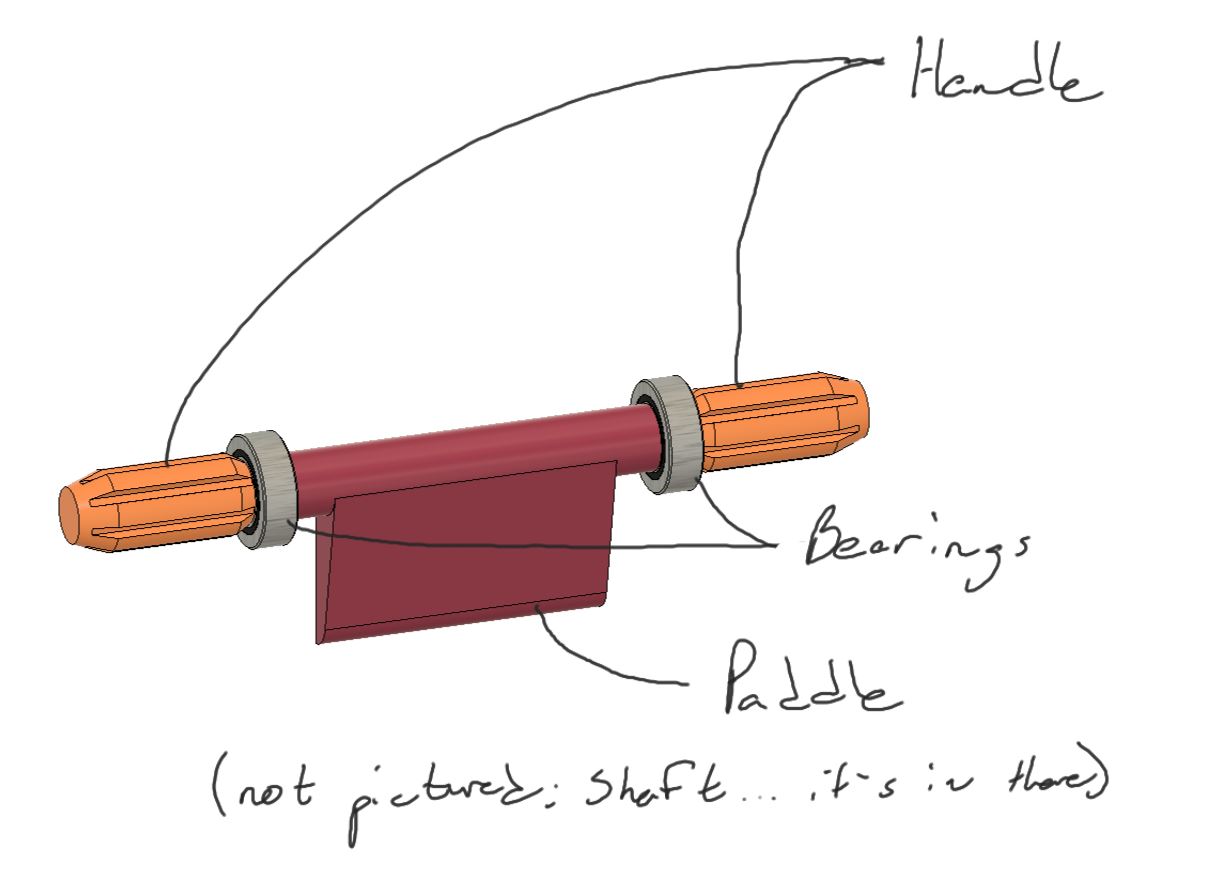
- (Qty 8) Handle.stl
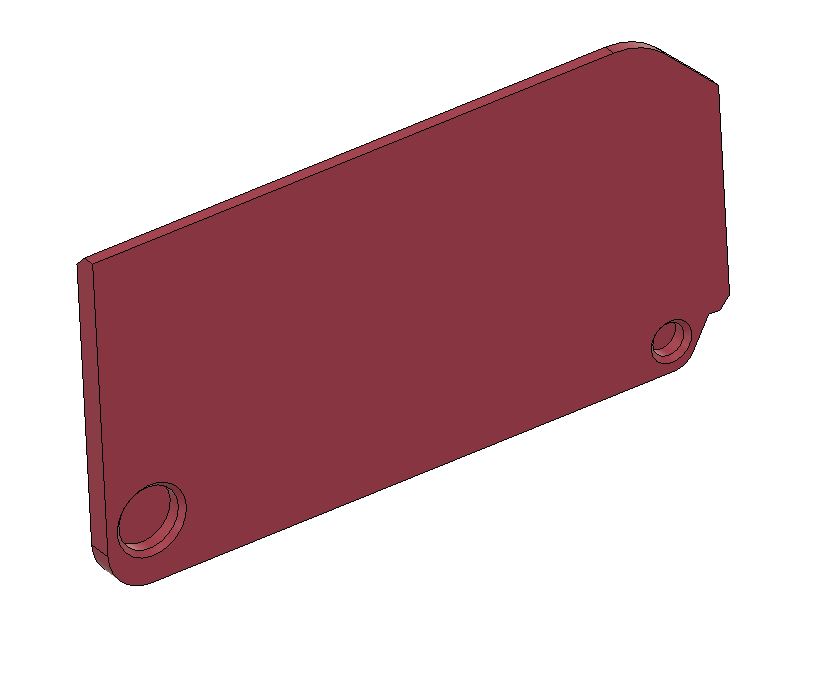
- (Qty 4) Paddle.stl

- COTS
- (Qty 8) Bearings - I designed it for (and used) 608-2RS roller bearings, aka roller skate bearings. BUT my plan is to switch these over to simple 8mm ID bushings for future builds. The roller bearings are substantial overkill :)
- (Qty 4) 8mm OD x 150mm length shafts - I used ones like these (I got long sections and cut to length, but otherwise this)
- (Qty 48) 10x3 disk magnets
- (Qty 32) 6x2 disk magnets
- "Super" Glue, cyanoacrylate (CA) if ya fancy - I used this medium CA...oh I'm fancy...I like this viscosity for securing the magnets because it has a good balance of penetration into the glue joint but without being so runny that I'm stuck to everything on my desk 10 min. later.
- BALLS - I almost forgot! You're going to need something to kick around. I'm going to start out with these polymer bearing balls.
Assembly
MOST IMPORTANT INSTRUCTION - Be extremely organized and careful with the orientation of your magnets! You don't want to have your board flying apart! Come up with a plan for what pattern of N/S you're going to use for your parts, and just be sure that all interfaces will be attracting!!! I know it sounds trivial...but I've scrapped many-a-part over the years due to unintended maglev kinematic mounts.
 |
 |
The assembly is pretty straightforward, so long as you adhere to the advice above.
- Glue in all your magnets. I'd recommend doing one magnet pocket at a time and let it cure fully before moving on to the next. Yes, this one can take a while, but if you do all of the parts in parallel, it's not THAT bad. I just set up an improvised 'rack' on a tabletop (made from all nonferrous materials, of course...I love magnets, but they'ze sneaky!) that allowed me to have the Quad parts upright spaced far enough to avoid magnet interference between them.
- Assemble the Paddle sub assemblies
- Press on the first handle (if yours has a loose fit, I'd tack it in with some CA
- Slide on the first bearing
- Press on the Paddle. The paddle is split, so it SHOULD expand and slide on (I recommend PETG, or other material with some compliance to it. PLA will almost definitely break for this fella). If it doesn't, one trick you can try, prior to cursing my name...hopefully, is to freeze your shaft (this will work better if you used a polymer shaft, but aluminum might give you enough) in your freezer and heat up your paddle a bit. If your interference problem is light enough, this should do the job. Don't heat the plastic to more than 100C (or look up the glass transition temp for the plastic you choose and just give yourself some margin under that)
- Slide on the second bearing
- Press on the second handle
- Pop the Paddle subs into the bearing mounts of the Pockets. Not gonna lie, I was pretty pleased with myself on these bearing mounts...even though I quickly decided the bearings themselves were overkill :/ I printed mine in PETG, and the bearings click in with a nice, satisfying pop and feel rigid (thus far) in use.
- Let the magnets do the rest of the assembly work, and let it self-assemble!* (*may not actually self-assemble, but once you get the parts close, they do pop together in a way that I thoroughly enjoy.)